Friday, December 02, 2022

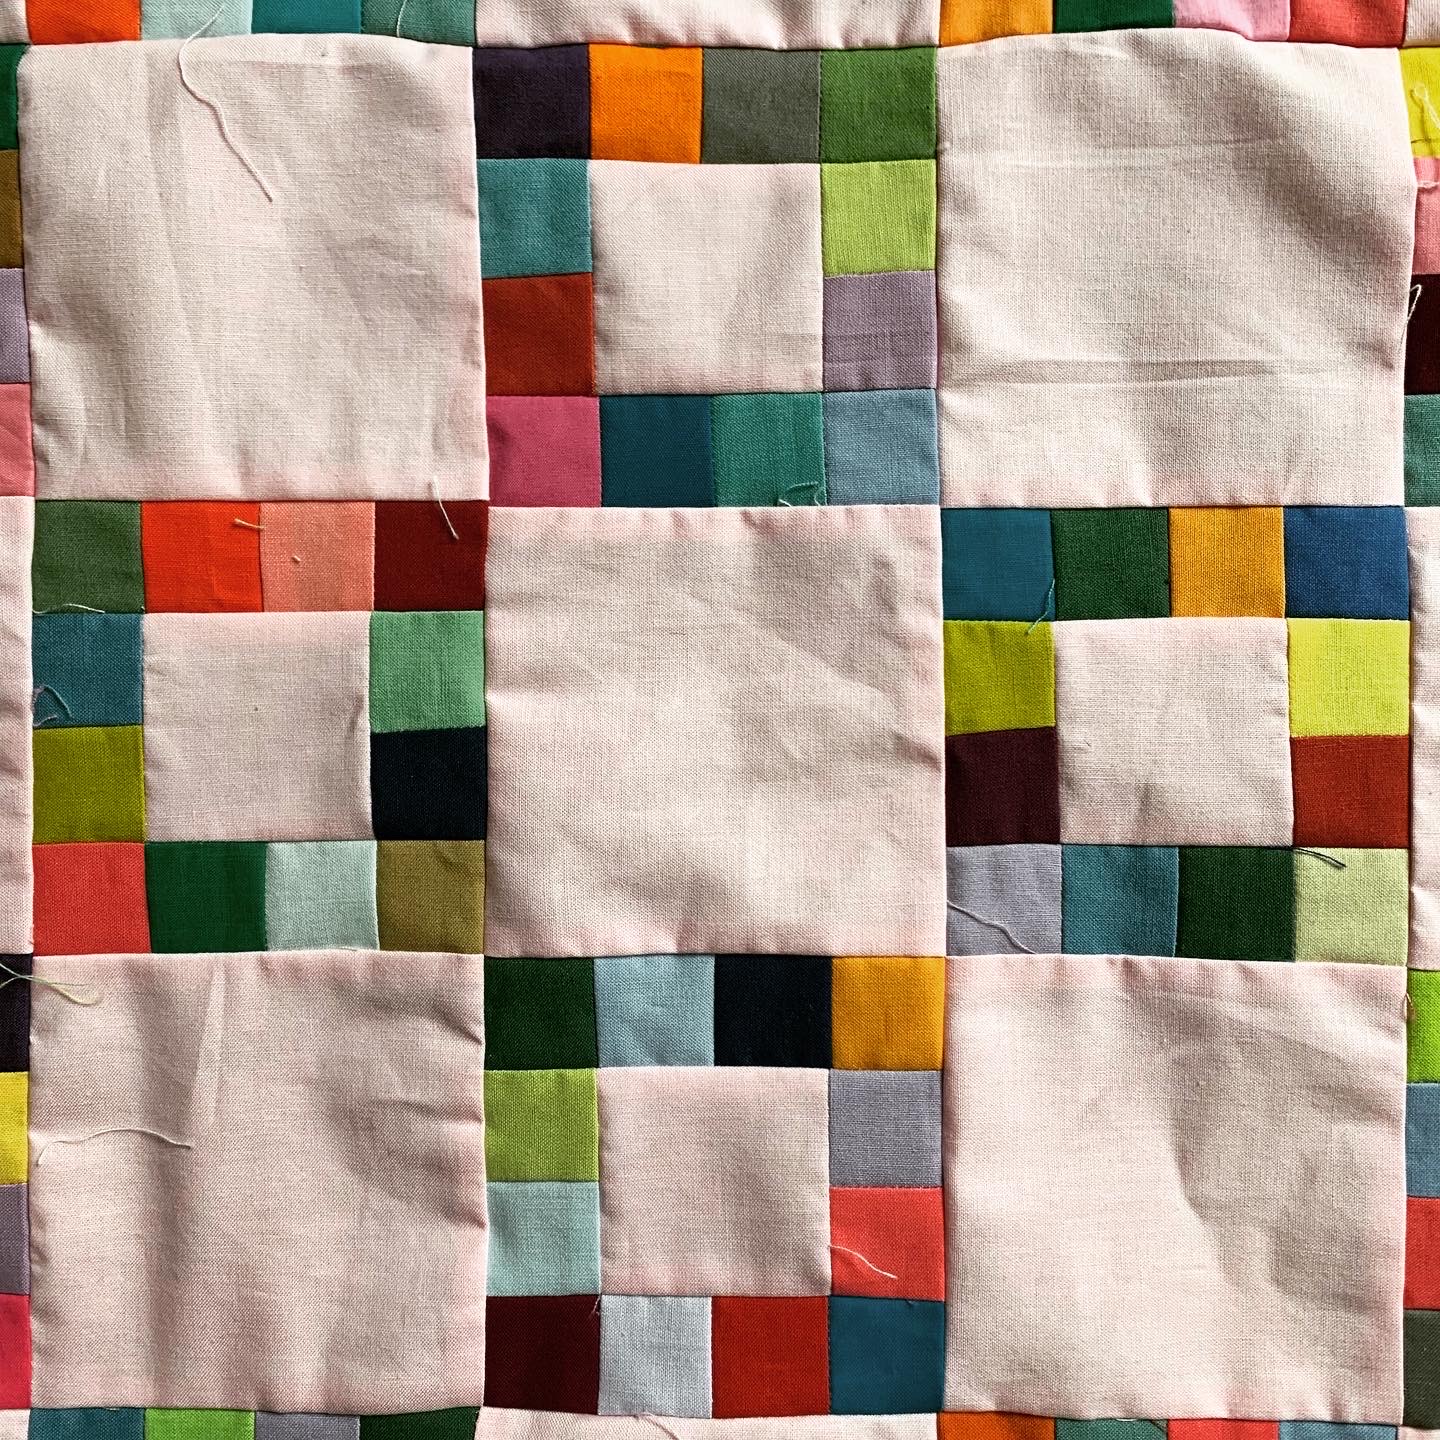
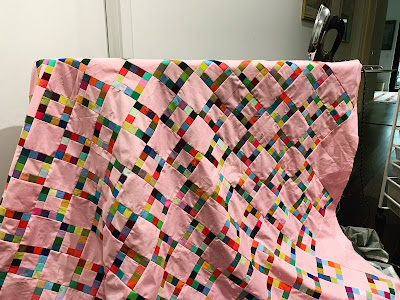
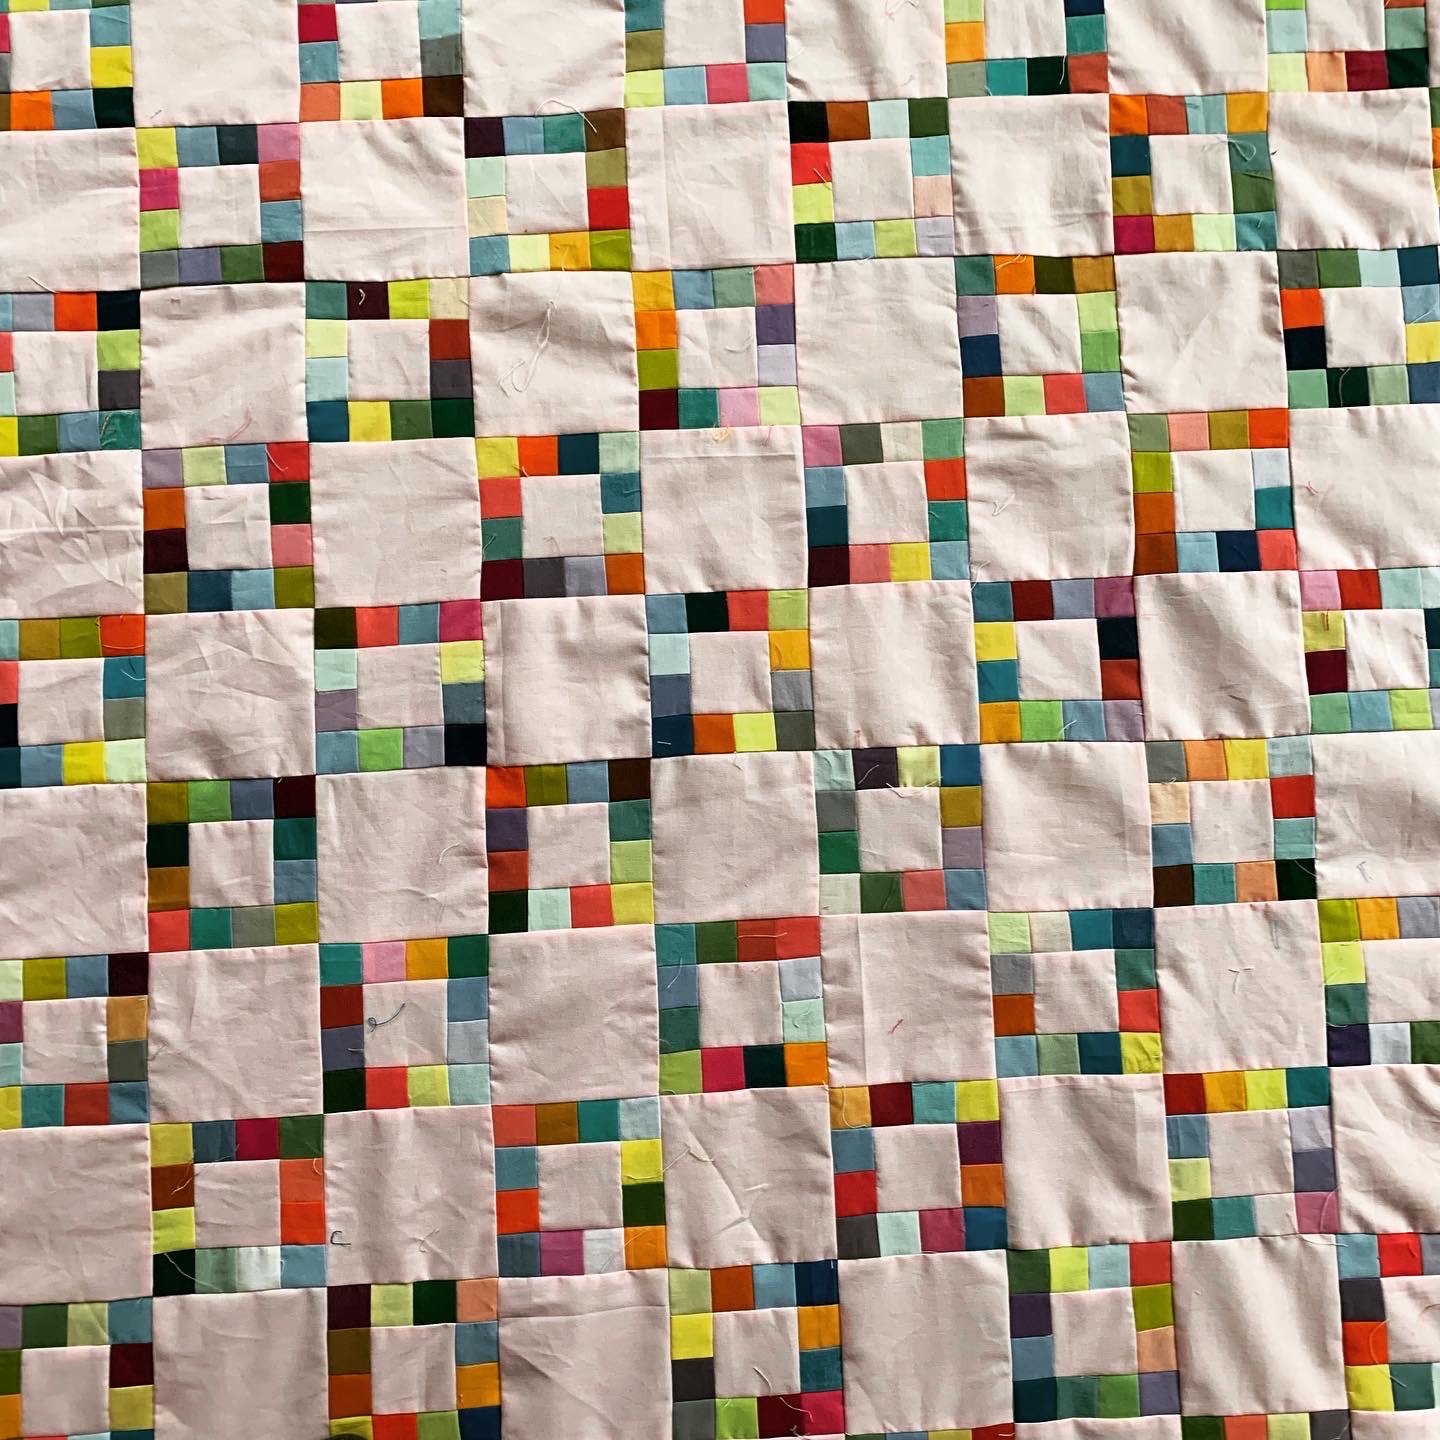
framed square, top completed

Color of pink is close in this photograph
Framed Square
top completed 2022
about 101 by 83 inches
50 blocks set on point
Block finishes 12 inches

Piece count for the quilt: (I may be off on these)
230 basic units, made from 230 2 1/2 inch squares, 2760 1 1/2 inch scraps
220 4 1/2 inch squares
18 setting triangles
4 corner triangles

This summer Bonnie Hunter featured a vintage quilt on an Instagram post. It was a simple and humble framed square and I sketched it out that very day.
Bonnie said she is fine with me sharing my write up, so here it is.

I had a bolt of Kona Peony and knew that would be a great background with my bin of solid 1 1/2 inch squares. I thought I had enough squares--I was wrong! And so I cut out another quilt (Bernina X 64) to yield scraps for this one.
(The pink is not photographing well in most of these pictures--the close-up above is very near what it is.)
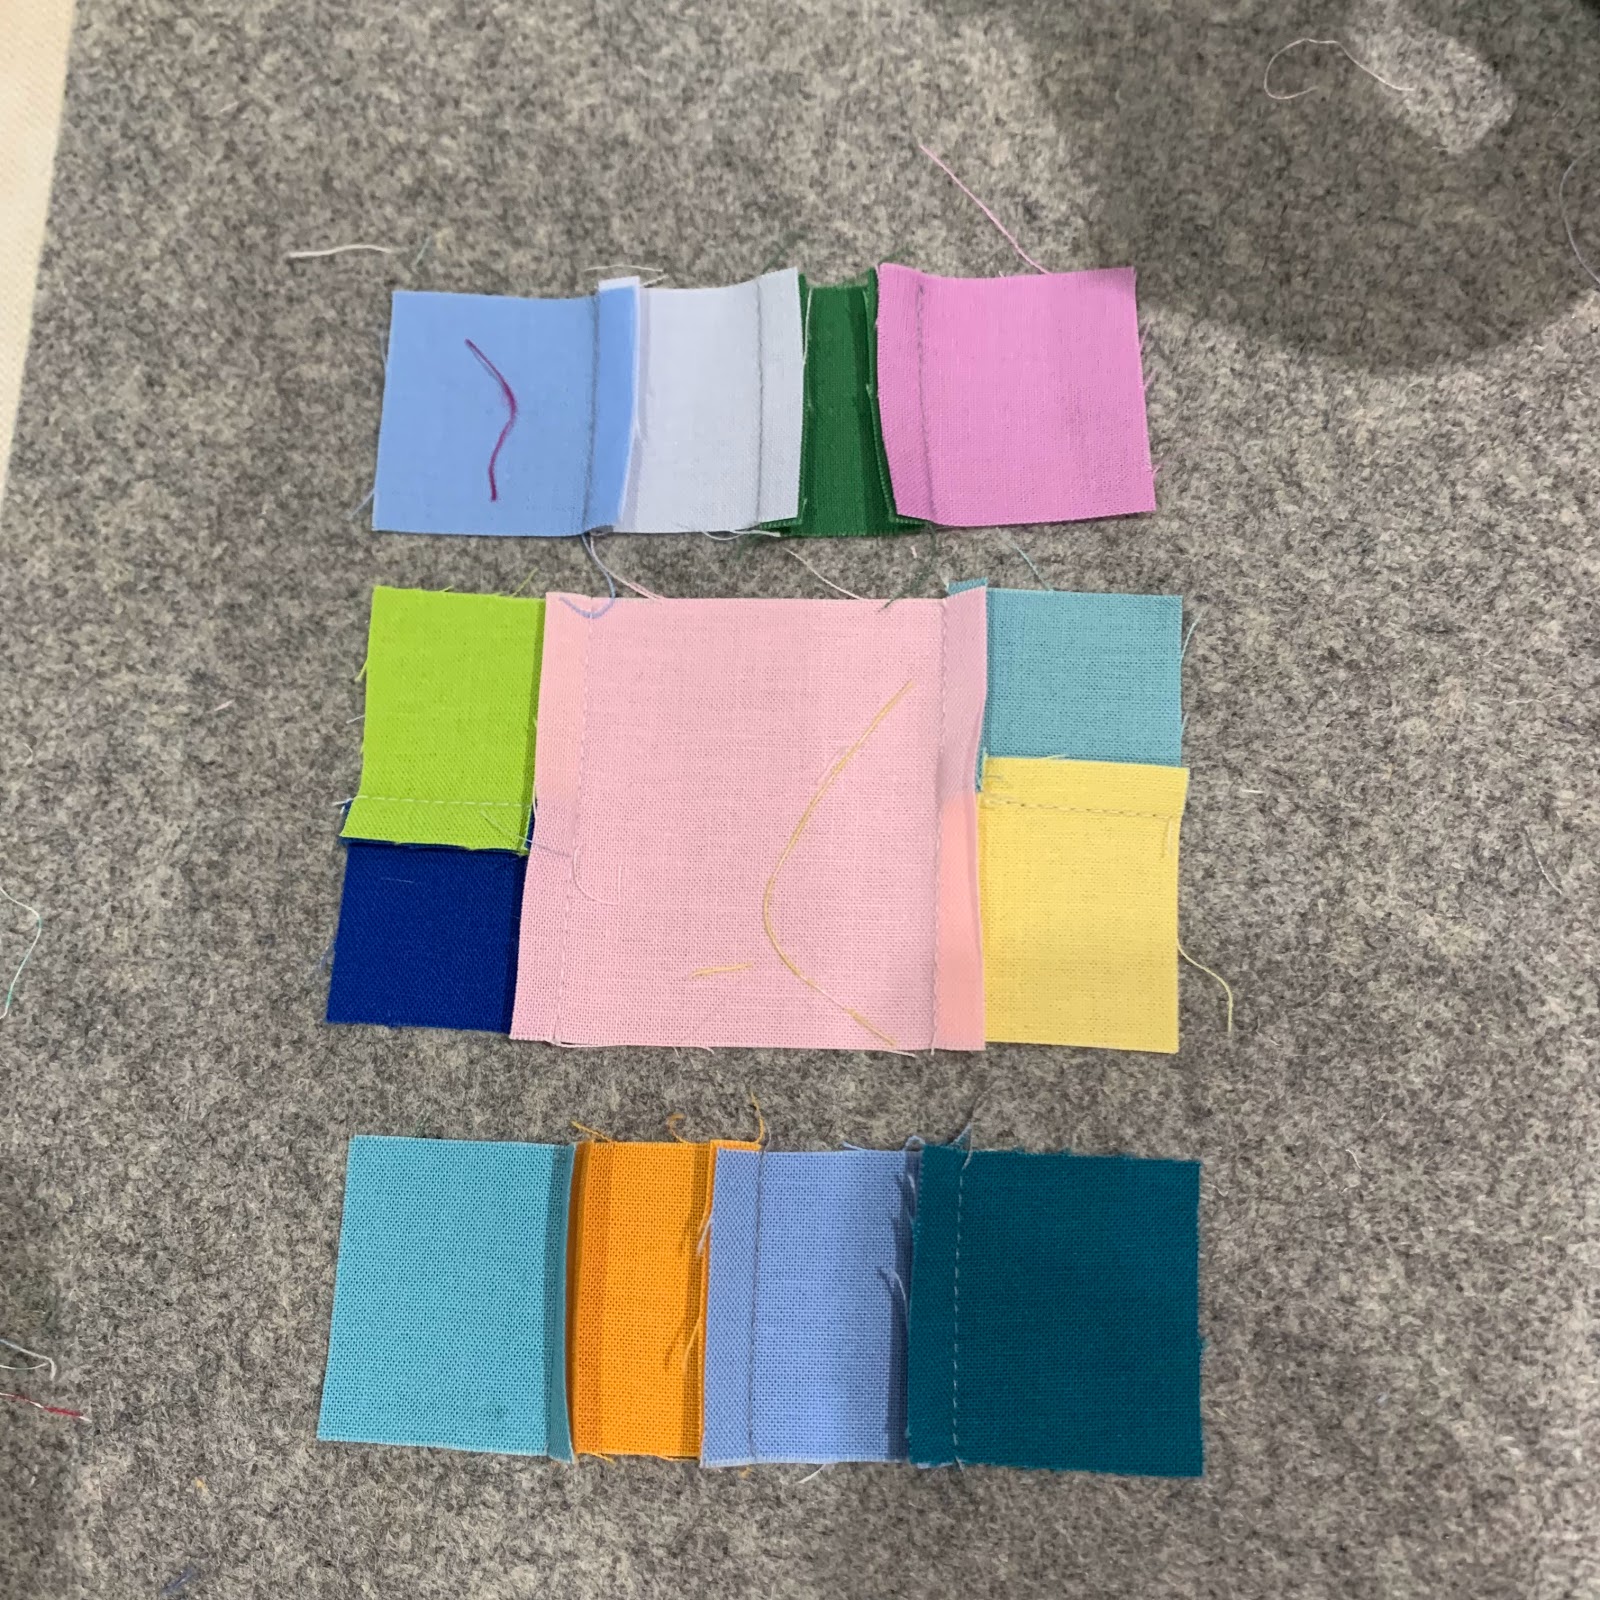
Basic unit
Basic unit (finishes 4 inches)
Background: one 2 1/2 inch square
Scraps: ten 1 1/2 inch squares

Sew scraps into pairs, sew a pair on two sides of the background
Press away from the background
Sew pairs into fours, sew on remaining two sides of the unit
Press towards the background
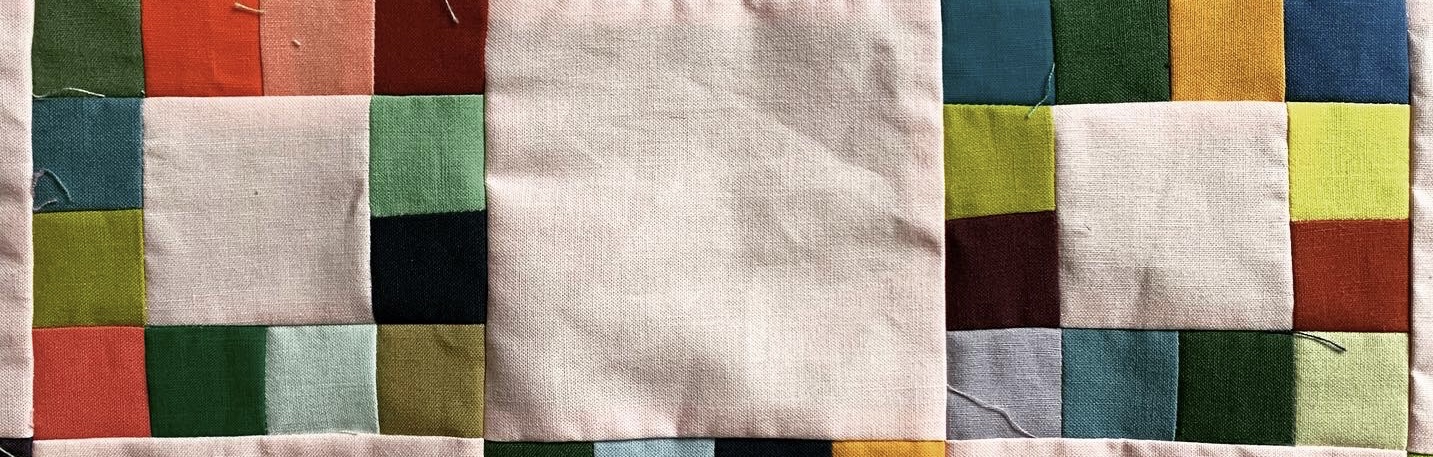
Unit A
Sew 80 Secondary unit A (finishes 4 by 12 inches)
Background: one 4 1/2 inch square
Two of the Basic units
Press towards the plain square
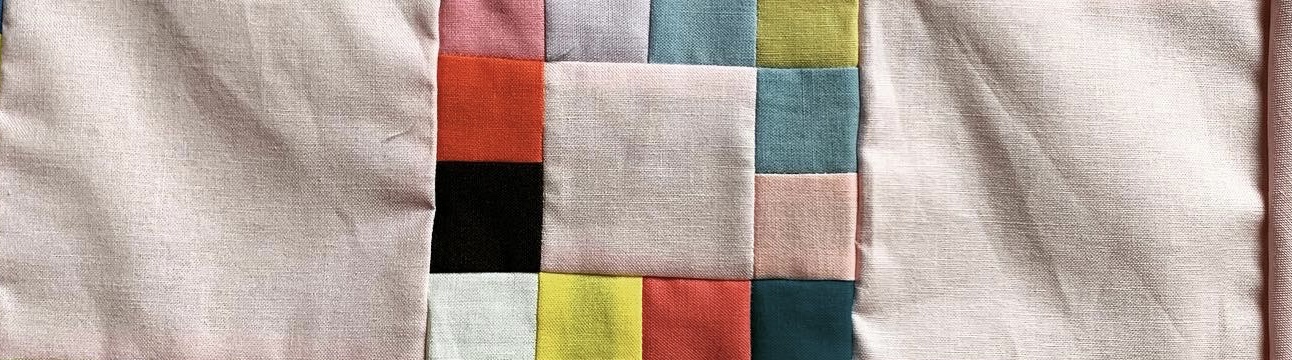
Unit B
Sew 70 Secondary unit B (finishes 4 by 12 inches)
Background: two 4 1/2 inch squares
One of the Basic units
Press towards the plain squares
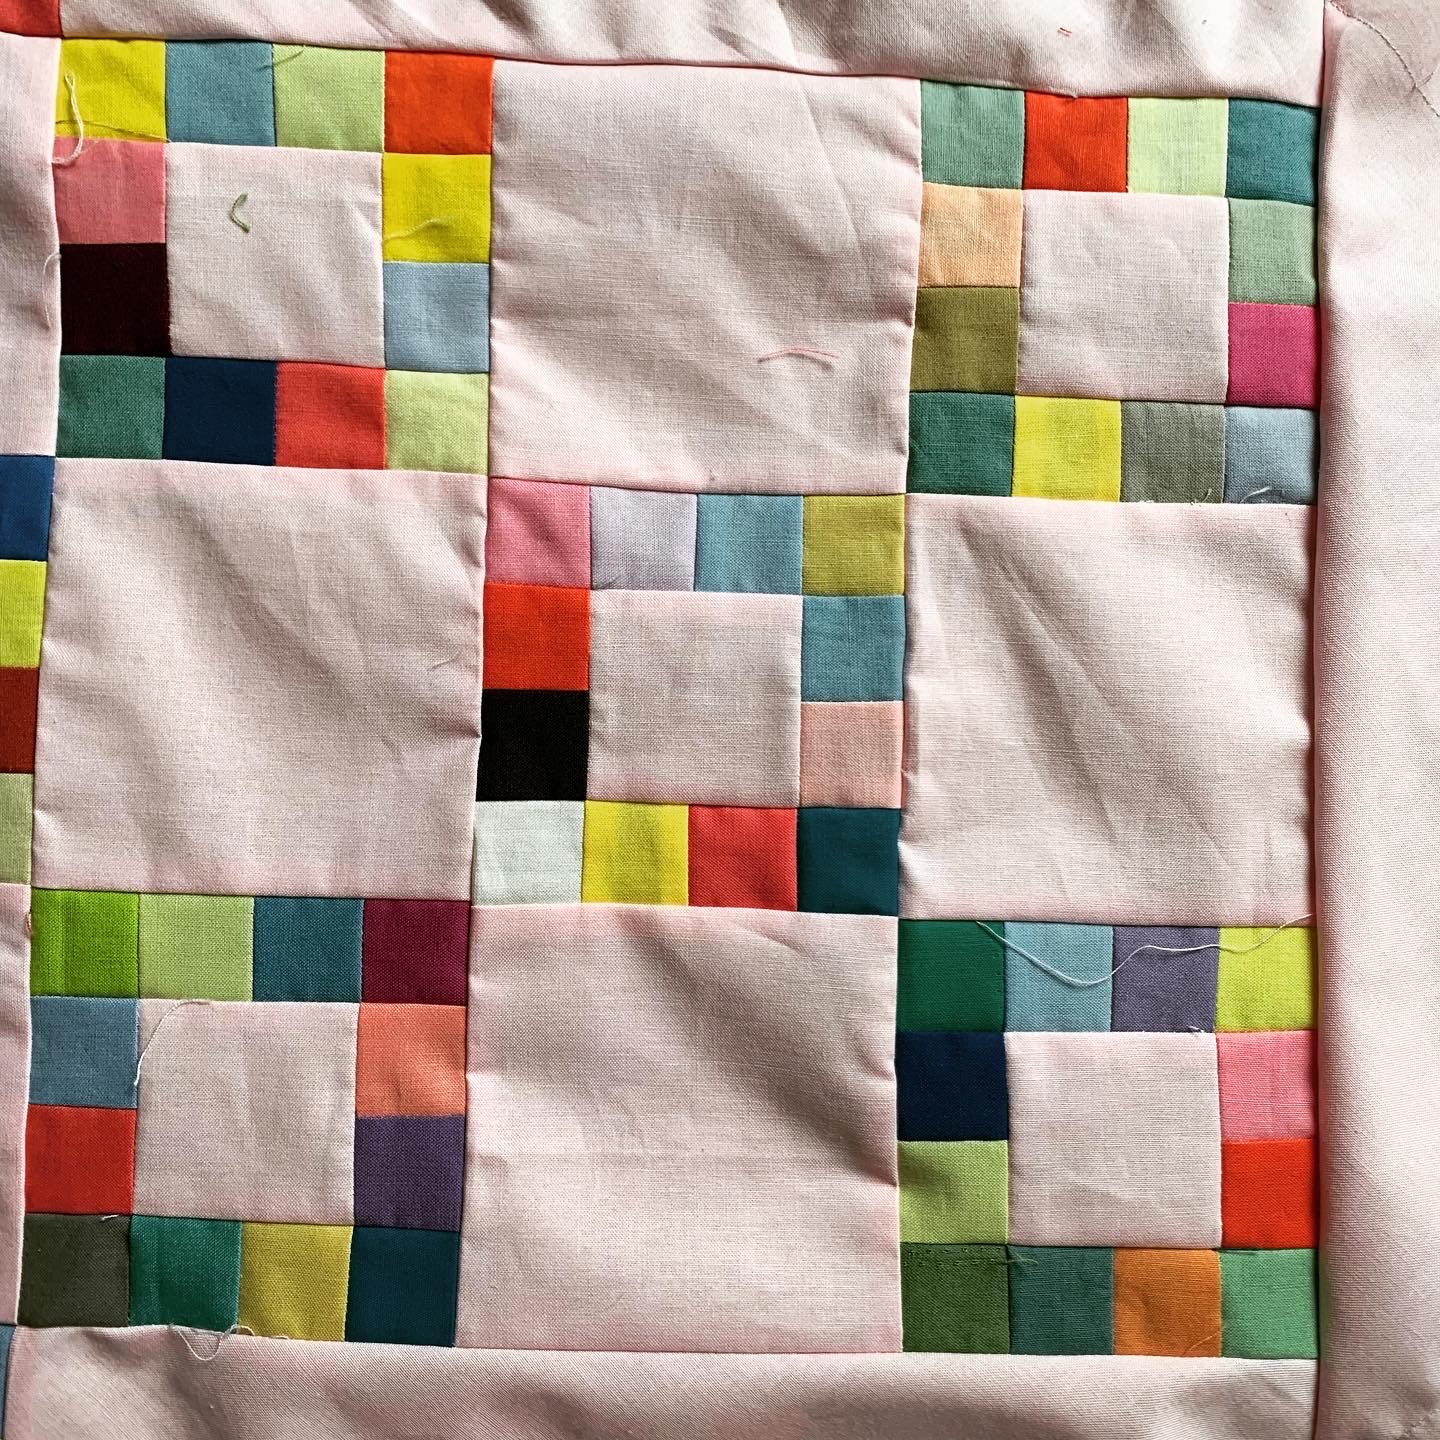
Block C

Block D


Larger 9-patch blocks (C and D) (finishes 12 inches)
30 block C
20 block D
DO NOT press the joining/horizontal seams until the blocks are sewn into rows in the quilt.
ASSEMBLY layout task: Keep the blocks oriented with the horizontal seams going in the same direction as the block joining seams. Press all these seams once the row is made. Press the seams in opposite directions each row.
All will neat when sewing rows together. 

Setting Triangles:
I like my on point quilts to have a decent float, so I overcut these triangles.
Because they would need a really difficult to manage sized square to cut into triangles, instead I use my 15 inch square and use the 14 inch sides as my guides to cut from a strip of fabric. 
Corner triangles are overcut from two 11 inch squares.
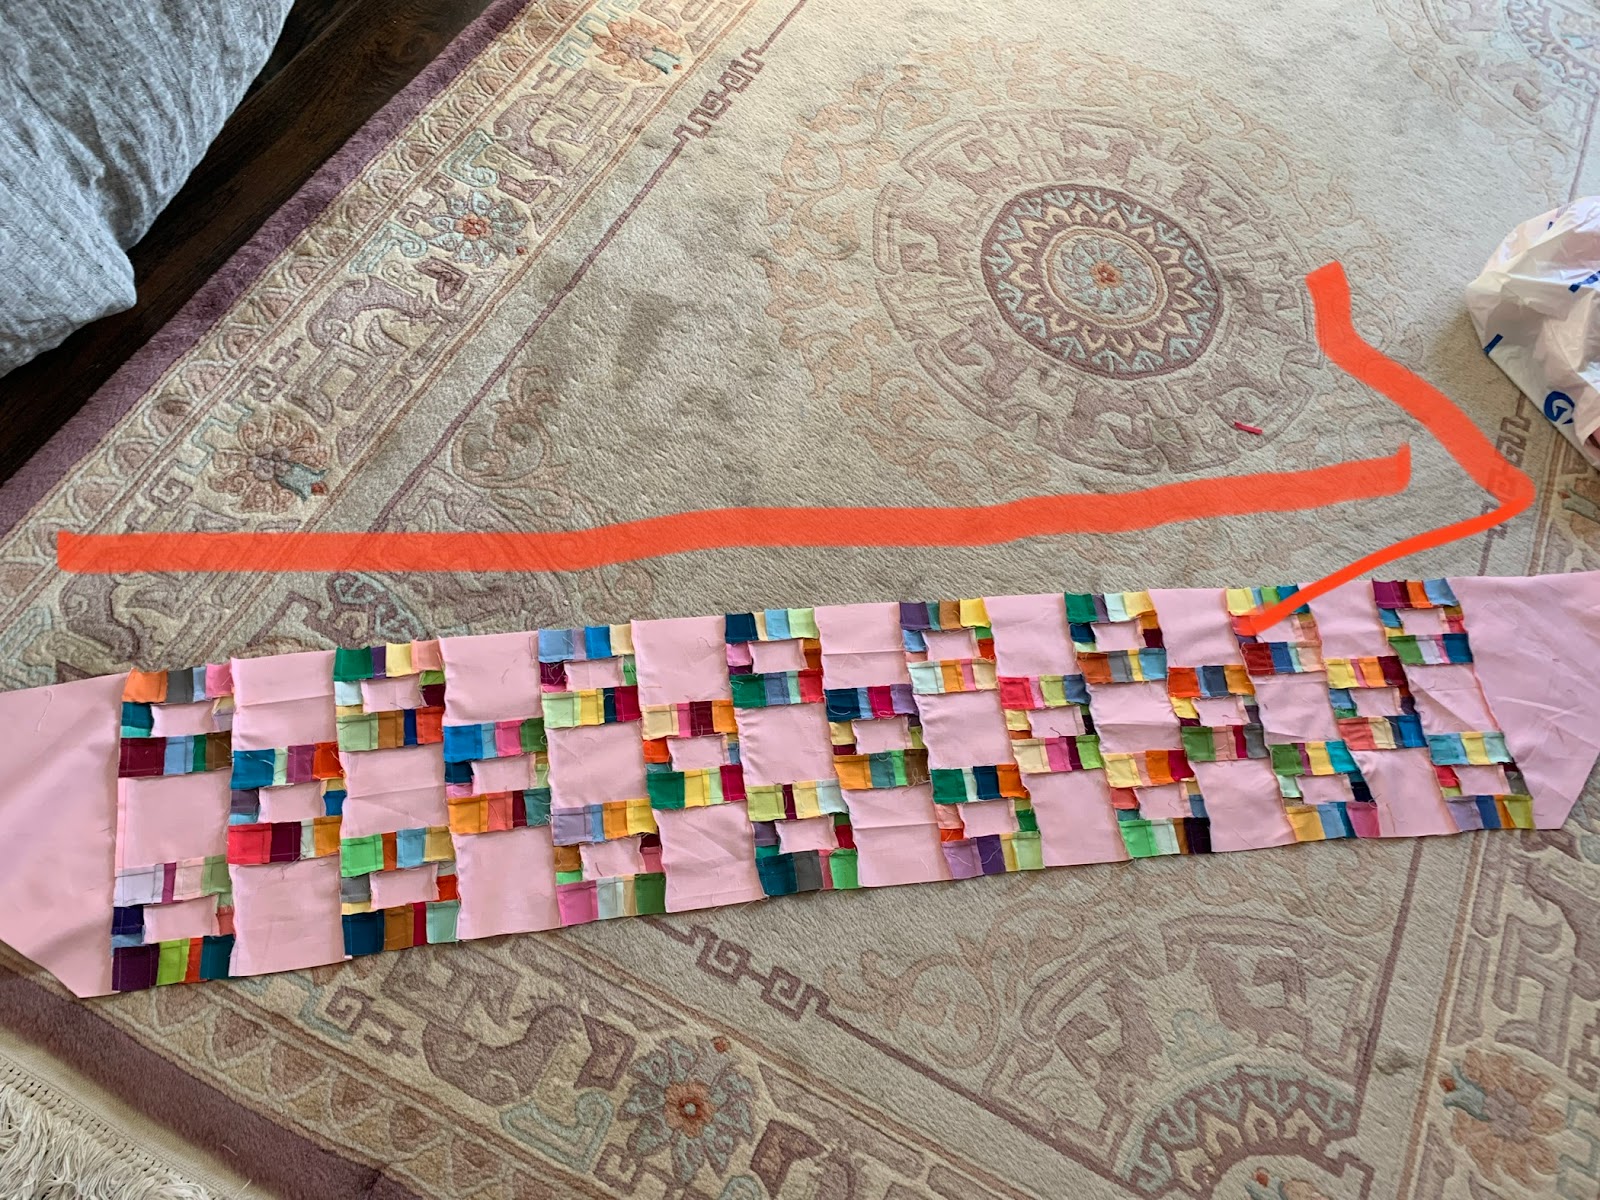
Press all internal block rows and block connecting rows in one direction
This photograph is close to the wonderful pink of the quilt

On point quilts tend to make their own border. The basic units do that in this quilt.
Quilt would also work well with a straight set.
On point quilt assembly wears me out. I try to get rows sewn together while still making blocks so the assembly isn't so daunting.

I plan to bind it in the Peony. It really is a lovely shade of pink.
My design based on a vintage quilt. Use at your pleasure.


Sunday, November 27, 2022

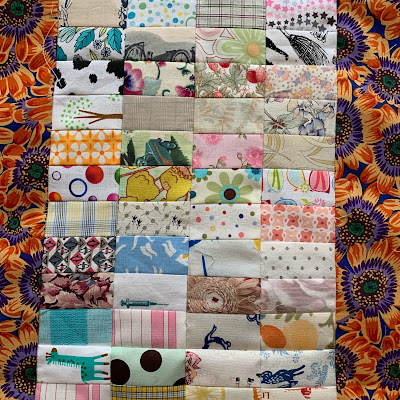
neutral Chinese coins strippie quilt, top completed

 
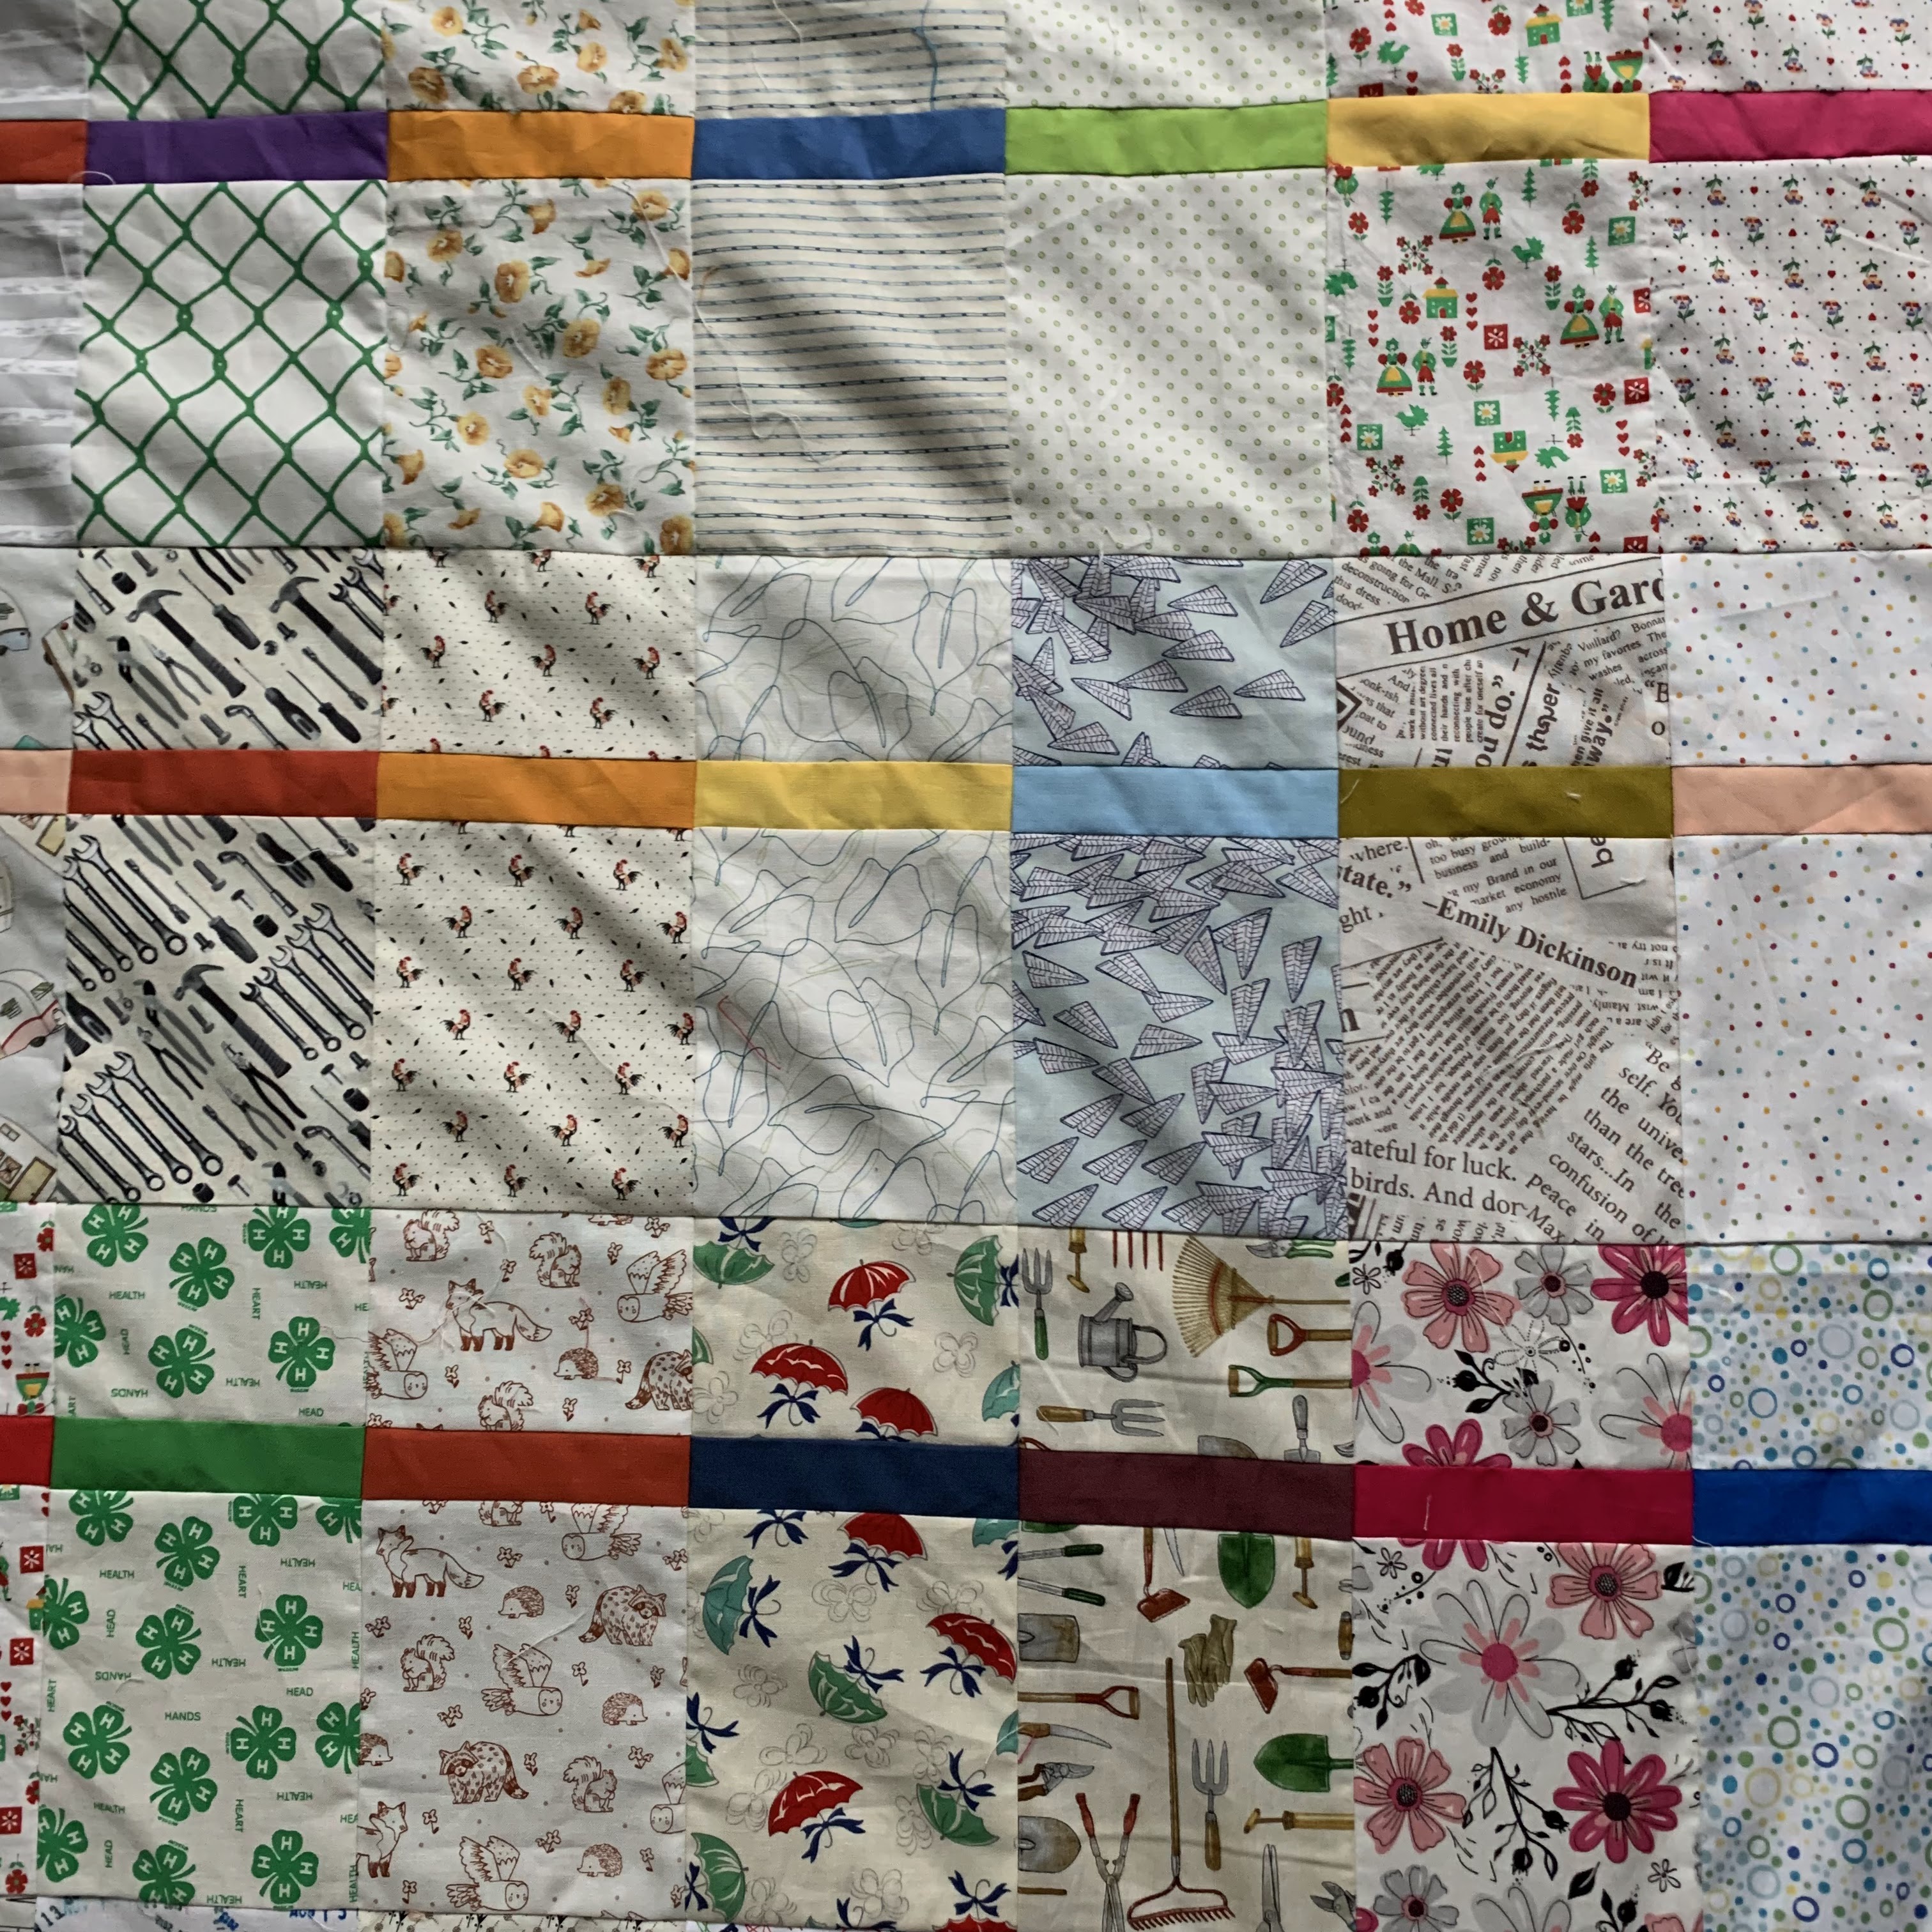
Neutral Chinese Coins, Strippie Quilt
Top completed 2022
84 1/2 by 80 inches

Block finishes 8 inches
77 blocks pieced into 7 columns of 11 blocks; 6 print columns
Block made with thirty-two 1 1/2 by 2 1/2 inch pieces
Piece count: 2464 1 1/2 by 2 1/2 inch rectangles
                    

When I made the blocks for Thirteen with the dark and brights from my 1 1/2 by 2 1/2 inch rectangles bins, pulling them out sorted the leftovers into their own category of neutrals and lights. A bin full! There are some of my mother's and my grandmother's fabrics in here.
I love the Chinese Coin rectangle and made at least 4 quilts featuring them.

The beauty of having bins of scraps ready to go is just that--they are ready to go.

I wanted to work with orange and found this lovely Kaffe floral.  PWPJ112 Lucy by Philip Jacobs for Kaffe Fassett Collective, Free Spirit. A strippie quilts was planned.


I started by sewing together the rectangles together in pairs. I knew I needed a lot of them, so I did not keep track. They were used between blocks of other projects and for when I wanted some machine time without thinking. When I finally did a count of my fours, I was only about 80 away from having enough.
Pile of fours
These were then sewn into 4s, then 8s.
Then they are pressed all in one direction, rotated, and sewed into units of 16 pieces.
The units are sewn into blocks of 32 pieces, finishing 8 inches.
Blocks are pressed to one direction.

So:
77 blocks
154 half-blocks (sixteens)
308 eights
616 fours
1232 twos
2464 pieces
Blocks are sewn into seven columns of 11 blocks, rotating each block so seams nest, and should finish 8 by 88 inches.
(This did not happen according to plan--see the next paragraph!)
I cut six strips of the floral 4 1/2 inches to be inserted between each column of blocks.

Here is where humility comes in.
I consider myself a careful piecer, and my quilts are pretty on target with seam allowances. BUT, in construction with so many small pieces and no other sizes to keep them in check, they tend to shrink in size from the intended.
Mathematically, columns should measure 88 1/2 inches. My 7 columns averaged 84 1/2 inches. HUGE difference!
I cut my print to this measure and the top came together nicely and lays flat and square.

Press columns seams in one direction--I pressed down
Sew together with floral on top
Press towards floral
All seams nest

I plan to do a tips post on strippie quilts some day.

My design, use at your pleasure.


Thursday, November 10, 2022

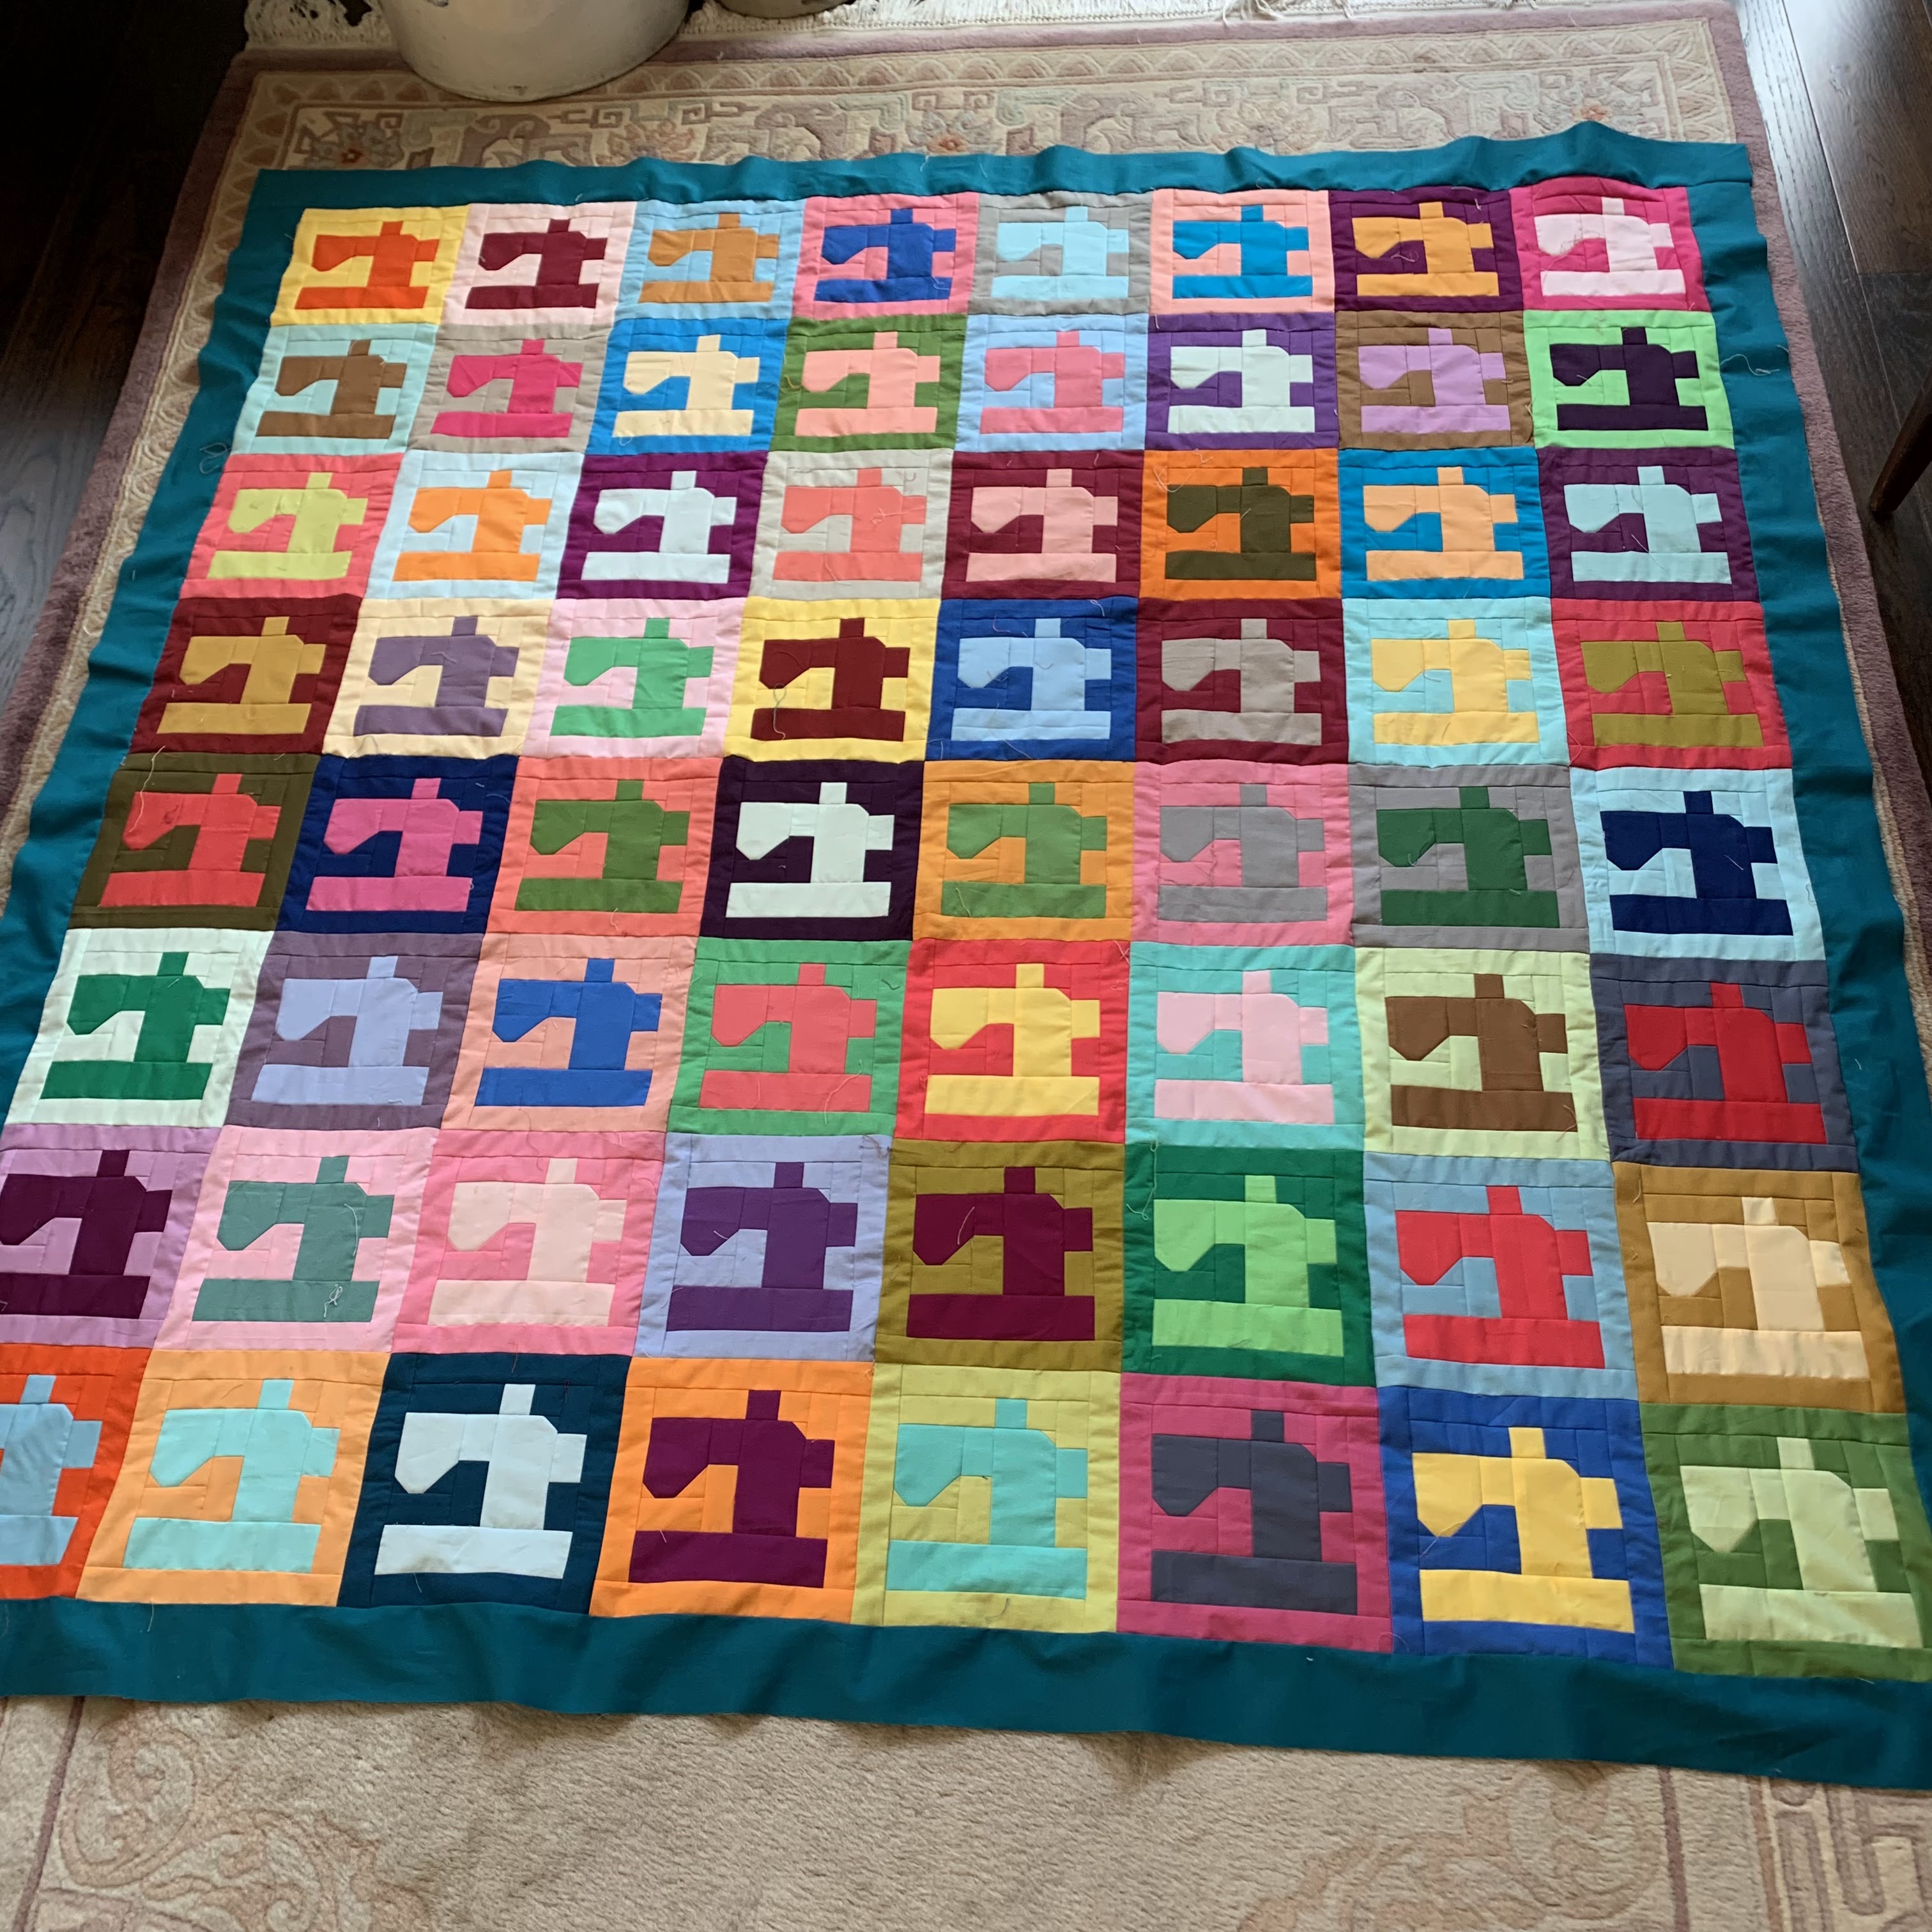
bernina X 64, top completed

Bernina X 64 
top completed 2022
about 70 inches square
Block finishes 8 inches, 64 blocks set 8 by 8

I spent quite a bit of time in front of Andy Warhol's Marilyn X 100 while visiting the Cleveland Museum of Art this summer.

https://www.clevelandart.org/art/1997.246
Click on this link where you can scroll in to see the wonderful detail.
He was so quilt-like in his work.
my beloved Bernina Record 830
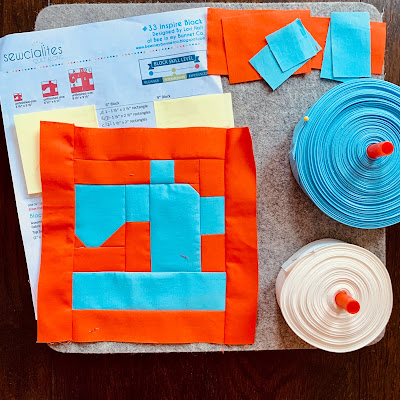
I liked this block by Lori Holt:
https://www.fatquartershop.com/sewcialites-block-thirtythree-inspire-free-pdf
I thought it would be a good one for repetition.
I skipped the top left flipped corner to reference the more angular lines of my beloved Bernina Record 830.
Here are my construction and pressing directions:
https://kleinmeisjequilts.blogspot.com/2022/11/bernina-x-64-block-construction.html
I have quite the collection of solids so it was fun to make combinations of color, shade, and value.
It would be a great two-fabric quilt with a positive and a negative block repetition.

I made Lori's 6 inch finished size and added 1 1/2 inch cut frames so my blocks finish 8 inches. Alternating blocks have the frames done with the short frames on the sides or on the top and bottom, allowing needing only the corner seams to nest.
Read here for my block construction details:
https://kleinmeisjequilts.blogspot.com/2022/11/bernina-x-64-block-construction.html

In deciding how big to go, I landed on 64 blocks to observe I am 64 years old. 
To help reduce stress on the top I decided to add a border. They are cut 3 inches.
It is Kona Glacier. 

They are set 8 by 8. 
Thinking maybe straight line quilting on this in yellow.

My frames and setting using a Lori Holt design. Use my variations at your pleasure.


Saturday, November 05, 2022

bernina X 64, block construction


Lori Holt designed this delightful block that is available as a free pdf from the Fat Quarter Shop:
https://www.fatquartershop.com/sewcialites-block-thirtythree-inspire-free-pdf

I used the middle sized one.
I modified it slightly by eliminating the top left flipped corner. I added 1 inch finished frames so my blocks finish 8 inches.
Frames: Cut of the background fabric two rectangles 1 1/2 by 8 1/2 inches, two rectangles 1 1/2 by 6 1/2 inches.
I made half the blocks with the short pieces on the top and bottom, and half with the short pieces on the sides.

Watch for the completed top with more details soon!

Tuesday, November 01, 2022

dia de los muertos


In honor of Dia De Los Muertos, I am sharing photographs from my mother's funeral from 2019. 
We put my tulip quilt on her casket and a bouquet of tulips.
The casket was from Trappist Caskets, made in Iowa. They are wonderful to work with and it was the beautiful, simple casket that our mother asked for.
At the cemetery we placed dirt from the farm where she grew up on the casket.
And we had her buried with a thimble on her finger.

Remembering her today with love, and with love for my sisters with whom  thoughtful decisions were made.

Wednesday, October 12, 2022

alphabet, (Missouri Star Easy Alphabet) quilt completed

Alphabet
2022
79 1/2 by 58 inches

Adapted from the Missouri Star Easy Alphabet pattern.
I changed the V.
They use squares for the backgrounds. I instead used larger pieces of fabric. I used Doug Leko's mini simple folded corners tool and Bonnie Hunter's Essential Triangle tool to make these construction adaptations.

The background is Kona Cyan. Love this color.
The scrap squares were from my solid 2 1/2 inch squares bin. Having that bin ready to go made for a quick quilt.

The back is a delightful qwerty typewriter keys batik in a coppery brown.
Quilted by Sue Divarco

This is my fifth alphabet quilt. I have the sixth being quilted and have another two in planning stages.

Penny Dog in the picture!


Saturday, September 24, 2022

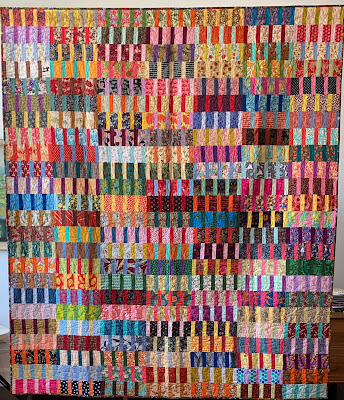
thirteen, quilt completed

Thirteen
91 by 78 inches
2022

42 blocks finishing 13 inches
My design, use at your pleasure

Directions for block construction and top assembly are here:
https://kleinmeisjequilts.blogspot.com/2021/08/thirteen-block-construction-and-quilt.html

Greatly influenced by Tonya Ricucci's Lego/Ellis Island quilt
Tutorial showing antique quilt inspiration: http://lazygalquilting.blogspot.com/2011/08/lego-tutorial.html
Finished quilt named Ellis Island
https://lazygalquilting.blogspot.com/2011/11/ellis-island.html

Tonya using varying lengths of fabric and has a 10 inch block. 
Mine has a 13 inch finished block and is made from 1 1/2 by 2 1/2 inch rectangles, plus 1 1/2 inch squares.

Made from my bin of 1 1/2 inch by 2 1/2 inch rectangles. Included are fabrics of my mother and grandmothers.
Every piece is a memory.
I love working with this size piece and by cutting down my scraps into rectangles, I am ready to go when an idea comes. I have a bin of 1 1/2 by 2 1/2 inch solid rectangles calling my name.
This quilt used mainly of darks and mediums along with brights and lights added in.

The back is a fun print from the Night Ride collection of Rae Ritchie for Dear Stella.

A perennial problem is having help hanging a quilt for photography.
Paul stepped up today!


Monday, September 12, 2022

ladder, quilt completed

Ladder
2020
96 by 84 inches
168 blocks
Block finishes 4 by 12 inches

I find I neglect showing my completed quilts and am on a mission to post those that I've missed over the years.

Ladder is a design I came up with in trying to mess with the grid. By having the seams both meet and not meet as they nestle to the next blocks gives a bit of vibrating to the quilt. I like how in sections it looks like there are diagonals where there aren't any.
It also showcases prints, always a requirement for these solid and prints quilts.

My design--use at your pleasure.

Block construction is discussed here:
https://kleinmeisjequilts.blogspot.com/2019/01/ladder.html

Quilt assembly is discussed here:
https://kleinmeisjequilts.blogspot.com/2019/04/ladder-top-completed.html

Quilted by Sue Divarco

Monday, August 15, 2022

17 years!

August marks 17 years of this blog.
I am glad to have this record of my life.

Scrolling to the early posts, I find it interesting that there is a consistency to my quiltmaking. There is growth, learning, refinement, but there is also a sense of this person 17 years ago is the same person making quilts today.

I also enjoy seeing our children grow up on these pages. I've tried to protect their privacy in those posts. They have expressed how they like reading these memories too.

Thank you for reading my thoughts!
Lynn Dykstra


Wednesday, August 10, 2022

summer horizon, top completed


Summer horizon
95 by 81 inches
180 blocks set into 10 rows of 18
Block finishes 9 1/2 by 4 1/2 inches


While I was cutting for my summer quilt with the triangles in the corners, I also cut pieces to make another horizon quilt featuring those same low volume fabrics; a sister quilt.

Again I love the summer feel to it and plan to have it densely quilted with a cotton batt. And I am thinking either Kona Peony or Kona Prairie Sky binding for both of these summer quilts.

Directions for the block are here:
https://kleinmeisjequilts.blogspot.com/2021/05/horizon.html

Here is what my first quilt looks like:
https://kleinmeisjequilts.blogspot.com/2022/04/horizon-quilt-completed.html

I have a batik version of this quilt being cut here behind the scenes.
It is a popular quilt--many have written to me with delightful interpretations of it.

My design. Use at your pleasure.