Tuesday, November 25, 2025
quilt installation, Solids + Prints
Friday, May 09, 2025
lady of the lake
Lady of the Lake
Quilt completed 2025
96 by 80 inches
quilted by Sue DiVarco
I show how to make the block HERE.
Top construction is HERE.
I cut for this top when I made the Ocean Waves. This one uses several larger motif fabrics.
Monday, March 24, 2025
ocean waves, binding
top completed 2024
quilt completed 2025
96 by 80 inches
120 blocks, block finishes 10 inches
I talk about the block construction HERE
Layout options HERE
And quilt completion HERE
Sunday, January 19, 2025
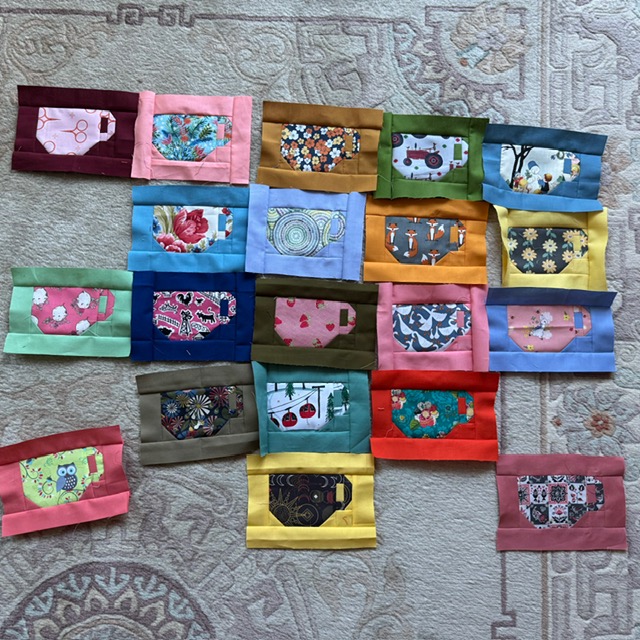
teacups: framed "I Need a Cup of Tea"
I anticipate being in need of this effect over the next while, so I started another I Need a Cup of Tea.
In this post I will describe my Solids + Prints version that includes a frame around the cup.
Go HERE if you want to read about my red teacups block construction. Because of the high contrast of the fabrics, this link's illustrations may be easier to see how the flipped corners work for the teacup.
Go HERE if you want to read about L sashing.
Go HERE if you want to see the completed quilt top.
To make framed teacups, two types of frames are used to eliminate having to adapt pressing and to reduce matching seams.
FRAMES ARE ALWAYS PRESSED AWAY FROM THE TEACUPS in the settings shown on this post.
REMINDER- you will need to do flipped corner sewing for this block. I HIGHLY recommend Doug Leko's Mini Simple Folded Corners tool available HERE. I use this ruler and the larger version all the time.
NOTE: I experimented with the ear pressing differently differently than I did for the red and white. Follow your preference. I found with some fabrics one way worked better and others, the alternate way. (With my Red and White I was using the same background fabric throughout and one way seemed to work best.)
![]() |
| Two options for ear pressing |
Teacup cutting
Teacup print:
One rectangle 3 1/2 by 4 1/2 inches
Two 1 inch squares
One 2 1/2 by 1 inch rectangle
![]() |
| teacup cutting |
Background solid:
Three 1 1/2 inch squares
Two 1 inch squares
One 1 1/2 inch by 1 inch rectangle
Block A frame cutting from SOLID
Two rectangles 7 1/2 by 1 1/2 inches
Two rectangles 3 1/2 by 1 1/2 inches
Block B frame cutting from SOLID
Four rectangles 5 1/2 by 1 1/2 inches
![]() |
| Block A sewing |
![]() |
| Block A sewn |
![]() |
| Block B sewing |
![]() |
| Block B sewn |
Sew flipped corners on sides of ear and press towards the squares
Sew cup little squares onto background of ear and press towards the squares
Sew ear together and press towards the ear
Sew background square to bottom of ear
Sew ear to cup.
PRESS ear to the cup.
Frame teacups for Block A or Block B. Press frames away from the teacups.
These blocks will alternate in the quilt eliminating bulk and matching of seams
I am sewing into units of 4 then into a larger block of 8.

Let me know if you are sewing along!
I have a instagram hashtag of #ineedacupofteaquilt that I would love you to use on your blocks.
I have lots of ideas for different quilts.
-A Delft idea with all blue teacups on white
-Hot cocoa feeling with browns/tans
-Orange teacups on grey--a favorite color combination of mine
My design, use at your pleasure.
Tuesday, December 03, 2024
pavement, top completed, construction details
top completed 2024
90 by 80 inches
block finishes 10 inches
72 blocks set 8 across and 9 down
Block construction HERE
It is a simple block and a good one to use if you are experimenting with this solids + prints concept.
All blocks are made with the same pressing plan.
In layout, every other block is rotated so all seams nest.
Set aside 8 blocks to be the bottom blocksSew remaining 64 blocks into 32 pairs, rotating blocks so one is oriented horizontal and one is vertical. These are 2-block units---press away from the horizontal oriented blocks
Sew into 16 4-block units, making sure to sew a horizontal block to a vertical block--press consistent with the previous

Layout the 4-block units to make two rows of 8 columns, rotating every other unit to nest to the blocks next to each other. Make sure to keep columns consistent in orientation.
Layout remaining 8 blocks to make a 9th row, making sure to orient horizontal or vertical to nest into the blocks above.
I sewed these 9th row blocks to the 4-block units above them, making 5-block units--pressing consistently

Then sewed into two sections, pressing one section east and one west.
Sew together into top, pressing final seam north.
Everything nests!
My directions and design using a traditional block.
Use at your pleasure.
| back is by Dear Stella |
Wednesday, November 13, 2024
paths and stiles, top completed, construction details
Paths and Stiles
top completed 2024
90 by 81 inches
block finishes 9 inches
90 blocks set 9 across and 10 down
See block construction HERE.
Blocks are rotated every other block so all seams nest.
I pieced in pairs--2-block units--made 45 pairs
| 4-block units |
Then set aside 9 pairs and with remaining 36 pairs, made 18 units of 4, pressing seams consistently with the previous pressing.
Lay out two rows of the 4-block units and one row of the 2 block units, making sure keeping columns consistent with either horizontal oriented unit on top or vertical oriented unit on top.
Sew into to rows
Press center row east, top and bottom rows west
Sew rows together
Press final rows up or down
Everything nests!
My design and directions using a traditional block.
Use at your pleasure.
| Backing by Dear Stella |
Tuesday, November 05, 2024
pavement, block construction
I plan to set 8 by 9, so will make 72 blocks to make a quilt 80 by 90 inches
Cutting
Solids:
Nine 2 1/2 inch squares
Prints:
Four rectangles 4 1/2 by 2 1/2 inches
Eight 2 1/2 inch squares
Layout block with the rectangles horizontal in the four corners
Sew into rows
Press top and bottom rows to the solid squares
Press center row towards the center square
Press second and fourth rows away the center square
Sew into block, press away from the center row
I will be rotating every other block when I put together the top so all seams will nest.
My directions for a traditional block. Use at your pleasure.
Sunday, October 27, 2024
paths and stiles, block construction
| corn fabrics celebrating harvest! |
Block finishes 9 inches
I plan to set 9 by 10, so will make 90 blocks for a quilt to finish 81 by 90 inches
Cutting
Solids:
Four rectangles 1 1/2 inches by 3 1/2 inches
One 3 1/2 inch square
Four triangles cut from 3 1/2 inch strip using the Easy Angle or Bonnie Hunter's essential tool
Prints:
Eight rectangles 1 1/2 inches by 3 1/2 inches
Four triangles cut from 3 1/2 inch strip using the Easy Angle or Bonnie Hunter's essential tool
Sew together triangles, pressing away from the solid triangle
Sew together rectangles; with two sets, press towards the center solid and with the other two sets, press away from the center solid
Layout block with the vertical stiles pressed away from center rectangle at the top and bottom and the horizontal stiles pressed towards the center rectangle at the sides
Sew into rows
Press triangle rows away from the triangles
Press center row away from the center square
Sew into block, press away from the center row
My directions for a traditional block. Use at your pleasure.
Monday, September 30, 2024
sample blocks
Working on pressing plans for Paths and Stiles and for Pavement. Quite a few blocks already cut out, so I am ready to go when more sewing time opens up in later October.
Saturday, May 11, 2024
lady of the lake, top completed
Lady of the Lake
top completed 2024
96 by 80 inches
120 blocks
block finishes 8 inches
I love this traditional block. The large triangle is a great place to feature fabrics.
There are many variations of the block, I went with the simple one.
Details of block construction and unit assembly are here.
I started this last summer along with the Ocean Waves. Both are triangle heavy and my wanting to keep the fabric images oriented a certain way made it efficient to work on both at the same time. All that triangle making made it a slog. But, I am glad I persevered and look forward to them being quilted.
My design using a traditional block. Use at your pleasure.
| Alice came out to play |
![]() |
| Backing is by Miriam Bos for Dear Stella |