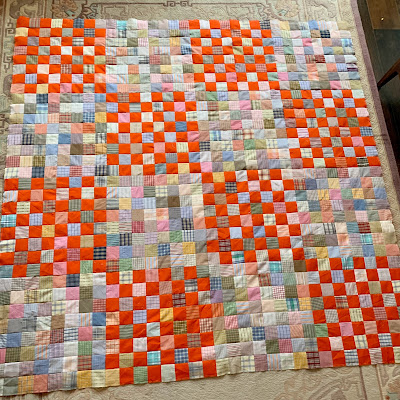
96 by 80 inches
top completed 2022
block finishes 8 inches
120 blocks set 10 by 12
Another from the 2 1/2 square bins! Lots of my covid-squares trading with my group are included.
I love the color of Kona Glacier and thought it would work in sort of a Hudson Bay blanket influenced design with the light squares giving that soft wool look. I push my neutrals.
80 neutral blocks
20 checkerboard blocks
20 Half checkerboard and half neutral blocks
Cutting:
Solid: 240 2 1/2 inch squares
Neutrals: 1680 neutral 2 1/2 inch squares
Making half-blocks:
MAKE SURE you sew the half blocks keeping the pressing orientation:
pieces on top have seams pressed south--pieces on bottom have seams pressed north


Neutrals block:
Make 360 units of 4 squares. Press in one direction
Make 180 half blocks--set aside 20 for mixed blocks
This leaves 160 half blocks
Make 80 blocks of all neutrals
Set aside 40 blocks
This leaves 40 blocks
Sew into 20 two-block units. Press in one direction
Solid/neutral checkerboard blocks
Make 120 units of 4 squares. Press in one direction away from the solid end square
Make 60 half blocks--set aside 20 for the mixed blocks
This leaves 40 half blocks
Make 20 blocks
Pair with 20 neutral blocks and sew 20 into two-block units
Press half the pairs towards the side with neutral block, half to side with solids
Mixed blocks
These are made with one half all neutrals and one half of a checkerboard
Make 20 blocks.
Pair with 20 neutral blocks and sew into 20 two-block units keeping the neutral side of the mixed block connecting to the neutral block
Press half the pairs towards the side with the neutral block, half to the side with the solids
 |
| blocks |
 |
| two-block units Orientation will be vertical in quilt lay-out |
 |
| note the two-block units are vertical |
Lay out into 6 rows of 10 vertical two-block units, pay attention to units for pressing patterns
Make sure all odd two-block-units that are pressed north and even units have seams pressed south.
Sew into 6 rows, then sew the rows together.
All seams nest.
My love of 16 patches continues. Another is in the works!

My design, use at your pleasure.
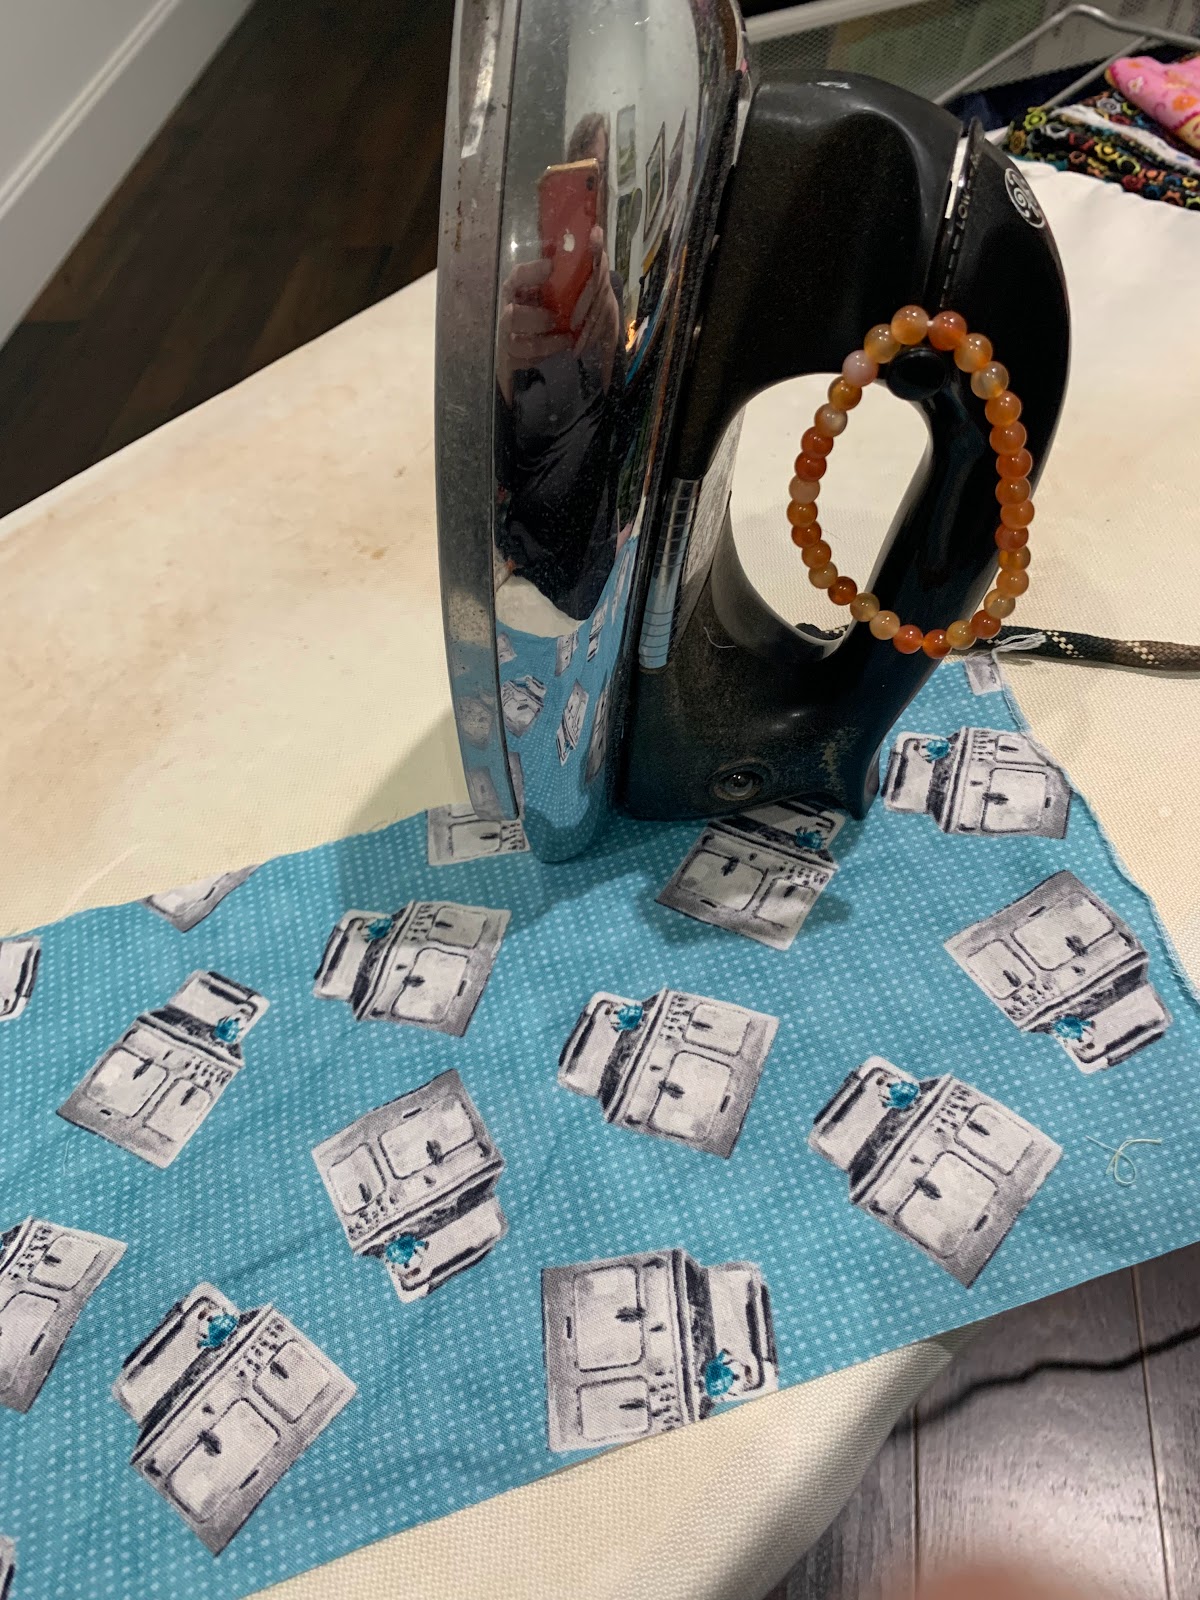
AND, look at this great stove fabric for the back!
Homemade Happiness Danhui Nai, Wilmington Prints