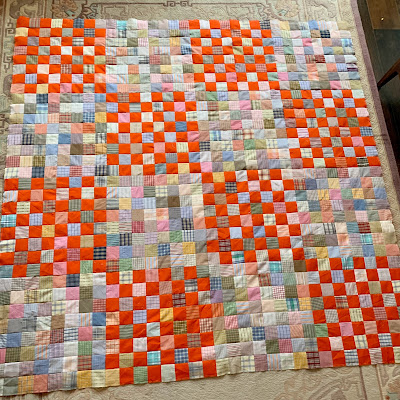
16 patch of 16 patches
top completed 2022
64 inches square
Block finishes 8 inches
64 blocks set 8 by 8
32 all scrap blocks, 32 checkerboard blocks
When going through my 2 1/2 inch light squares I found a large pile from reclaimed fabric of shirts. Several years ago I made quite a few quilts from reclaimed fabrics. I loved working with them then and since scattered them into my other quilts. But, having found a good number of squares, I decided to feature the shirt fabrics once again into their own quilt.
These fabrics are a bit limp/flimsy compared to regular quilting fabrics. I control this by using starch and by constructing the quilt into segments/large blocks instead of by rows or columns. The orange fabric helps stabilize everything as I go.
The mix is of lights to light mediums to mediums.
I added Kona Tangerine as my solid.
I laid it out into a giant 16 patch.
Cutting
Solid: 256 2 1/2 inch squares
Scraps: 768 2 1/2 inch squares
Sewing
Make pairs, then four squares units
Press unit to one side. When pressing the units with solids, I always pressed away from the edge that ends with a solid.
Make half-blocks and full blocks: (do not press these yet
TIP: when sewing the half-blocks I nest the seams with the bottom seams north and the top seams south.
This is because when putting just two units together you are in most control of the seams. Having done this at this stage, all sewing for blocks and in joining blocks will have the nesting with the bottom seams down and the top seams up, locking the nest.


Sew blocks into pairs. Press block pairs with all seams going in one direction.


Sew into large blocks, flipping one side so the seams nest. Press to alternating sides.


Lay out the four giant blocks, paying attention to orientation to keep the seams ready to nest. Sometimes I do this by having the blocks all with the backs showing to keep me organized.
Sew the top together.
All seams nest.
Staystitch along the edges.
My design using a traditional pattern.
Use at your pleasure.

5 comments:
Wonderful finish! Thank you for explaining the details.
These are really nice directions, and these blocks - and the whole top - are FABULOUS!
I really like this scrappy shirting quilt! Quiltdivajulie
What a lovely design idea, to add the bright red in alternating blocks! I keep thinking I want to do a postage stamp quilt like this but the pieces are sooooo tiny! Great directions!
The tangerine adds such dimension to the blocks! Thanks for the tips for construction.
Post a Comment