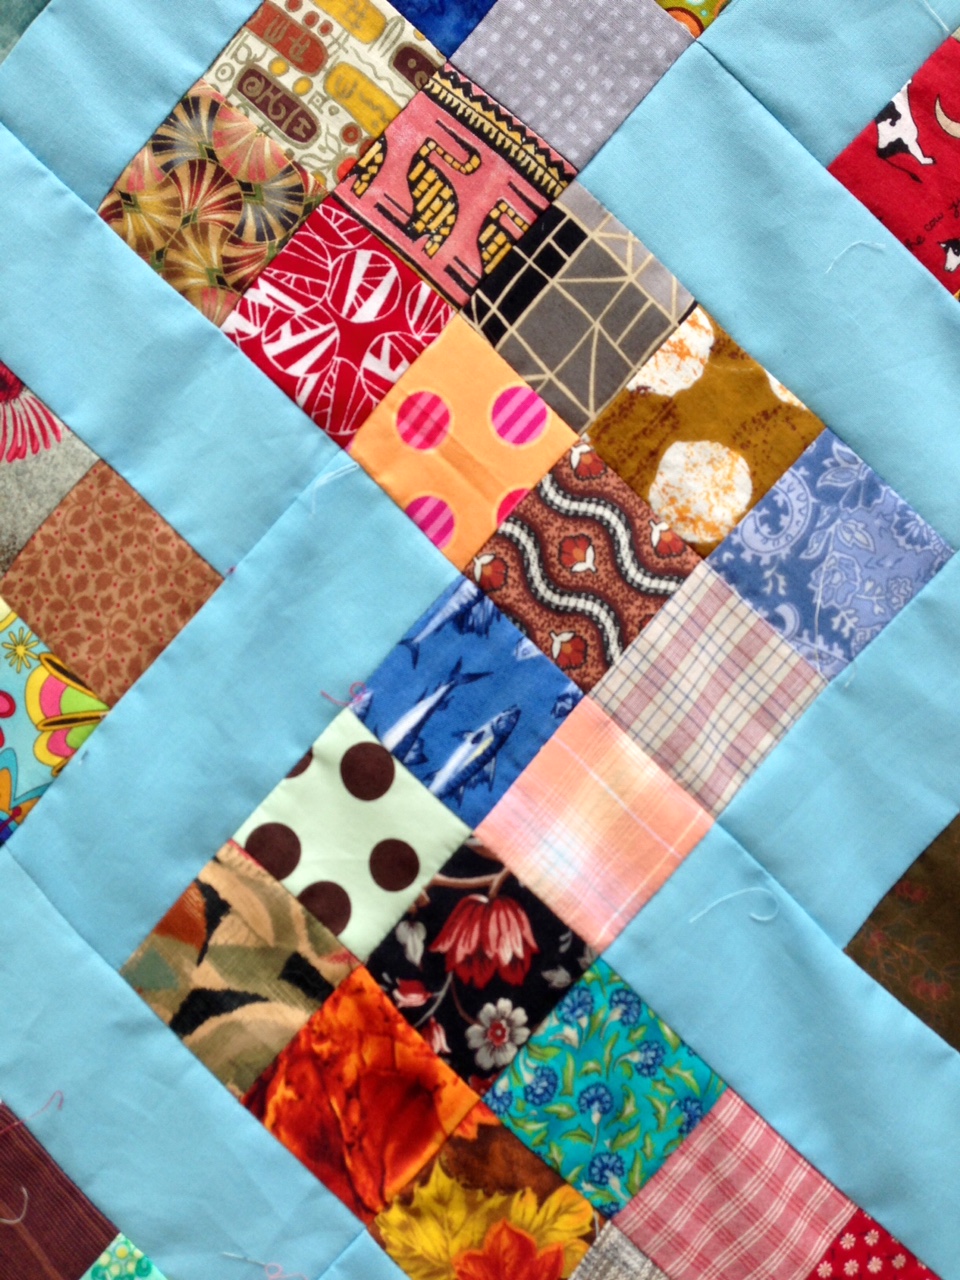
About 84 by 102 inches.
This variation on a rail fence has a 6 inch finished block, made from two rows of 3 squares each and one solid strip.
The scraps are 2 1/2 inch cut squares and the solid is a 2 1/2 by 6 1/2 inch rectangle.
http://kleinmeisjequilts.blogspot.com/2015/06/rail-fence-streak-of-lightning-process.html
Photographed on a windy Iowa day.
This quilt now belongs to my sister Beth.
On the back I used up some of my precious Hoffman fabrics--a nice way to enjoy them.
Showing posts with label rail fence. Show all posts
Monday, December 26, 2016
Saturday, July 11, 2015
rail fence in streak of lightning set, top completed
It is huge! About 84 by 102 inches.
The unit (finishing 6 inches) is a rail fence, with two rails made from 2 1/2 inch cut squares and the third with a solid 2 1/2 by 6 1/2 inch cut strip. I used a Moda Blue.
I put 4 of these units into a 12 inch block. If you go to my earlier post you will see my pressing plan.
You may notice the odd floating units along one edge. I could have figured out how to make that edge flow, but decided the simplest solution was the lazy way, and let them float.
And, it used up 1/4th of my 2 1/2 inch squares! Just one and a half shoe boxes left of them. I am trying to pull together my sewing room, so I fear they both will be full again soon. I need a new 2 1/2 inch square project...
Labels:
rail fence,
streak of lightning
Thursday, June 25, 2015
rail fence streak of lightning--process
My 2 1/2 inch square shoebox has become two shoeboxes and I have been looking for a project to use them. I saw a picture of a quilt using squares in a rail fence block in a straight set--I decided to try to set them on point.
Sew the squares into 3 piece units, press to one side.
Then, sew two units together BUT, in two different ways.
Set 1 sew with the seam allowance toward the needle.
Set 2 sew with seam allowance away from the needle.
Keep these sets separate, and sew a solid 6 1/2 by 2 1/2 inch piece on to each set.
Set 1 press all seams to the solid fabric.
Set 2 press all seams away from fabric.
I keep one block of each by the machine to keep this sewing and pressing plan in front of me as I make more blocks.
Sew two of the same set together. Pictured has set 1 on top and set 2 on the bottom
Then, using one section from each set, put together into one large block.
All this sorting allows for the seams to nest. Eventually in putting the top together there will be some twisting ones, but I can live with that. If you wish, you can make all the rail fence blocks the same and just deal with more twisted seams.
I am keeping some sets unsewn into blocks so they will be available to fill in on the edges once I decide how I am going to do that.
This is using up a lot of squares!
Sew the squares into 3 piece units, press to one side.
Then, sew two units together BUT, in two different ways.
Set 1 sew with the seam allowance toward the needle.
Set 2 sew with seam allowance away from the needle.
Keep these sets separate, and sew a solid 6 1/2 by 2 1/2 inch piece on to each set.
Set 1 press all seams to the solid fabric.
Set 2 press all seams away from fabric.
I keep one block of each by the machine to keep this sewing and pressing plan in front of me as I make more blocks.
Sew two of the same set together. Pictured has set 1 on top and set 2 on the bottom
Then, using one section from each set, put together into one large block.
All this sorting allows for the seams to nest. Eventually in putting the top together there will be some twisting ones, but I can live with that. If you wish, you can make all the rail fence blocks the same and just deal with more twisted seams.
I am keeping some sets unsewn into blocks so they will be available to fill in on the edges once I decide how I am going to do that.
Labels:
rail fence,
streak of lightning
Subscribe to:
Posts (Atom)