Sunday, May 19, 2019

4-in-the-corner, top completed

4-in-the-corner
120 blocks
Set 10 by 112
80 by 90 inches

Block finishes 8 inches

Adapted from the block by Carol Thelen found at her website Quilt Notes. https://quiltnotes.com/learning-center/corner-4-patch/


Wednesday, May 15, 2019

two more plus a re-do

U is for umbrella
K is for kitten
J is for jumprope re-do
I wasn't happy with the J. I tried to get used to it but it needed re-drafting. This one is much more pleasant.
Only the N left to sew!
Made using the McCallsQuilting.com alphabet, with variations in constructing and a few re-drafted letters.

Tuesday, May 14, 2019

a lot more

Q is for Queen Anne's Lace
(note the Dutch royal orange)
S is for Scrabble
Y is for yarn
J is for jumprope
W is for woods
E is for egg
(note use of yolk-yellow)
V is for volcano
O is for owl
Getting more of these blocks done and now playing with setting options.

I am really enjoying the bits of sewing time that yield the blocks. They are not difficult. Some are a bit fiddly.
Made using (with variations) the McCallsQuilting.com alphabet.

Sunday, May 12, 2019

sewing with fabric from my mother

A quiet day. The first Mother's Day since our mother's death.
Nice commemorations from our children. Henrietta had nine pretty incredible grandchildren.
Tonight I sewed a bit and used the butterfly fabric from my mother's scraps. She made summer dresses for us from it.
Thanksgiving 2018


Friday, May 10, 2019

a couple more

X is for fox
T is for tulip
I did a bit of research on pedagogical theories for teaching the letter X. Several suggest to teach it as it is normally used--in the middle or end of a word since it is rarely used with the X sound at the beginning of a word.
So, I went with fox.

The tulip fabric I have used for several quilts. I used most of it up so I ordered more. For being a scrap quilter, I tend to be a bit traumatized when I use up some of my favorites and then I have to search to buy more. Did that with the lamps and the foxes too. 
The rabbits are very sparsely scattered on the yardage, so I was glad with the new yardage I had a rabbit to feature.

Tuesday, May 07, 2019

two more letters

Z is for zebra
L is for lamp
Made using the McCallsQuilting.com alphabet.
For the z I didn't follow their instructions but I did follow their shape. I want to keep the background fabrics as uninterrupted as possible. So I cut the backgrounds from a 4 1/2 inch strip. the top one is a triangle at 4 1/2 inches, the bottom piece is a chisel shape cut to about 6 1/2 inches. I added the Z fabric to the top triangle and bottom piece, trimmed them, joined them, and trimmed again to have the whole piece 6 1/2 by 7 inches. Their pattern had 9 pieces in the center of that Z. I have 4.
This is really hard to describe. I am not even sure I could replicate my steps. But it worked without resorting to my nemesis of paper piecing.

The L was a welcomed respite letter after that.

Saturday, May 04, 2019

puss-in-two-corners

I've been drawing and playing with this block for some time. And now I see a similar one showing up on Pinterest as "Chandelier" from Vanessa Goertzen's Charm School book.
Mine is also based on the puss-in-the-corner block. But with different proportions from Vanessa's delightful block.
And different proportions from the traditional puss-in-the-corner block.
The puss-in-the corner is a 4-patch grid of 1:2:1. Mine is a 1:1.5:1 grid.

7 inch finished block
I plan to set these on-point so will probably make 128 blocks set 8 by 9 with 30 setting triangles and 4 corner triangles.

Solid: cut one 3 1/2inch  square, two 2 1/2 inch square
Print: cut two 2 1/2 by 5 1/2 inch rectangles, two 3 1/2 by 2 1/2 inch rectangles

Setting triangles:
I like my on-point quilts to have a float, so I over-cut these to about 9 inches on the sides.

Pressing:
Press pieces all to the solids
Then press seams to one side.
Rotate blocks so the seams nest when sewing rows.
Press alternating rows right or left so all the seams nest.

Wednesday, May 01, 2019

4-in-the-corner

I slightly simplified a delightful block Corner 4-patch from Carol Thelen's Quilt Notes.
Carol uses a stand-alone four-patch. I melt mine into the print of the rest of the block by just adding the solid.
https://quiltnotes.com/learning-center/corner-4-patch/
She has a wonderful variety of setting suggestions; the block lends itself to many successful settings. Check out her instructions for cutting, construction, size, and variations. Pressing will vary by which setting is chosen.
I will add my pressing instructions below.
Her whole site is a great resource:
https://quiltnotes.com/

The setting I plan to use looks a bit like a double helix. Maybe more of a single helix!
I plan to make mine set 10 by 12, 80 by 96 inches. 120 blocks. Maybe 10 by 11, 110 blocks.

Press small squares to the prints, then press the seam in the 4-patch and the seam of it to the print larger square.  Wait with pressing the center seam until setting into rows and columns.

I first sew two blocks together.
Still not pressing center seams of blocks or the seam of the two blocks.

After laying out I will piece into columns, alternating direction of seams for each two-block unit.

Monday, April 29, 2019

a few more letters

G is for giraffe
A few more blocks.
The Dear Stella giraffe fabric was what started this project. I saw it and knew it was time for another alphabet quilt. I bought it for a backing with the primary purpose of having leftovers to make the G.
(The backing I made is pretty wonderful too.)
C is for celestial
F is for fairy
H is for honeycomb

Sunday, April 28, 2019

alphabet

A is for Alice
I made an alphabet quilt in 2012/13 with Cheri Payne's sew-a-long.
This time I am using the McCall's Quilting Best Day Ever alphabet.
https://www.quiltingcompany.com/Quilt/best-day-ever-free-alphabet-characters-block-patterns/
Again with changes in construction and design as I go along because I cannot leave well enough alone.
Watch for the tutorial I am writing about how to cut the chisel shape used in these blocks and in the basket block.

The McCall's blocks finish 6 by 10 1/2 inches.
I add a 2 inch cut boarder to each block so they finish 9 by 13 1/2 inches.
Every other block is an A or a B block for these borders.
A: from 2 inch strips cut two rectangles 6 1/2 inches for the top and bottom and two rectangles 14 inches for the sides.
B: from 2 inch strips cut two rectangles 11 inches for the sides and two rectangles 9 1/2 inches for the top and bottom..
This mades setting the quilt easier with fewer seams to deal with between blocks.

I am not making in order, instead using fabrics I have out to match the letters.
Thinking ahead with the X dilemma. I may go with fox.
I is for iris
D is for dog
B is for baseball
P is for popcorn
M is for maple
R is for robot

Friday, April 26, 2019

riven, top completed

Riven
90 by 80 inches
Block finishes 9 by 10 inches

Sitting at her bedside during my mother's decline I would sketch quilt block ideas. I kept coming back to this very simple split block which seemed to show the separation to come.
It has been a quiet, contemplative project to sew on. I included several of her fabrics into this quilt.
four blocks
80 blocks set 8 by 10. 

Solid: cut 1 1/2 by 9 1/2 inch rectangle
Print: cut 9 1/2 inch square, divide in two, making the cut anywhere from midway to 3 inches from the edge.

Press away from the solid

Setting:
Because I never let the solids meet from block to block it was easiest to sew into columns first..
Press every other column up or down. Then sew columns together.

My design, use at your pleasure.

Monday, April 22, 2019

riven

Riven

Block finishes 9 by 10 inches
I plan to set 80 blocks 8 by 10. to finish about 80 by 90.

Solid: one rectangle cut 1 1/2 by 9 1/2 inches
Print: one square cut 9 1/2 inches, then split into two vertically. I vary the cut from right in the middle to any point up to about 3 inches from either side.

Pressing:
Press to the prints.

In setting I am not having the solids meet.

It is interesting how my personal thoughts shape my quilting path.
Sitting at her bedside during my mother's decline I would sketch quilt block ideas. I kept coming back to this very simple split block which seemed to show the separation to come.
It has been a quiet, contemplative project to sew on. I have been including some of her fabrics into this quilt.

Sunday, April 21, 2019

Easter

This is our first Easter without our mother.
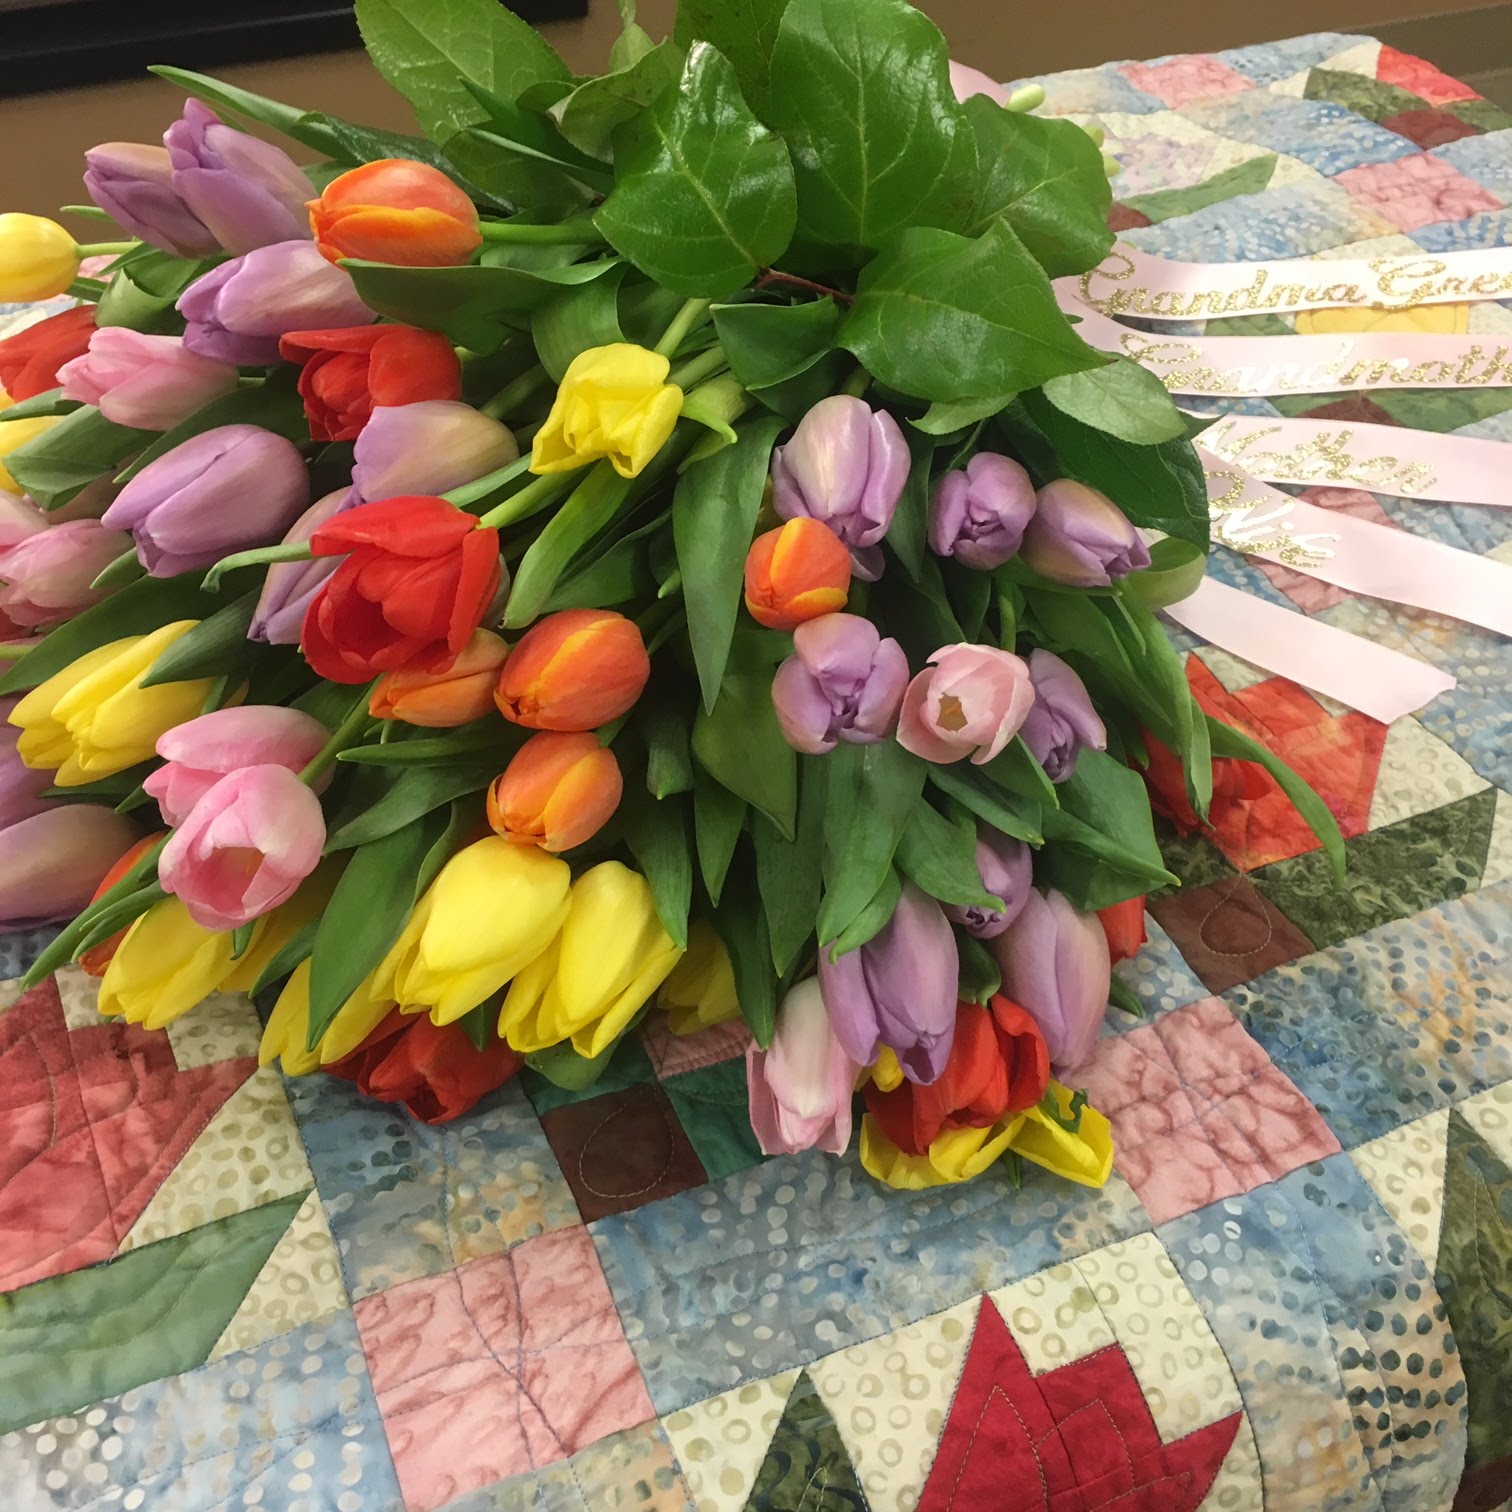
I am sharing photographs from her funeral. We used the tulip quilt I made for my parents' 60th anniversary on the casket and had a bouquet of tulips on top.
We had her buried with a thimble on her finger.

I want to acknowledge the wonderful help we had from Trappist Caskets, made by monks at the New Melleray Abbey in eastern Iowa. They sell to us Protestants too!
My mother wanted a simple casket which is surprisingly difficult to get through traditional means with funeral homes.
We chose the simple rectangle style directly from the Abbey, which shipped it quickly. It was beautiful, reasonable, and respectful.
https://trappistcaskets.com/

Saturday, April 20, 2019

basket, top completed

Basket
Ready for Easter Sunday!

Block size 8 inches
Quilt size approximately 80 by 92 inches
112 blocks set 7 by 8
Set on point with float

Pieces:
Solid: Cut from 2 1/2 inch strip using EZ Angle or Bonnie Hunter's Essential Triangle Tool: four half square triangles, two chisel pieces cut at the 4 1/2 and 6 1/2 inch lines
Print: Cut from 2 1/2 inch strip three 2 1/2 inch squares, two 2 1/2 by 4 1/2 inch rectangles, and two half square triangles using the EZ Angle or Bonnie's tool, and one triangle cut from 4 1/2 inch strip using the EZ Angle or Bonnie's tool (I didn't cut a strip, rather cut it from the corner of the fabric)

I'll post a tutorial on cutting the chisel shape with the specialty rulers.
My adaptation of a traditional design. Use at your pleasure.

Friday, April 19, 2019

tip # 47, trim triangles for floating sets

When making on-point set quilts I prefer a float.
The triangles are cut over-sized  To make sure I do not distort the triangle along the bias when sewing it into the row, I trim the triangle on the side that will be sewn to the block.
Here you can see I measured the side of the triangle to 8 1/2 inches, the unfinished size of my basket block. The nub that is cut off is circled.

To lessen distortion with the bias:
1. Sew with the triangle on the bottom again to lessen distortion to the bias.
2. Start from the 90 degree angle and sew to where the nub was cut off, in this case, from the bottom of the basket block towards the top of the basket block.
NOTE: on at least one of the sides of the quilt you will have to make a choice as these two steps will not both be possible!