Friday, February 02, 2024

red and white framed square on point, block construction, top completed


Red and white framed square on point
Top completed 2024
Approximately 85 by 71 inches
A very simple framed square on point.
Block finishes 5 inches

Another in my red-and-white series. I have four completed quilts. Two at the quilter. Another 3 (4?) in progress. I have many plans in my head for more red and white quilts! 
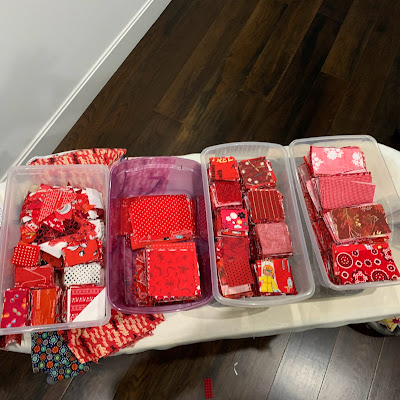
And a net gain of red fabric in the house.

My fabric choice process with red and white quilts:
I like to push my reds. I go from tomato/orange red to berry/cherry red. If a single block stands out I add more of that color or closely related to help it step into the others. There will always be a darkest block, an orangest block, a rustiest block. I am fine with that. It makes it a more interesting quilt for me.

In talking with a friend about how we both make odd choices, I said, 
"I call those my "a little bit too much" or "a bridge too far" blocks. The blocks a more sensible quilter would remove but I leave in because they are a bit wrong."


CUTTING
Framed Square
120 needed
Red: one 3 1/2 inch square
White: two 1 1/2 by 3 1/2 inch rectangles; two 1 1/2 by 5 1/2 inch rectangles

Setting Squares
99 needed
Red: 5 1/2 inch squares

Setting Triangles (I prefer over-cut triangles for on-point so the design floats away from the edge)
38 needed
Red: cut from 5 inch strips, using the Companion angle or Bonnie Hunter's essential tool

Corner Triangles: (also over-cut)
4 needed
Red: cut from 5 1/2 inch strip with Easy Angle or Bonnie Hunter's essential tool

SEWING AND PRESSING
Sew 3 1/2 by 1 1/2 inch rectangles to sides of 3 1/2 inch square
Press away from the square
Sew 5 1/2 by 1 1/2 inch rectangles to top and bottom
Press away from the square

UNIT SEWING
Set aside 21 of the framed squares for the first and last row and for end of each row.
Sew the rest into pairs with the setting squares.
Keep the framed squares in the same orientation so you are always sewing on the side of the 3 1/2 inch rectangle to the setting squares, and the setting square is always on the right of the pair.
Press towards the setting squares


ROW SEWING
Lay out your rows.
First and last rows are a single framed square with setting triangles.
For the rest of the rows add a single framed square to the end of each row. Place a setting triangle at each end.*
Sew blocks together and press seams towards setting squares and setting triangles.

*Cut one point from each setting triangle to 5 1/2 inches. I wait to do this until I lay out the rows/quilt so I make sure I cut the correct point.


Sew together rows, deciding which direction to press row seams. I tend to press up.
Add corner triangles.

My design. Use at your pleasure.
That red with the bobbies police? A scrap from my mother's sewing for my sister in the mid 1950s


Could also work well in a straight set

backing fabric is Michael Miller


Friday, January 26, 2024

Sample blocks/sections, red and white efficiencies


I have been working on several red and white designs in my sketch book and put several to fabric. If I have my red fabrics out I like to be efficient in my time and fabric use, so having plans for cutting makes sense.
I used Kona Snow for the white in all these.

For the above samples, I am cutting
L upper (Single rail fence): 3 1/2 by 5 inche rectangles  (will need setting triangles down the road) (white 2 by 5 inches)
R upper (Patience corner): 3 1/2 inch squares (white 3 1/2 by 1 1/2 and 4 1/2 by 1 1/2)
R center (Lower-case alphabet) 2 inch squares (white lengths of 2 inch strips)
R lower (Framed square) 3 1/2 inch squares, 5 1/2 inch squares, setting trinagles overcut from 5 inch strips, corner triangles from 5 1/2 inch strips (white 3 1/2 by 1 1/2 and 5 1/2 by 1 1/2)
L lower (Ladder): 4 1/2 by 2 1/2 inch rectangles (white 4 1/2 by 1 1/2 inches)

In addition from the red I cut 2 1/2 inch squares and 2 1/2 inch half-square triangles for projects down the road. This cleans up scraps from cutting the setting and corner triangles for on-point quilts.
I cut lots of 2 inch squares as I have a double 4-patch in mind. 

I cut off of short cuts or fat quarters. If the yardage is larger than a fat-quarter I tear off a 11 inch piece to cut from. (Why 11 inches? My ruler is 12 inches.)

I cut up small scraps to 1 1/2 by 2 1/2 rectangles and 1 1/2 inch squares so no little scraps go back into my red fabric bins.

SO, my cutting sessions are:
Squares
5 1/2, 3 1/2, 2 1/2, 2. 1 1/2
Rectangles
3 1/2 by 5, 2 1/2 by 4 1/2, 1 1/2 by 2 1/2
Triangles
over-cut triangles for setting and corner triangles, 2 1/2 inch using easy-angle

Ready for ideas in the future:
Red patches cut to size in their own bins.


Sunday, January 21, 2024

ocean waves, top completed


Ocean Waves
Top completed 2024
96 by 80 inches
120 blocks
Block finishes 10 inches
Block and unit directions are HERE.

I layed out the 4-block units, alternating A and B units.
Sewed into A over B and B over A sets of 8, then into 3 rows.
Almost everything nests.

My construction design variation of a traditional pattern. Use at your pleasure.

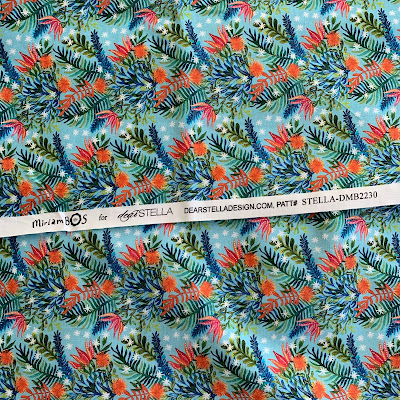
backing from Dear Stella

Wednesday, January 17, 2024

alphabet i (9), lower case

Started a new alphabet for the new year.
This one is based on a couple of cross stitch graphs that I found on Pinterest that do not have working links. 

Making it with a 2 inch cut, 1 1/2 inch finished grid. Reds are cut 2 inches square. White (Kona Snow) is cut into lengths to fit grid

My notes for cutting the white pieces from 2 inch strips:
Squares    Cut        Finish
1                2           1  1/2
2                3 1/2     3
3                5           4 1/2
4                6 1/2     6
5                8           7 1/2
6                9 1/2     9
7               11          10 1/2
8               12 1/2    12
      
Rundown of my alphabet quilts. Several more on my to-do list.
a. B is for Beth, done with plaids and various red solids
b. I-spy alphabet
c. 30s repro alphabet blocks
d. 37 times around the sun, green with a bit of pink batiks on neutral batiks
e. Squares on teal
f. Checkerboard medallion with 1880s repros
g. Red and white capital letters
h. Eggplant chunky alphabet with batiks
i. current red and white lower case alphabet

Anyone know of a cyrillic pieced alphabet?

Sunday, December 31, 2023

red and white sreak of lightning, quilt completed

Red and White Streak of Lightning
about 92 by 74 inches
2023
Details on construction here.
My directions for a traditional design--use at your your pleasure.
Quilted by Sue Divarco. I like how the red thread of the quilting looks like baubles in the white parts (Kona Snow).
My final finish for 2023. I finished the top a year ago this week.

About 18 months ago I had one red and white quilt. I had a desire to have a stack of red and white quilts. Now I have 4 completed--a stack!
And two more being quilted, one more top in progress, and about 6 more in my head.
And I have more red fabric than when I started.

Monday, December 25, 2023

Thursday, November 30, 2023

Thanksgiving 2023, visiting my quilts (and my sisters)

My sister's kleiderschrank with quilts piled above.
Some are mine.

A quilt signature quilt of mine from our family gathering in the mid 1990s.
Beth is eating oyster stew, our family's traditional meal after the harvest is complete.
Lynn, Beth, Janna
The Dykstra Sisters, sitting on their parents' davenport.
And remembering what
an excellent jumping on davenport it was.
It belongs to Janna now, who had the pokey broken spring repaired.
orange rind garland making!

Hammers add to the fun

smells and looks good!
A full table, around and atop.

Tuesday, October 03, 2023

bernina x 64, quilt completed


Bernina x 64
about 70 inches square
Top completed 2022
Quilt completed 2023
Quilted by Sue Divarco

I explain the piecing of the quilt at HERE. I was inspired by Warhol's Marilyn x 100 that hangs in the Cleveland Museum of Art.
I used a slightly altered Fat Quarters Shop's Sewcialities block 33 by Lori Holt.
Made with solid fabrics, mainly Kona and Moda. Border is Kona Glacier.
It was a fun block to sew. The 64 was for me being 64 when I pieced it.

A new building has gone up a block to the west and I am having trouble picking the right time/cloud cover for quilt photography. And also trouble finding willing family members for quilt photography. I have quite the backlog of finished quilts to post!

Friday, September 22, 2023

ocean waves, layout options


There are many options in layout, but I played with these two until I committed.

Block pressing would have been different for each layout.
When this block was pieced by hand it was pieced with odd shaped segments.
Which I was not going to do. This left me with these two choices.

A: Traditional with geese half solid half print

Traditional and most frequently seen in vintage quilts
Note all the intersections are similar in shape.
Blocks are set so at every intersection of four blocks there are two triangle effect corners and two rectangle effect corners to make the center on-point square.
With this layout, there is that fun nip out in the center square on point that happens where four blocks come together.
I like those bits "chewed out".
Note the triangles when they meet make geese that are half solid/half print.
However, it just felt more chaotic than I was wanting for one of my multi-fabric, multi-scale, multi-color, and multi-value quilts.


SO, I am going with:

B: Traditional with all solid and all print geese

Also traditional, but not as frequently seen in vintage quilts
Note: intersections are varied, either a plus shape or a square on point shape.
Blocks are set so at every intersection of four blocks there are either four triangle effect corners or four rectangle corners.
I like how the solids stand out a bit more in this setting with this mix of fabrics.
With my multi-everything quilts, I like to keep a bit of structure that isn't always evident. I keep a strong grid. I like and include my "ghost" blocks but keep enough high-contrast blocks that the pattern stands out.
I also keep directional fabrics directional within the block--and these blocks directional in the quilt.
A bit of order keeps these chaotic quilts in check.

Now, on to making about 20 remaining of the needed 120 blocks and get this thing put together! Christmas is my goal.

Saturday, August 26, 2023

ocean waves, block construction

Ocean Waves
Block finishes 8 inches
A block I have long wanted to use.
I have two separate pressing plans, an A block and a B block, which will help with top construction.
(((I have updated this post with my revised pressing plan)))

Both start out similarly

Cutting
Solid: 12 half square triangles cut from 2 1/2 inch strips using EZ angle or Bonnie Hunter's essential triangle tool
Print: 12 half square triangles cut from 2 1/2 inch strips using EZ angle or Bonnie Hunter's essential triangle tool, two 2 1/2 inch squares, one 2 1/2 by 4 1/2 inch rectangle
Make 12 squares using the solid and print triangles, press towards the solid
Lay out pieces and sew into four rows, press as shown.

At this point, make half the blocks with A pressing:


Sew rows together and press all seams toward the row with the rectangle.

And make half the blocks with B pressing:


These blocks will be set into 4-block units of all A or all B, rotating so the rectangles are on the outsides and the center brings together the triangles.

In developing my pressing plan, I found it all nests except for the triangles in the centers of these 4-block units. Careful sewing kept the points meeting fine.

I plan to make 120 blocks, set 10 across and 12 down. So 15 4-block unit A and 15 4-block unit B.
I'll detail the top construction in a post when I get that far!

My directions of a traditional block. Use at your pleasure.