Wednesday, June 19, 2024

Fragments: Jamie Siel's Floating Fragments, top completed

Fragments
(Floating Fragments pattern by Jamie Siel)
top completed 2024
78.5 by 65 inches
(pieced area 72 by 58.5 inches)
12 blocks

White is Kona Snow
Red scraps

Jamie Siel of Sew Brainy Designs has a delightful pillow pattern series she does for Riley Blake. Her October 2023 "Floating Fragments" pillow begged to be scaled up to quilt size.
Her description of it is HERE.
The pattern tutorial is HERE.

The pillow pattern makes an 18 inch block.
It is a sophisticated design, not random. Note there is an underlying structure of every other unit being a bullseye. 
Cutting directions are a bit fiddly as she is using specific color placement. I cut my scraps to size and made the units, carefully followed her block pattern for a sample block, then used that as a guide to place my units onto for the rest of the blocks. I wanted to keep fabric orientation consistent in the quilt, so my own added fiddliness was managed by using that sample block for patch and unit placement.

Block A

Block B

I used my 2 1/2 inch square bin for the bullseye units. I pressed all these seams away from the red square.
Cutting for the other unit: I am planning another quilt with 3 1/2 inch squares, so I cut a strip of 3 1/2 inch wide fabric, cut off a 1 1/2 inch piece and a 3 inch piece that I cut down to a square. Made efficient use of my cutting time.
(Then I cut remainder of the strip to 3 1/2 inch squares for that future project.)
For this unit I pressed first seams away from the white. I pressed final seams towards that insert plain white piece.


I used Julie's tutorial directions with a couple of changes to make it into a quilt.
One, I decided to make the quilt a bit wider than three blocks would yield, so I added one extra unit at the edge of each row in the four blocks that would be the right side of the quilt. These units were the same that would have been there if I made it a whole block wider.
This resulted in me making 8 of Block A and 4 of Block B.
Second, I maintained a pressing plan. As I made the rows for each block I pressed the the units towards the bullseye units so all rows nested. I waited with the horizontal pressing until column assembly.
And third, I added a simple border.

Layed out the quilt, and sewed the blocks into columns, pressing the outer two columns south and the center column north.
Sewed columns together (all row seams nest).

To aid stability and to let the reds float, I added a border:
Sides cut 3 1/2 by 72 1/2 inches
Top and bottom cut 3 1/2 by 65 inches 
I will bind with the Kona Snow

Jamie's wonderful design sized for a pillow.
Use my modifications to make a quilt at your pleasure.

Backing is from a bolt I bought over 20 years ago. I had used from the bolt in the distant past and thought there would not be enough, but there was!
A sweet winter scene called Blessings of the Season by RJR Fashion Fabrics.
As a nurse, I seek good nurse fabrics

Saturday, June 08, 2024

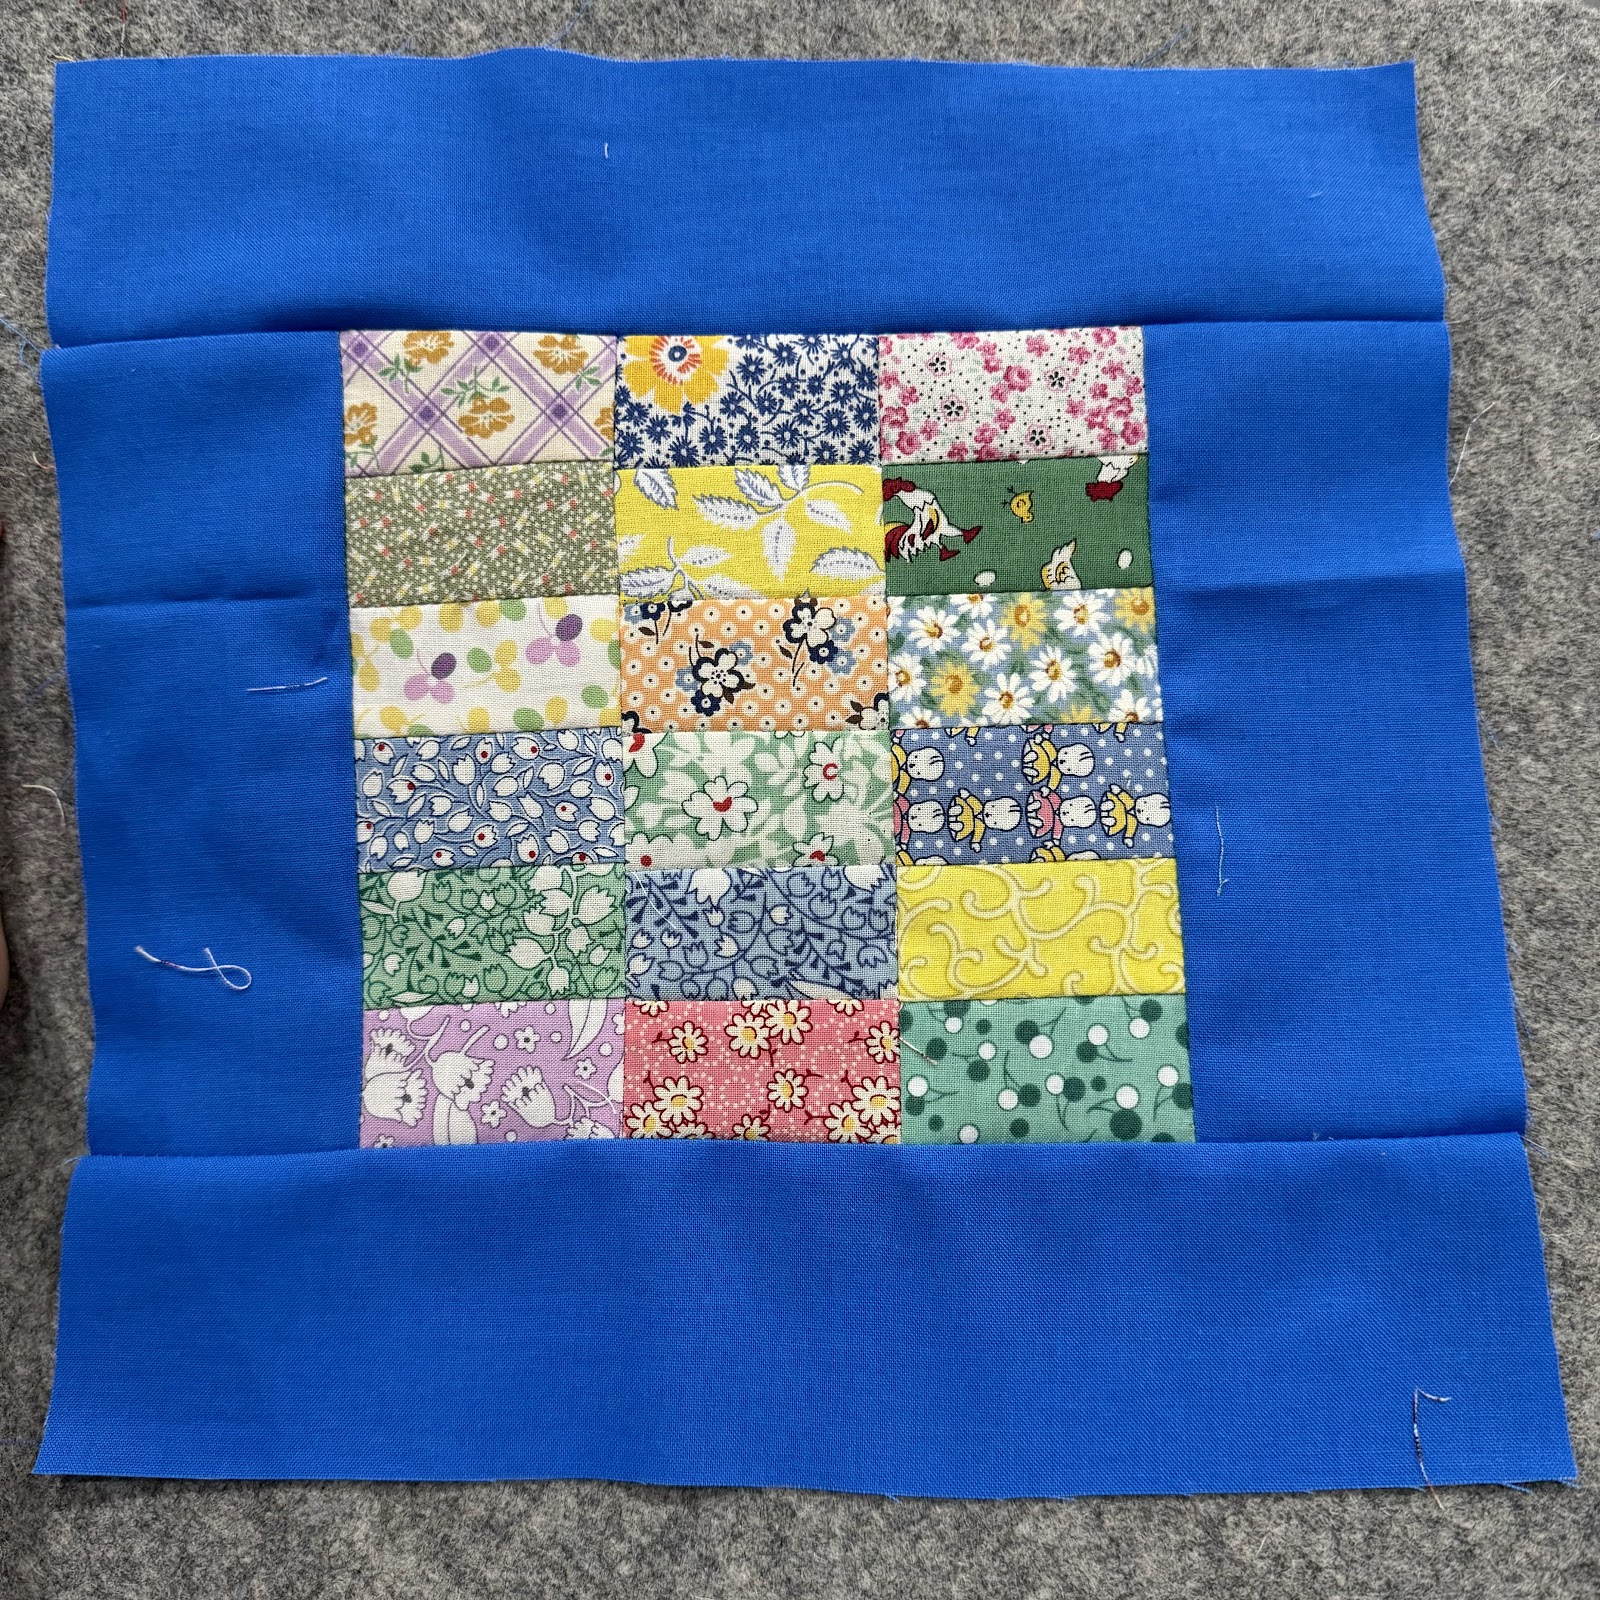
Chinese coins, framed blocks: top completed, construction details

Chinese coins, 1930's repros framed blocks
Top completed 2024
70 by 50 inches
35 blocks
Blocks finish 10 inches

Scraps are 1930's/40's repros, plus a few vintage scraps of my mother, all from my bins of cut down scraps. 
(One of the bins I sort scraps into is 30's repros rectangles 1 1/2 by 2 1/2 inches. So no cutting needed for this quilt other than the blue frames.)
The blue is Kona Harbor (love the 1940's feel this color gives to the scraps)
Block A

Block B
Block A (18 blocks)
18 scraps 1 1/2 by 2 1/2 inches (((324 for quilt)))
Frame: two rectangles 2 1/2 by 6 1/2 inches, two rectangles 2 1/2 by 10 1/2 inches (((36 each for quilt)))

Block B (17 blocks)
50 scraps 1 1/2 by 2 1/2 inches (((850 for quilt)))

SO,
1174 scrap rectangles total for this quilt.

Process:
I sewed into 587 twos
I set aside 139 of the twos.
The remainder, 448, were sewed into 224 fours.
(This is not how I actually work--I sew twos until I am tired of it, then fours, etc. I count up when they are at the fours stage. I always think I am way over; I am always under and need to make more.)

Block A
I took 54 of the fours and added a two to each making 54 sixes.
These units were pressed with all seams going one direction.
I sewed these into 18 blocks of three units, flipping the center unit so all seams nest.
I added the frames onto these.
The short sides frames were pressed to the frames.
The top and bottom frames were pressed north (this helps with nesting later).


Block B
The remaining 170 fours were sewn into 85 eights. 
A two was sewn onto each of these to make tens.
These units were pressed with all seams going in one direction.
5 units were sewn into blocks, flipping every other unit so all seams nest.

Joining blocks
Orient the Block B so the outer seams are pressed south and it will nest into Block A with its sashing seams pressed north.
Sew in rows and press rows north.

My design, use at your pleasure.

I am trying to make smaller quilts so my initial sketch was for 63 blocks coming to 70 by 90. I scaled back to 34 blocks coming to 50 by 70.
It is hard for me to work smaller.
 Backing is mainly the wonderful Jane Sassaman's Spring Fever Mini Queen of May for Free Spirit (Jane and my children attended the same school back in the 1990s).
And to get to the right width,
a length of Color Pop Studies for Blank Quilting Corp.

My  beloved Bernina 830 take-up lever broke off. I gently packed it for repairs and brought out this lovely Bernina 930 I had in reserve. I wisely purchased it a few years ago during the lock down from a man moving out of town. $350. At the time I tested it to make sure it worked, bought what was missing (case, flatbed, accessories box, manual) and it went into the closet.
I needed to get to know the machine so I chose this project from my sketchbook as I knew there would be lots of repetitive sewing. 
I already had the scraps cut to size, so this was a pleasant sew.
And I fell in love with this machine.

Wednesday, May 22, 2024

"G is for Gouda"--orange and grey little alphabet, top completed


G is for Gouda
Orange and greylittle alphabet
36 by 30 inches
My 10th alphabet quilt
Top completed 2024
Block finishes 6 inches (6 1/2 inches unfinished.

Gouda cheese isn't supposed to have big holes in it, but I could not pass up naming this quilt for the G block fabric.
I used the B is for Baby pattern by Temecula Quilt Co.
There are a few errors in the pattern--or maybe I was reading things wrong-- and the scale of the letter drawings does not always match up with the directions, so I needed to review each letter before cutting and sewing.
I changed up a few of the construction techniques, letter proportions, and the set and made extensive use of the Doug Leko mini folded corners tool. Love that thing.
BUT it is a pleasant small primitive style alphabet and it got me to put together this orange on grey scrap alphabet quilt.

Plan to machine quilt it myself as it is small.

I framed each 4 inch finished letter with 1 1/2 inch cut rectangles, alternating blocks with the longer frame on the top and bottom of a letter next to the longer on the sides of the next letter. All frames were pressed away from the letters. Because the blocks alternated in orientation of frames, only block outer seams needed to nest.

Oranges were from my shelves and a few shared by my small group. I asked them to think "Creamsicle" when going through their fabrics.
Grey solids also from my shelves. Who knew one person could have so many varieties of solid greys.

My adaptation of Temecula Quilt Co. pattern. Use my set at your pleasure.


Thursday, May 16, 2024

ladder, red and white, top completed


Red and White Ladder
top completed 2024
81 by 68 inches
Block size finishes 3 by 4 inches (3 1/2 by 4 1/2 inches unfinished)
17 columns of 27 blocks
459 blocks

I used the idea from my earlier Ladder quilt. That version is shown:
Block Construction
Top completed
Quilt completed

This time I wanted to do a red and white take on Ladder with my wonderful scrap red fabrics. The white is Kona Snow. The reds are in random orientation. I let them fall as they wished, no up or down to this quilt.

Cutting
Red: 2 1/2 by 4 1/2 inch rectangles
White: 1 1/2 by 4 1/2 inch rectangles

Block
Sew one white rectangle to one red rectangle
Press towards the red

Units 
Sew blocks to make as long as you want the quilt to be.
For mine this is 27 blocks
Press in the same direction as the first pressing. 
Make 17 columns

Take two units, flip one, and sew into paired columns.
I made 8 pairs with one remaining column left single
The seams on each will be pressed opposite.


In making these columns two units sewn together I enter the machine with a white on top, the top unit with pressed seams south. Keep this consistent
Wait with pressing the columns until later.

Lay out the quilt. 
Sew together the columns, adding the single column on last.
Press all these joining seams one direction.
Everything nests.

An adaptation of my earilier design. Use at your pleasure.


Backing is pieced from these two color-ways of Michael Miller "Letters From Afar" 

Saturday, May 11, 2024

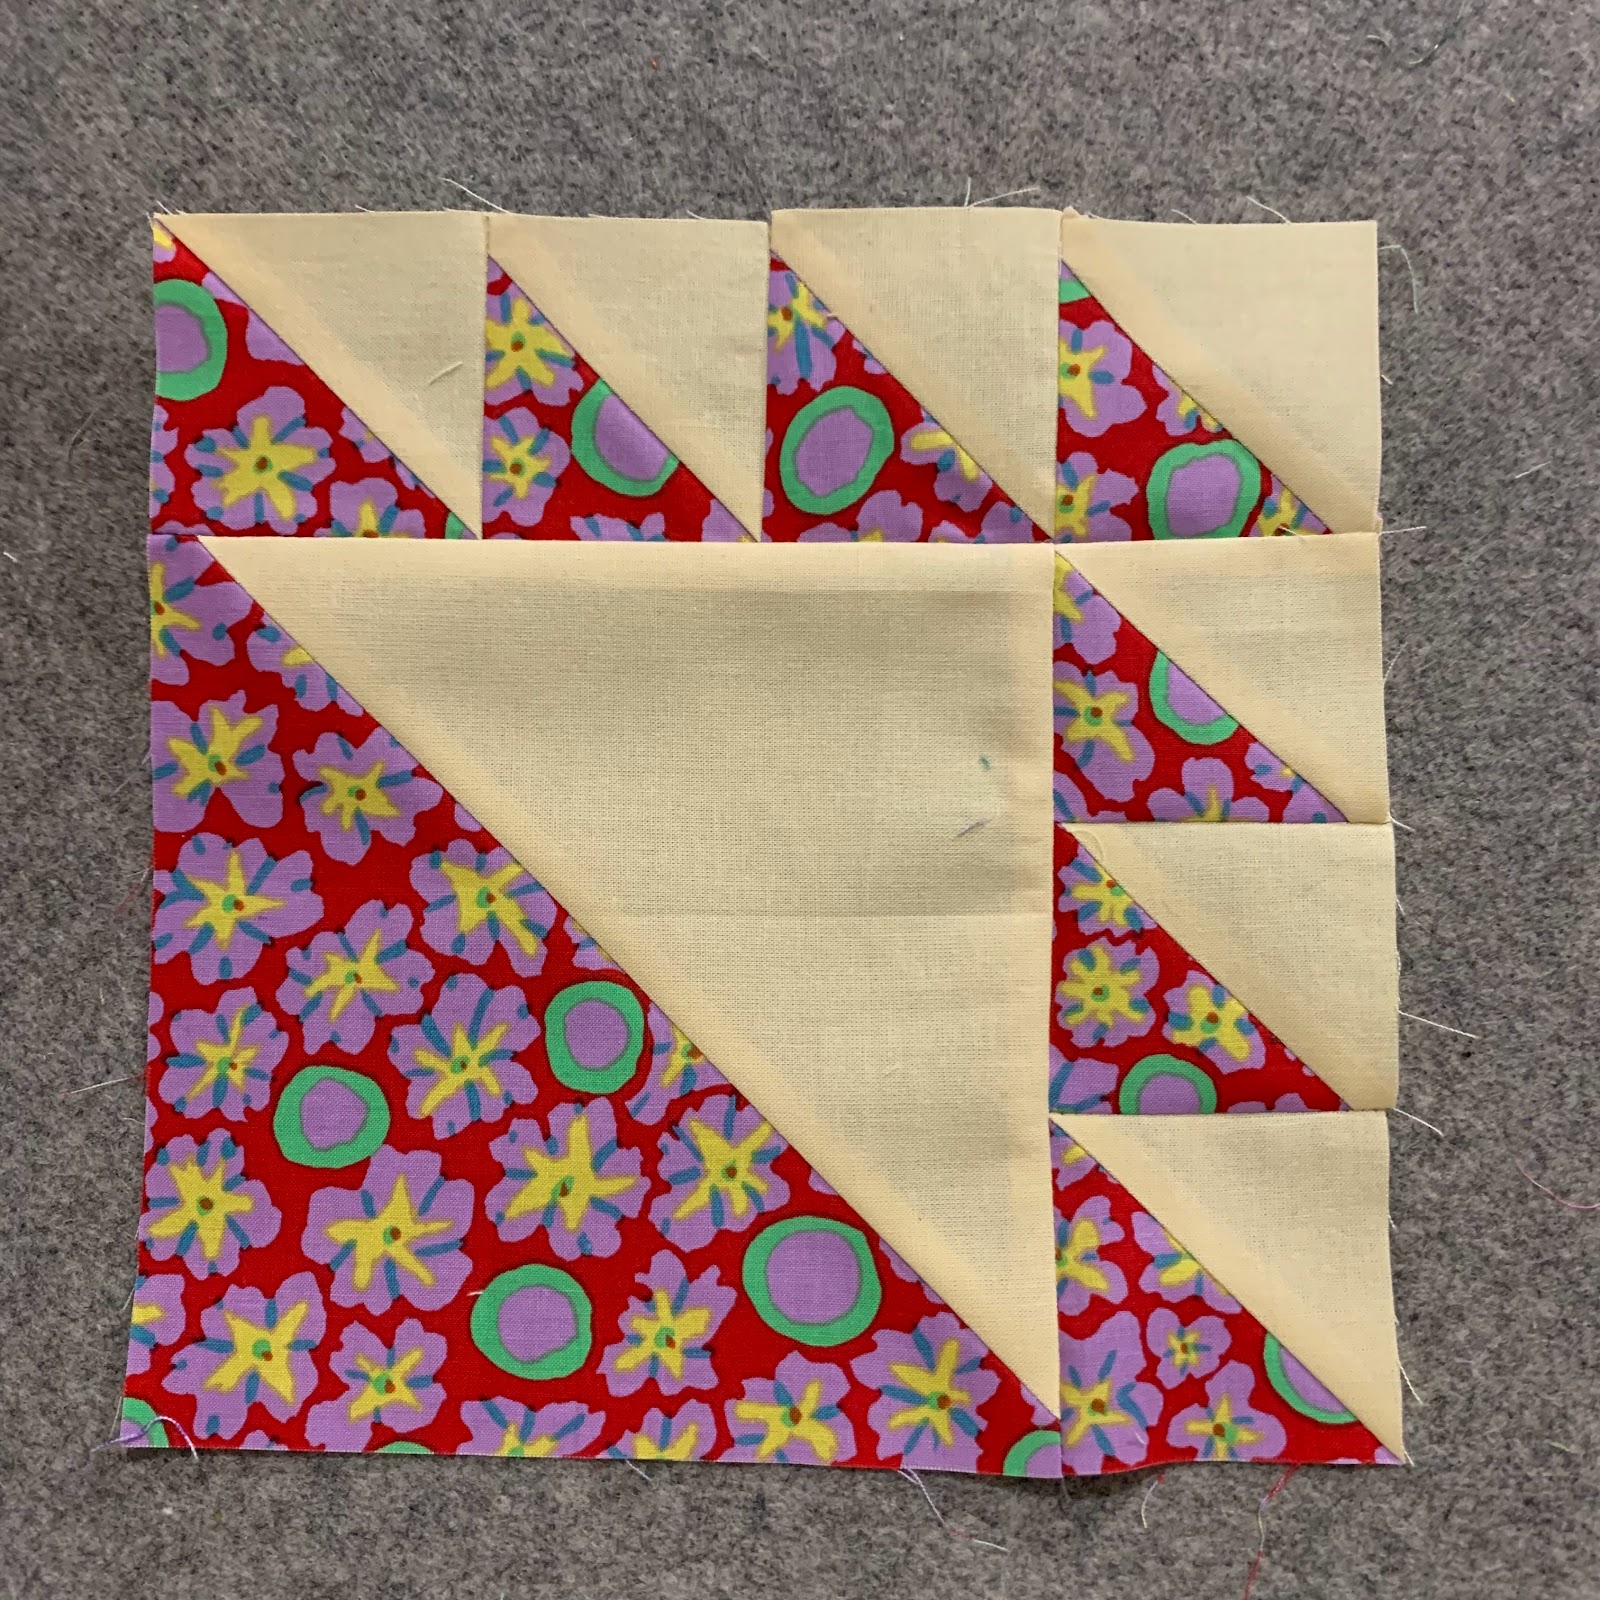
lady of the lake, top completed

 
Lady of the Lake
top completed 2024
96 by 80 inches
120 blocks
block finishes 8 inches

I love this traditional block. The large triangle is a great place to feature fabrics.
There are many variations of the block, I went with the simple one.
Details of block construction and unit assembly are here.

I started this last summer along with the Ocean Waves. Both are triangle heavy and my wanting to keep the fabric images oriented a certain way made it efficient to work on both at the same time. All that triangle making made it a slog. But, I am glad I persevered and look forward to them being quilted.
My design using a traditional block. Use at your pleasure.

Alice came out to play

Backing is by Miriam Bos for Dear Stella


Tuesday, May 07, 2024

lady of the lake, block construction

Lady of the Lake
Block finishes 8 inches
Another block I have always wanted to make!
I cut these while making the Ocean Waves so many duplicate fabrics are in these two quilts. I set this quilt aside in January as the semester began. Now it is close to assembly.

Cutting
Triangles all cut with EZ angle or Bonnie Hunter's Essential Triangle Tool.
Solid: One triangle cut from 6 1/2 inch strip, Seven triangles cut from 2 1/2 inch strip
Print: One triangle cut from 6 1/2 inch strip; Seven triangles cut from 2 1/2 inch strip

Sew together all triangles and press towards solid.
Layout as shown 

Sew together the three right side triangle squares and sew to large triangle square
Press towards large triangles

Sew together the top four triangle squares and sew to the top of the block.
DO NOT PRESS YET

Take blocks and sew into 4-block units.

Lay out two of these 4-block units
Left unit: press all the joining and delayed pressing seams north
Right unit: press all the joining and delayed pressing seams south
Sew together and you have an 8-block unit.

I made 120 blocks to set 10 across and 12 down, so I will need to make 15 of these 8-block units.

All seams nest. I will post again soon when I get the top finished as it is close to being done!

My directions of a traditional block. Use at your pleasure.

Tuesday, April 30, 2024

Prairie Patch Quilt Guild workshop

I had the pleasure of speaking and holding a workshop for Prairie Patch Quilt Guild in Grayslake earlier this month.
We took an eclipse break!