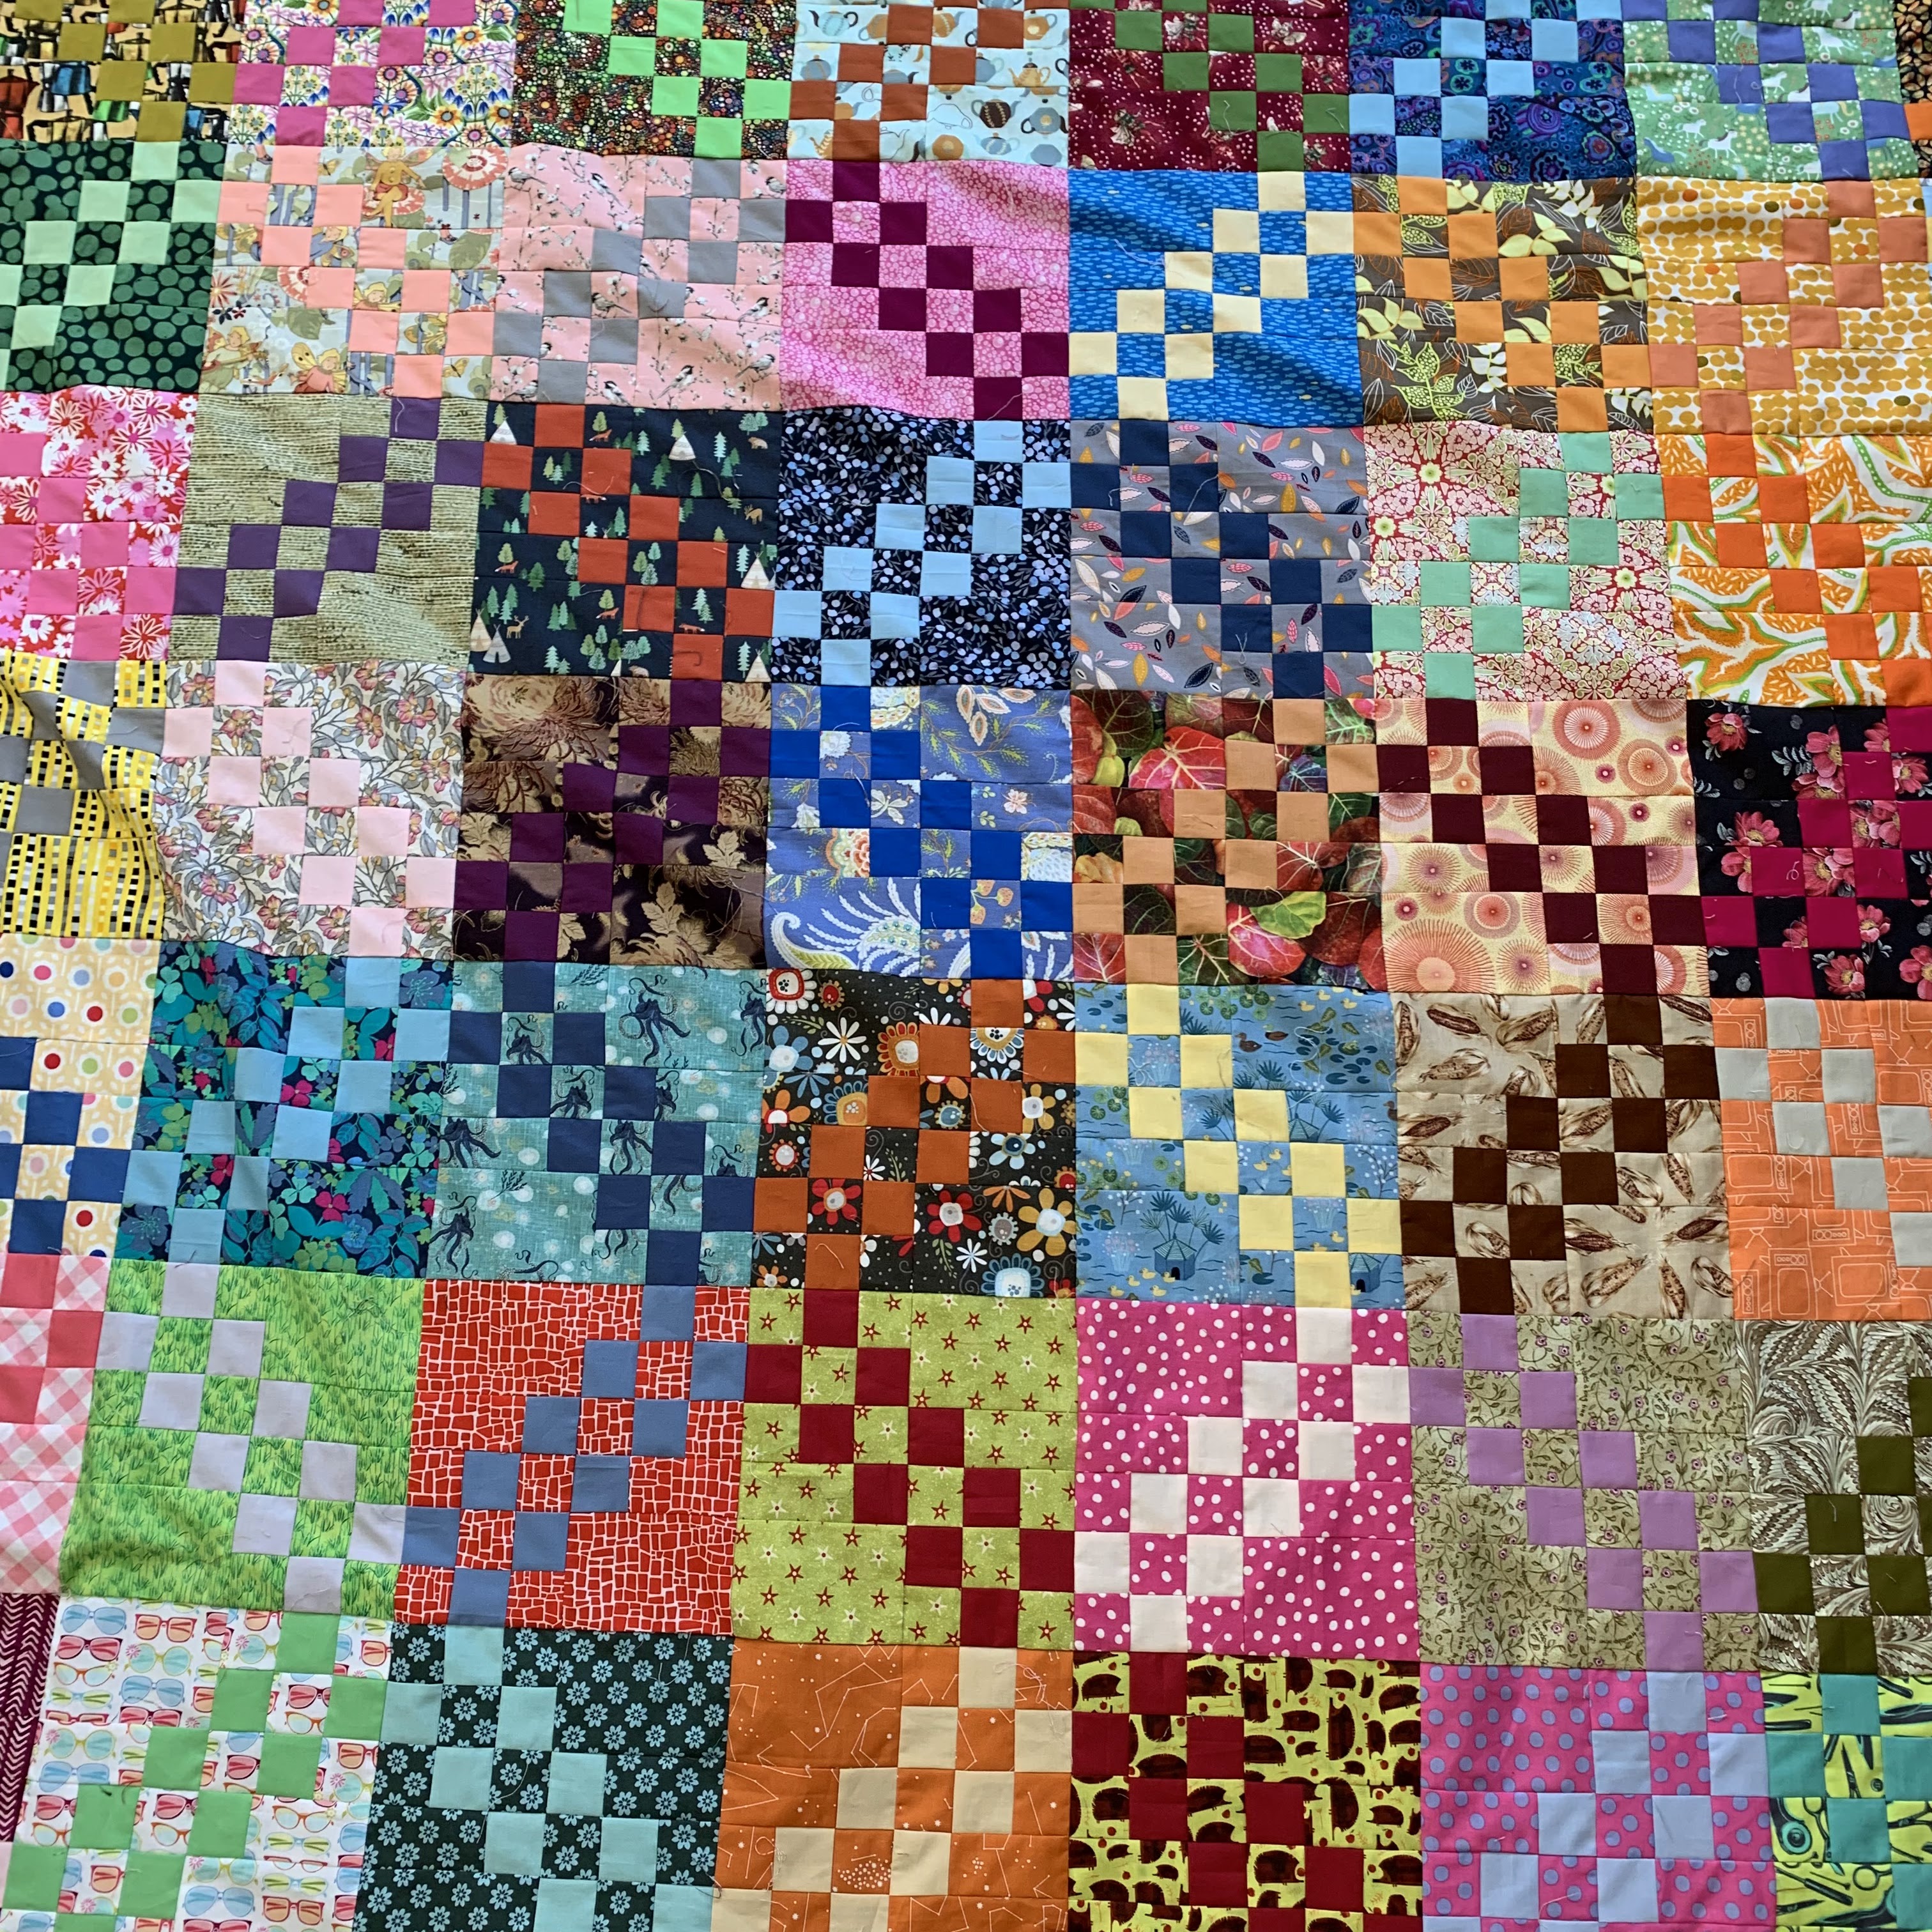
90 by 90 inches
100 blocks (50 A blocks, 50 B blocks) made into 25 four-block units.
Block finishes 9 inches.
Four-block unit measure 18 inches
Block and Four-block units direction are located here:
https://kleinmeisjequilts.blogspot.com/2022/06/irish-chain-block-construction.html
Top construction
Lay out 5 four-block units. Sew together into a row, wait to press the joining seams.
Make 5 rows.
Lay them out and press odd row unit joining seams to the left, even row unit joining seams to the right.
Sew together those rows and all seams will nest!
Just 4 long seams with this construction plan.
My design directions, use at your pleasure.
Tuesday, June 21, 2022
Irish chain, top completed
Monday, June 20, 2022
Irish chain, block construction
Four-block units finishes 18 inches
Irish chain works easiest with even numbered rows and columns, so I plan to make it 10 by 10 (100 blocks) to be 90 inches square.
There will be 50 Block A and 50 Block B.
Could also make it 8 by 8 (64 blocks) to land at 72 inches square, or 8 by 10 (80 blocks) to be 90 by 72 inches,
ALSO, can be made with odd number blocks if you want an asymmetrical quilt. I like this arrangement when there is less going on than my multi-fabric quilts.
Directions here are for an X being prominent in the blocks. An O can be prominent by changing the orientation of the block units. See examples below.
Note: this isn't a true Irish chain as the chains butt up against each other. I'm ok with this!
For each block (100 total)
Solid: Ten squares cut 2 inches
Print: Ten squares cut 2 inches; Two rectangles cut 3 1/2 by 5 inches; Two rectangles cut 2 by 3 1/2 inches
Watch with directional prints to keep orientation horizontal for the rectangles. Or be happy with it going every-which way.
Piecing and pressing plan
There are two lay-outs, Block A (50 blocks) and Block B (50 blocks)
Pressing plans for Block A and Block B.
Keep the center vertical seam unpressed until block unit lay-out.
![]() |
| Block A pressing plan NOTE: block A has those horizontal 3 1/2 by 2 inch rectangles and 2 inch squares pressed with the seams away |
![]() |
| Block B pressing plan NOTE; block B has that same section with the seams pressed inwards. |
Saturday, June 18, 2022
overlapped 9-patch, top completed
97 1/2 by 82 1/2 inches
143 blocks set into 13 rows of 11 blocks each
Block finishes 7 1/2 inches
Block directions can be found here:
https://kleinmeisjequilts.blogspot.com/2022/05/overlapped-9-patch.html
At the end of block construction, all vertical seams are in the same direction.
Lay out 11 blocks and sew together, keeping the seams in same direction and pressing the joining seams in that direction too.
Make 13 rows.
Keep all odd rows with seams pressed to the left, flip the even rows over so the seams are directed to the right.
Every seam will nest.
I usually dislike sewing long rows in a quilt, but this was not difficult--only two seams to nest in each block, and then the between block seams also nested.
I really like how this quilt turned out!
The solid squares between the blocks look like tabs holding them together.
My design, use at your pleasure.
Tuesday, May 31, 2022
overlapped 9-patch, block construction
Block finishes 7 1/2 inches
I plan to set this 10 by 12 (120 blocks) to be 75 by 90 inches, or 11 by 13 (143 blocks) to be 82 1/2 by 97 1/2 inches.
Cutting
Solid: Nine 2 inch squares
Print: Two 3 1/2 inch squares; Eight 2 inch squares
![]() |
| my pressing guide block for this quilt |
I lay out a stack of pieces for blocks with the back side showing.
See my arrows above for the pressing plan.
As I construct them, I keep a completed block in view to get my pressing correct. I use a directional fabric block for this pressing guide block to help me keep it oriented in the same direction as I work over time.
The blocks will nest side by side.
Then, by rotating alternate rows, the rows will nest too. I'll show that more when I get this top to the assembly stage. Still about 30 blocks to make!
Another simple block that takes some careful piecing and pressing to ensure everything nests.
My design. Use at your pleasure.
![]() |
| from the back |
Friday, April 29, 2022
cut glass dish, top completed
96 by 84 inches
Block finishes 12 inches
56 blocks set 7 by 8
Block and unit directions are here:
https://kleinmeisjequilts.blogspot.com/2022/04/cut-glass-dish-block-construction.html
Make 6 of the 8-block units and sew into rows of 3. Add the remaining two 4-block units to the ends of these, making the segments now 7 blocks across and 4 blocks down.
There are now two halves of the quilt.Press one half to the right, one to the left and sew the final seam.
All seams in the quilt nest!
Note: the triangles bulk up and will not want to stay pressed. This is fine! I keep them pressed for nesting, then let them fall where they will for the quilting stage.
My directions using a traditional pattern. Use at your pleasure.
Thursday, April 28, 2022
cut glass dish, block construction
I plan to set it 7 by 8 blocks, so 56 blocks
To measure 84 by 96 inches
In researching this block, the triangles can be all in the same orientation, or can mirror along the diagonal. The same orientation works for a three-fabric block, but I chose to mirror as I am using just two fabrics. There are also versions with 4 fabrics that are really fun.
I will show four setting options at the end of this post.
I am doing a straight-set so my pressing directions are for that orientation.
I tried the block at 9 inches, and it worked, but was tedious so I scaled up to 12 inches.
Cut
Solid: 24 triangles from 2 1/2 inch strip using EZ Angle or Bonnie's Essential Triangle Tool
Print: Three 4 1/2 inch squares; 24 triangles from 2 1/2 inch strip using EZ Angle or Bonnie's Essential Triangle Tool
Note, either cut directional fabrics all the same for them to be directional in the block, or be happy with them going every-which way!
I like to keep directional fabrics oriented the same in these quilts to help calm the chaos a bit. There still is chaos, but it is curated chaos.
Piecing
Sew together all the triangles. Press them all to the print fabric.
I do not press again until the block is in three columns.

I make a reference block. Over this I lay out several blocks. I'll lay out 3-10 blocks at a time. Working in sections I keep the pressing plan in mind (having a second reference block helps) to orient the seams.
(Note: keep directional fabrics blocks all in pile A unless you carefully lay out upside-down directional fabrics to put into pile B)

Once the blocks are in three columns I press the outsides up and the center down.

I do not press these seams new seams until block assembly time.
Block assembly
Once blocks are completed, press half to the right (A) and half to the left (B).

Sew into columns of four and press towards the bottom. (see the red arrows in picture below)
Flip every other column. All seams will nest.

I will soon post the quilt assembly instructions.
My directions using a traditional pattern. Use at your pleasure.
There are also many ways to set the blocks, most frequently are four blocks rotated to come together with the large squares meeting. They can also be set on point.
I am setting my blocks set straight, with the large squares making a diagonal across the quilt.
| Straight set, what I will do |
![]() |
| traditional set (but I see the top right block is not correct) |
![]() |
| on point with squares east and west |
![]() |
| on point with squares north and south |
a bridal tea
The girls made clothespin dolls for decorations
Monday, April 25, 2022
horizon, quilt completed
Horizon
2022
95 by 81 inches
180 blocks set into 10 rows of 18 blocks
Block finishes 9 1/2 by 4 1/2 inches
Block directions and setting described here:
https://kleinmeisjequilts.blogspot.com/2021/05/horizon.html
Final setting is described here:
https://kleinmeisjequilts.blogspot.com/2021/06/horizon-top-completed.html
A simple block. I like how it features each fabric.
I used a wool batt--nice for large quilts like this.
Quilted by Sue Divarco.
My design, use at your pleasure.


.jpg)
.jpg)