Tuesday, April 30, 2024
Prairie Patch Quilt Guild workshop
We took an eclipse break!
Saturday, April 06, 2024
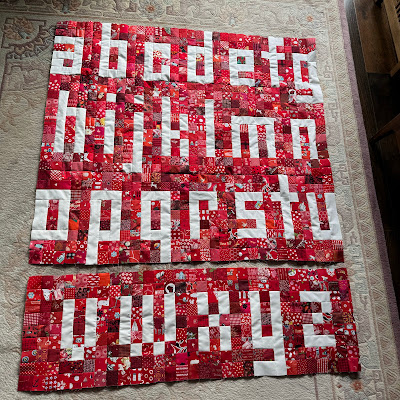
lower case alphabet, red and white, top completed
63 by 55 1/2 inches
Top completed 2024
This is my 9th alphabet quilt, the first with lower-case letters.
I wanted to make a lower-case and found several cross stitch designs on Pinterest. The links were dead so I am not sure who to credit. I made small edits from those inspirations and adapted to piecework.
Background red scrap squares are cut 2 inches, finishing 1 1/2 inches.
White letters (Kona Snow) are from 2 inch cut strips that are left continuous where possible.
Basic directions are here.
I worked from the left to the right into rows that minimized but did not eliminate all twisted seams. After the rows were assembled, I added additional a border of 3-squares-wide rows on all four sides.
Rundown of my alphabet quilts. (in parenthesis the source or inspiration--I adapted all to my sewing style and altered many letters along the way)
a. B is for Beth, done with plaids and various red solids (loosely based on Cheri Payne's from her blog Quilts by Cheri)
b. I-spy alphabet (McCall's Best Day Ever alphabet)
c. 30s repro alphabet blocks (Moda's Spell it with Fabric)
d. 37 times around the sun, green with a bit of pink batiks on neutral batiks (Moda's Spell it wiht Fabric)
e. Solid squares on teal (Missouri Star Easy Alphabet)
f. Checkerboard medallion with 1880s repros (Lisa Bongene's Primitive Gatherings Mini Alphabet)
g. Red and white capital letters (Missouri Star Easy Alphabet)
h. Eggplant chunky alphabet with batiks (Alyce Blyth's Easy as ABC)
i. Being quilted--Red and white lower case alphabet (adapted from several cross stitch drawing on Pinterest--originating links were not included)
j. In progress--Orange and grey small letters (Temecula Quilt Co. B is for Baby)
k. Just started--Grey with scrap orange triangles
| backing |
Saturday, March 23, 2024
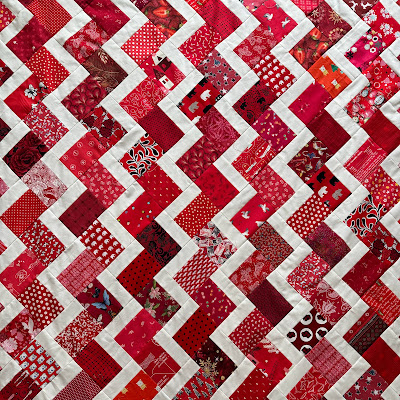
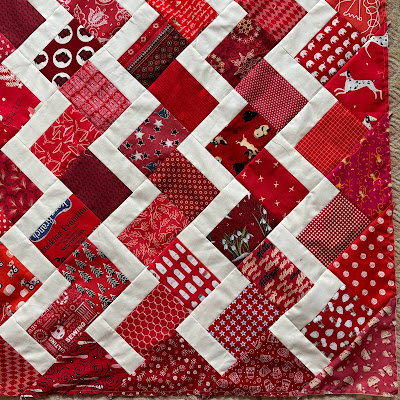
single rail fence streak of lighting, red and white, top completed
Single rail fence streak of lighting set, red and white
Top completed 2024
About 81 by 67 inches
Block size 4 1/2 inches square finished
240 blocks
This quilt can be made any size you wish.
(Numbers of units below are not necessarily correct...)
Another in my red and white series. Three more in progress, list at the bottom of this page; Other ideas keep coming to my sketch book!
Block cutting
White: (I used Kona Snow) rectangle cut 2 by 5 inches--250 needed
Red (I used scraps) rectangle cut 3 1/2 by 5 inches--240 needed
Setting triangles cutting
46 setting triangles plus a bit more fabric to resolve the corners.
I prefer a float with on-point quilts so I cut triangles from 5 inch strips using the Companion angle or Bonnie Hunter's tool at its full size. Could also use a square with the sides measuring 7 inches.
Both are pictured.
I do not cut the triangle corner off until I am sewing rows so I am sure I am cutting the correct corner.
Block piecing and pressing
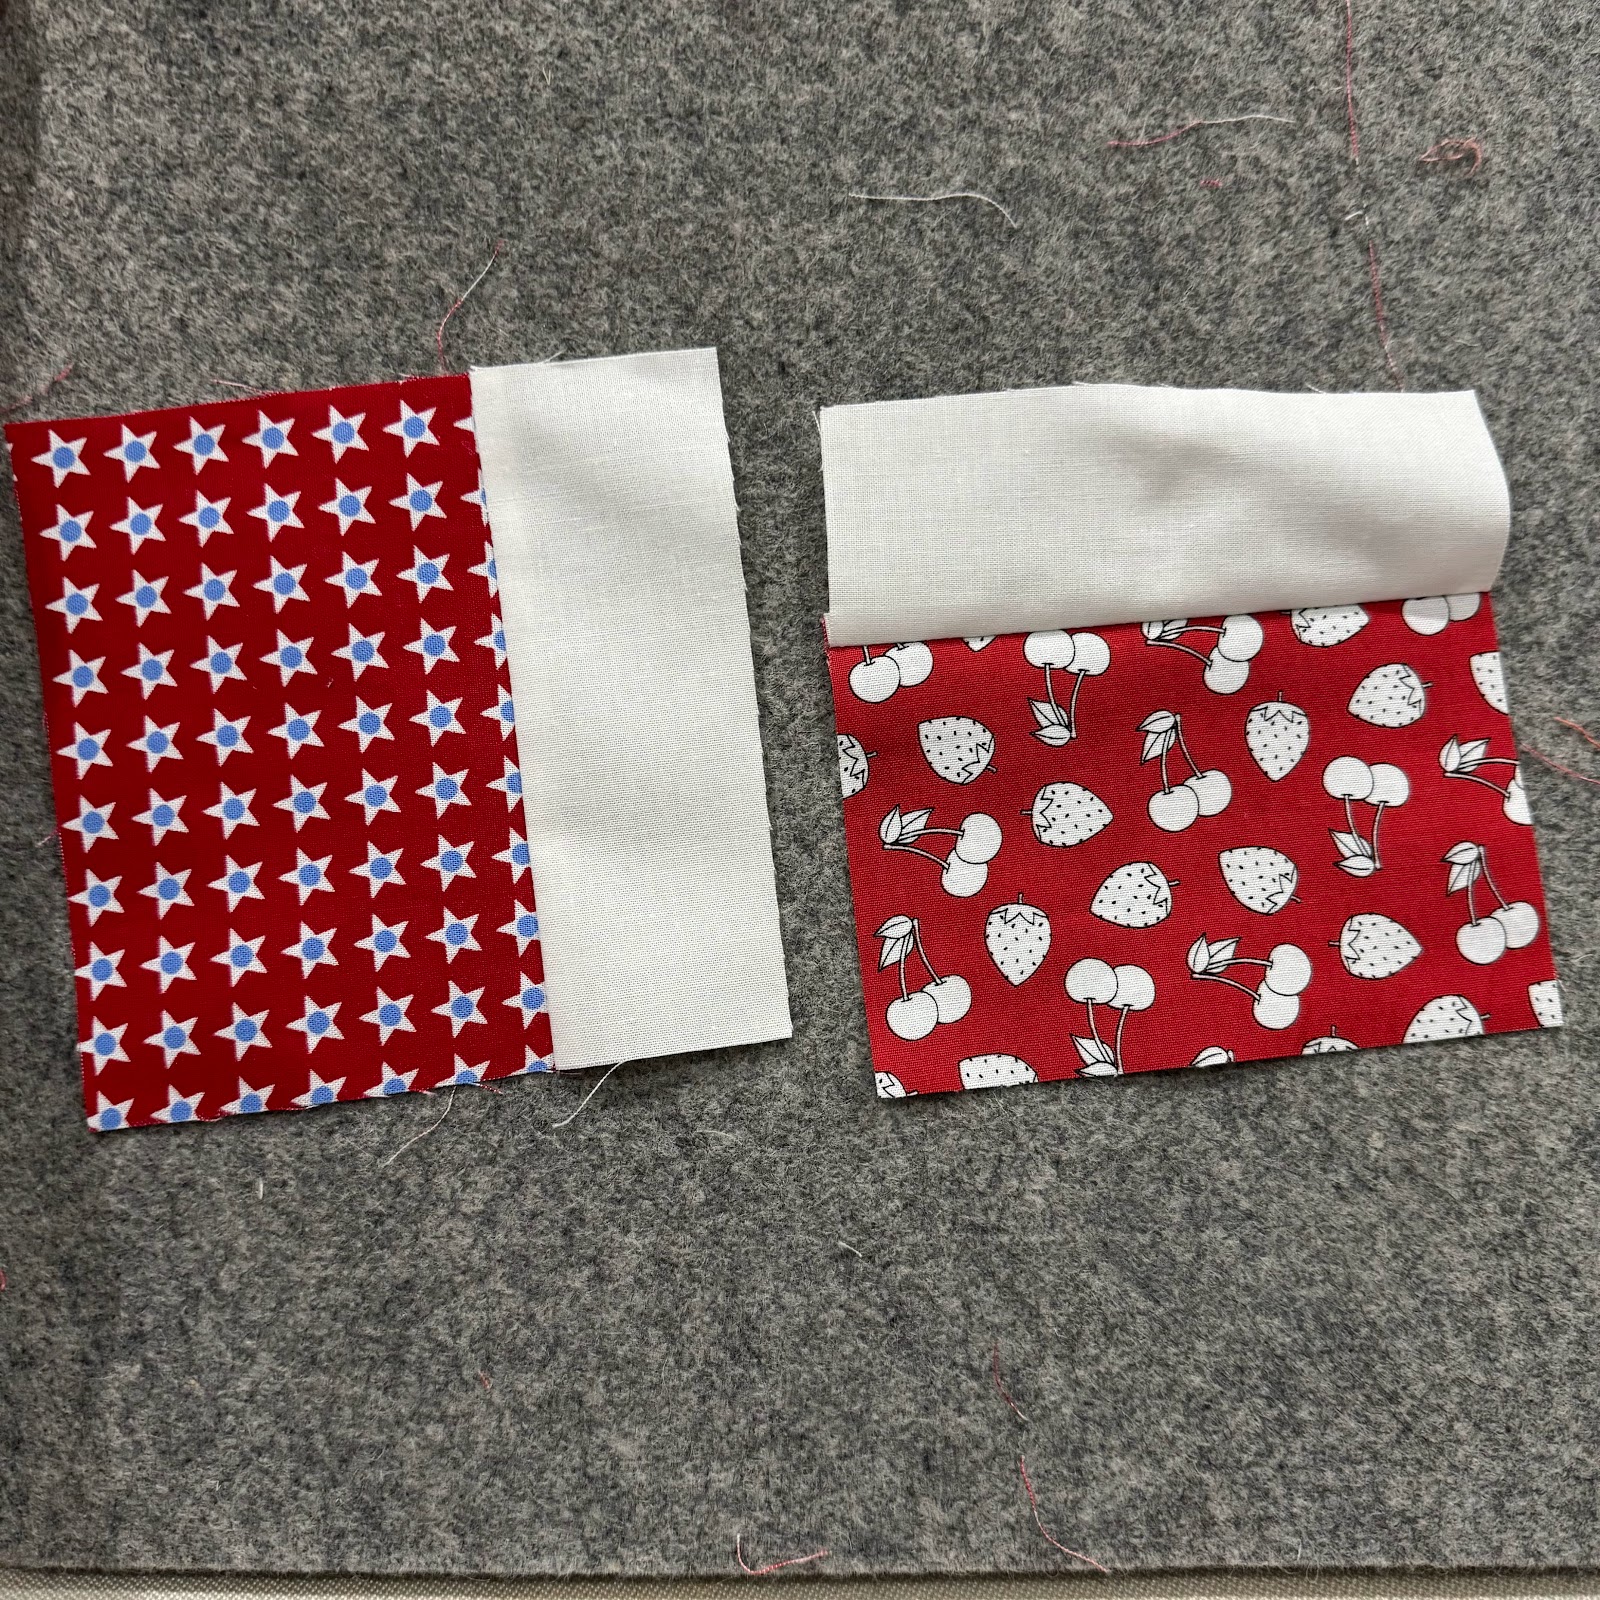
Sew white rectangle to red scrap rectangle
Press towards white rectangle
Make 240 blocks
Set aside 10 blocks for row completion in layout at the top edge
Set aside 10 white rectangles for row completion in layout at the bottom edge
Unit piecing
Sew two blocks together into a unit, I would think, "Make an r".
Layout quilt into diagonal rows, using the set aside single blocks on the right side of quilt and using the white rectangles on the lower side of the quilt. Place setting triangles Each corner will be resolved differently in this layout.
Sewing rows:
Press odd rows to the left and even rows to the right, keeping the original block pressing of the white to red in place.
Sew the rows together.
Resolve the corners:
Press the rows to one direction. I pressed to the top left corner about half way then the remainder of the top pressed towards the lower right corner.
My design, use at your pleasure.
Red and white quilts (can't believe there are 11!):
Red cross, 2010
Checkerboard star, 2022
Alphabet, 2023
Rail fence streak of lighting, 2023
Patience corner with 2 inch squares binding in progress
Rail fence woven binding in progress
Framed square, being quilted
Single rail fence streak of lighting, ready for quilting
Lower-case alphabet in progress
Ladder in progress
Patience corner with 3 inch squares in progress
| Backing is a delightful mushroom print by Rae Ritchie for Dear Stella |
Sunday, March 17, 2024
Friday, February 02, 2024
red and white framed square on point, block construction, top completed
Red and white framed square on point
Top completed 2024
Approximately 85 by 71 inches
A very simple framed square on point.
Block finishes 5 inches
Another in my red-and-white series. I have four completed quilts. Two at the quilter. Another 3 (4?) in progress. I have many plans in my head for more red and white quilts!
And a net gain of red fabric in the house.
My fabric choice process with red and white quilts:
I like to push my reds. I go from tomato/orange red to berry/cherry red. If a single block stands out I add more of that color or closely related to help it step into the others. There will always be a darkest block, an orangest block, a rustiest block. I am fine with that. It makes it a more interesting quilt for me.
In talking with a friend about how we both make odd choices, I said,
"I call those my "a little bit too much" or "a bridge too far" blocks. The blocks a more sensible quilter would remove but I leave in because they are a bit wrong."
CUTTING
Framed Square
120 needed
Red: one 3 1/2 inch square
White: two 1 1/2 by 3 1/2 inch rectangles; two 1 1/2 by 5 1/2 inch rectangles
Setting Squares
99 needed
Red: 5 1/2 inch squares
Setting Triangles (I prefer over-cut triangles for on-point so the design floats away from the edge)
38 needed
Red: cut from 5 inch strips, using the Companion angle or Bonnie Hunter's essential tool
Corner Triangles: (also over-cut)
4 needed
Red: cut from 5 1/2 inch strip with Easy Angle or Bonnie Hunter's essential tool
SEWING AND PRESSING
Sew 3 1/2 by 1 1/2 inch rectangles to sides of 3 1/2 inch square
Press away from the square
Sew 5 1/2 by 1 1/2 inch rectangles to top and bottom
Press away from the square
UNIT SEWING
Set aside 21 of the framed squares for the first and last row and for end of each row.
Sew the rest into pairs with the setting squares.
Keep the framed squares in the same orientation so you are always sewing on the side of the 3 1/2 inch rectangle to the setting squares, and the setting square is always on the right of the pair.
Press towards the setting squares
ROW SEWING
Lay out your rows.
First and last rows are a single framed square with setting triangles.
For the rest of the rows add a single framed square to the end of each row. Place a setting triangle at each end.*
Sew blocks together and press seams towards setting squares and setting triangles.
*Cut one point from each setting triangle to 5 1/2 inches. I wait to do this until I lay out the rows/quilt so I make sure I cut the correct point.
Add corner triangles.
My design. Use at your pleasure.
Friday, January 26, 2024
Sample blocks/sections, red and white efficiencies
I have been working on several red and white designs in my sketch book and put several to fabric. If I have my red fabrics out I like to be efficient in my time and fabric use, so having plans for cutting makes sense.
I used Kona Snow for the white in all these.
For the above samples, I am cutting
L upper (Single rail fence): 3 1/2 by 5 inche rectangles (will need setting triangles down the road) (white 2 by 5 inches)
R upper (Patience corner): 3 1/2 inch squares (white 3 1/2 by 1 1/2 and 4 1/2 by 1 1/2)
R center (Lower-case alphabet) 2 inch squares (white lengths of 2 inch strips)
R lower (Framed square) 3 1/2 inch squares, 5 1/2 inch squares, setting trinagles overcut from 5 inch strips, corner triangles from 5 1/2 inch strips (white 3 1/2 by 1 1/2 and 5 1/2 by 1 1/2)
L lower (Ladder): 4 1/2 by 2 1/2 inch rectangles (white 4 1/2 by 1 1/2 inches)
In addition from the red I cut 2 1/2 inch squares and 2 1/2 inch half-square triangles for projects down the road. This cleans up scraps from cutting the setting and corner triangles for on-point quilts.
I cut lots of 2 inch squares as I have a double 4-patch in mind.
I cut off of short cuts or fat quarters. If the yardage is larger than a fat-quarter I tear off a 11 inch piece to cut from. (Why 11 inches? My ruler is 12 inches.)
I cut up small scraps to 1 1/2 by 2 1/2 rectangles and 1 1/2 inch squares so no little scraps go back into my red fabric bins.
SO, my cutting sessions are:
Squares
5 1/2, 3 1/2, 2 1/2, 2. 1 1/2
Rectangles
3 1/2 by 5, 2 1/2 by 4 1/2, 1 1/2 by 2 1/2
Triangles
over-cut triangles for setting and corner triangles, 2 1/2 inch using easy-angle
Ready for ideas in the future:
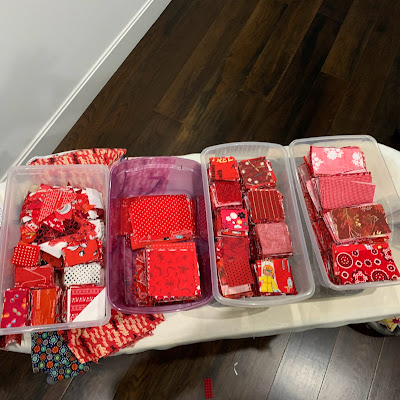
Red patches cut to size in their own bins.
Sunday, January 21, 2024
ocean waves, top completed
Top completed 2024
96 by 80 inches
120 blocks
Block finishes 10 inches
Block and unit directions are HERE.
I layed out the 4-block units, alternating A and B units.
Sewed into A over B and B over A sets of 8, then into 3 rows.
Almost everything nests.
My construction design variation of a traditional pattern. Use at your pleasure.
Wednesday, January 17, 2024
alphabet i (9), lower case
This one is based on a couple of cross stitch graphs that I found on Pinterest that do not have working links.
Making it with a 2 inch cut, 1 1/2 inch finished grid. Reds are cut 2 inches square. White (Kona Snow) is cut into lengths to fit grid
My notes for cutting the white pieces from 2 inch strips:
Squares Cut Finish
1 2 1 1/2
2 3 1/2 3
3 5 4 1/2
4 6 1/2 6
5 8 7 1/2
6 9 1/2 9
7 11 10 1/2
8 12 1/2 12
Rundown of my alphabet quilts. Several more on my to-do list.
a. B is for Beth, done with plaids and various red solids
b. I-spy alphabet
c. 30s repro alphabet blocks
d. 37 times around the sun, green with a bit of pink batiks on neutral batiks
e. Squares on teal
f. Checkerboard medallion with 1880s repros
g. Red and white capital letters
h. Eggplant chunky alphabet with batiks
i. current red and white lower case alphabet
Anyone know of a cyrillic pieced alphabet?