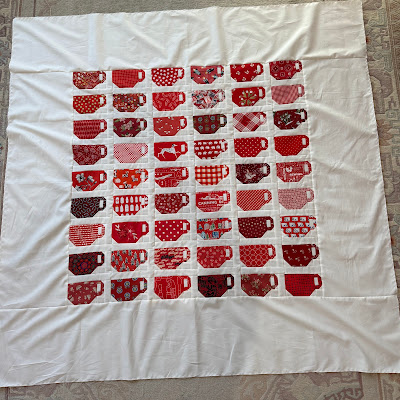
Monday, March 24, 2025
ocean waves, binding
top completed 2024
quilt completed 2025
96 by 80 inches
120 blocks, block finishes 10 inches
I talk about the block construction HERE
Layout options HERE
And quilt completion HERE
Monday, March 17, 2025
Monday, March 10, 2025
framed coins
Chinese coins, 1930's repros framed blocks
Top completed 2024
Quilt completed 2025
70 by 50 inches
35 blocks
Blocks finish 10 inches
Directions on making this quilt are HERE.
Monday, March 03, 2025
Thursday, February 27, 2025
red and white ladder, binding!
top completed 2024
quilt completed 2025
81 by 68 inches
quilted by Sue Divarco
I realize I don't get completed quilts photographed very often and it often is years after I finish them that I do so.
I have decided to start posting them at the binding stage as that is something I can photograph more easily and can post them when I am actually at the completion stage.
Here is my Red and White Ladder quilt.
Directions on how to make it are HERE.
I have asked the kids to help me photograph the backlog of dozens of quilts!
Sunday, January 26, 2025
I made a chicken
My block finishes 12 by 14 inches. Future blocks may have different proportions.
In a re-shuffling of stuff of our mother with my sisters this Christmas I ended up with some chicken feedsacks. I used some prevously as a backing of a chicken quilt for Janna several years ago and now it is time to make another chicken quilt for Beth so I can use more feedsacks on the back.
We were in charge of chickens as little girls. Feeding, gathering eggs, putting in the coop at night. A good job. Also a bit of a terrifying one when the chickens are nearly your own height.
Egg-beater crock of my Great-Grandma Meerdink that my Grandma Dykstra used to hold her salt box and I use to hold sewing supplies and knitting needles and pencils. |
I love the original design but wanted to simplify it.
I am not including all details as it is not my original pattern. Here are my changes.
-I decided to use one fabric so the chicken is in silhouette
-Doug Leko's Mini Essential Triangle tool was used for flipped triangles
-I moved the beak down the face
-I changed the comb from applique to pieced with 1 1/2 by 2 1/2 inch backgrounds and 1 1/2 inch squares for flipped triangle
-I made the tail a bit smaller, cut 2 1/4 inch square for flipped triangle
-I used an insertion technique for the feet (explanation below)
all parts |
background parts |
chicken parts |
flipped triangles are completed. |
Chicken leg section directions:
Reposition the chicken fabric off the background fabric and cut one inch from the newly angled side of the chicken fabric. |
Carefully place chicken fabric again on the red and make a cut where the second leg will go. Discard the leg fabric of the center cut piece, keeping the background piece. |
Sew the center red part to the two legs |
Add the background to both sides Trim to finish width (2 1/2 inches) Trim to finished length to fit the chicken |
My adaptations--use at your pleasure.
![]() |
Grandma and Grandpa Dykstra plucking chickens with us |
Sunday, January 19, 2025
teacups: framed "I Need a Cup of Tea"
I anticipate being in need of this effect over the next while, so I started another I Need a Cup of Tea.
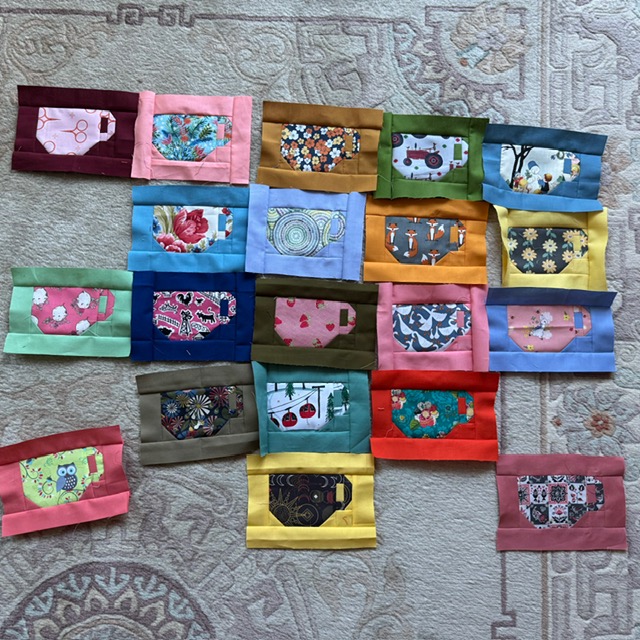
In this post I will describe my Solids + Prints version that includes a frame around the cup.
Go HERE if you want to read about my red teacups block construction. Because of the high contrast of the fabrics, this link's illustrations may be easier to see how the flipped corners work for the teacup.
Go HERE if you want to read about L sashing.
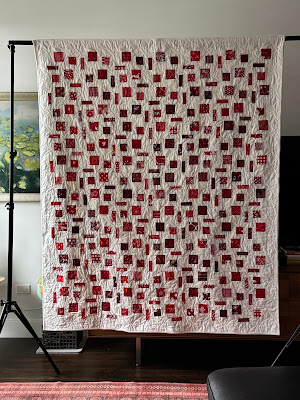
Go HERE if you want to see the completed quilt top.
To make framed teacups, two types of frames are used to eliminate having to adapt pressing and to reduce matching seams.
FRAMES ARE ALWAYS PRESSED AWAY FROM THE TEACUPS in the settings shown on this post.
REMINDER- you will need to do flipped corner sewing for this block. I HIGHLY recommend Doug Leko's Mini Simple Folded Corners tool available HERE. I use this ruler and the larger version all the time.
NOTE: I experimented with the ear pressing differently differently than I did for the red and white. Follow your preference. I found with some fabrics one way worked better and others, the alternate way. (With my Red and White I was using the same background fabric throughout and one way seemed to work best.)
![]() |
Two options for ear pressing |
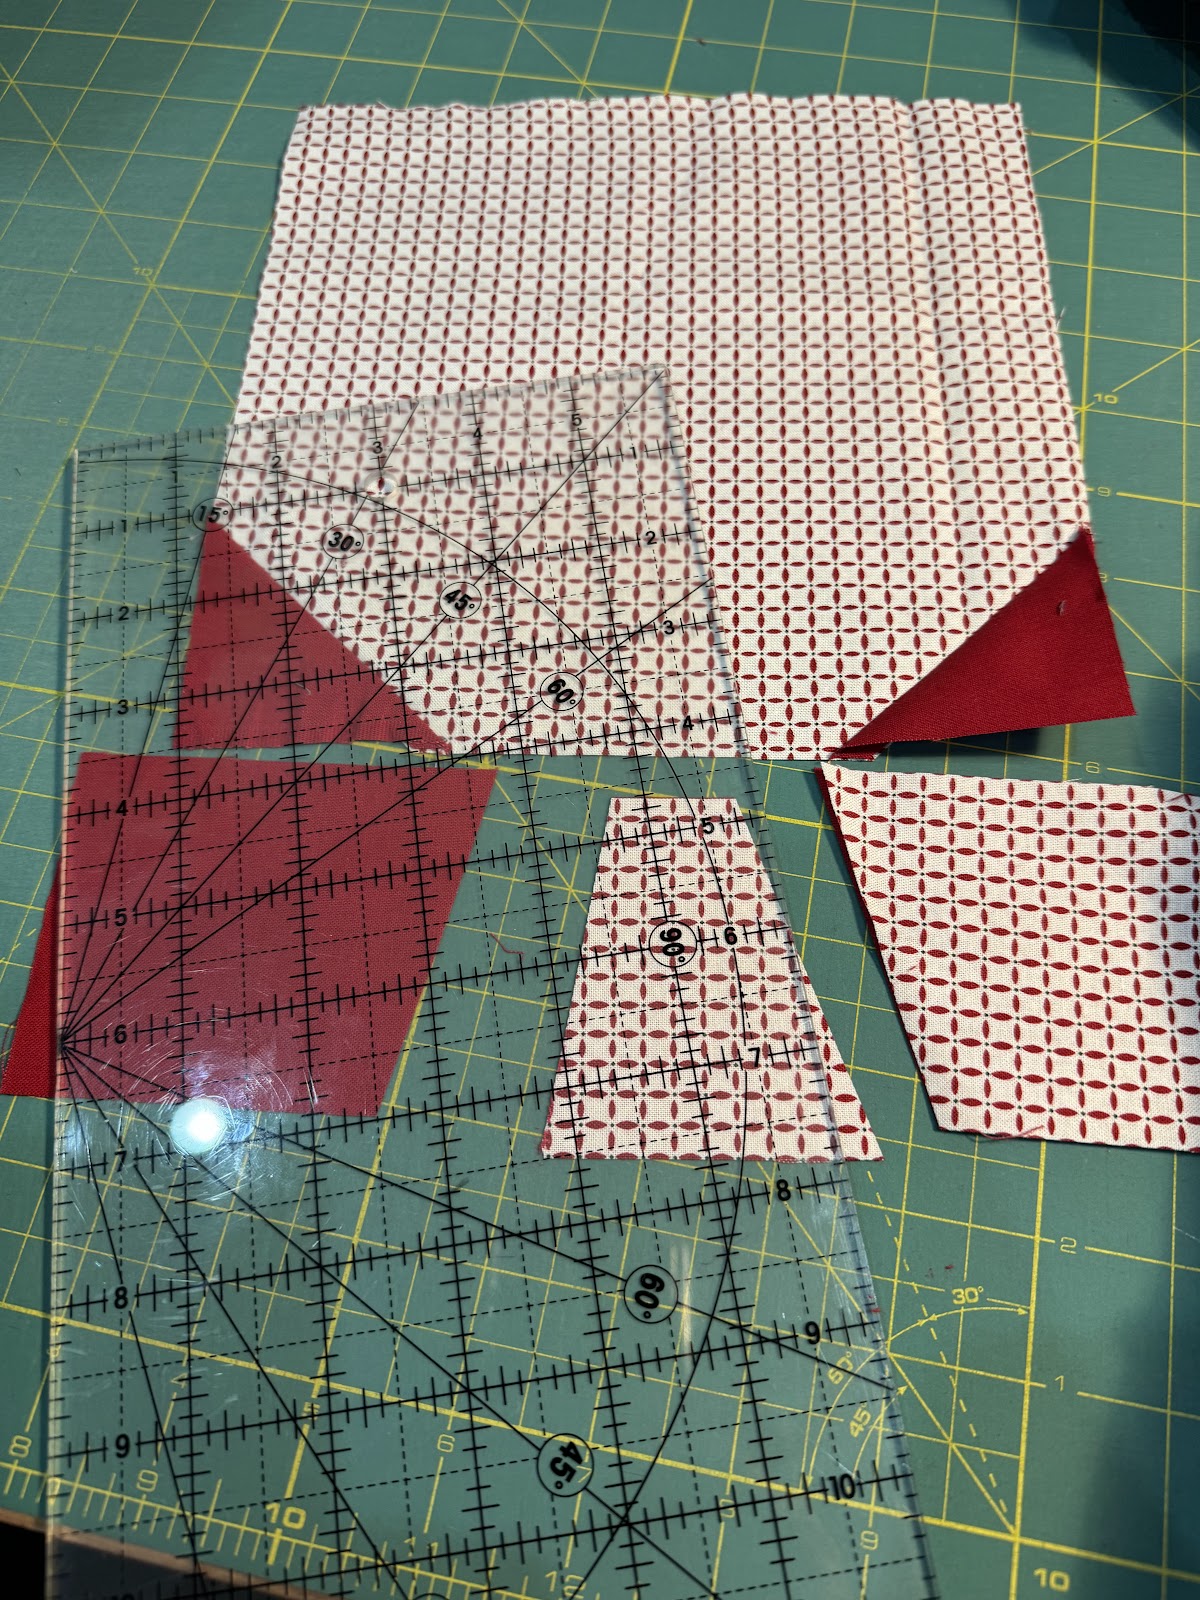
Teacup cutting
Teacup print:
One rectangle 3 1/2 by 4 1/2 inches
Two 1 inch squares
One 2 1/2 by 1 inch rectangle
![]() |
teacup cutting |
Background solid:
Three 1 1/2 inch squares
Two 1 inch squares
One 1 1/2 inch by 1 inch rectangle
Block A frame cutting from SOLID
Two rectangles 7 1/2 by 1 1/2 inches
Two rectangles 3 1/2 by 1 1/2 inches
Block B frame cutting from SOLID
Four rectangles 5 1/2 by 1 1/2 inches
![]() |
Block A sewing |
![]() |
Block A sewn |
![]() |
Block B sewing |
![]() |
Block B sewn |
Sew flipped corners on sides of ear and press towards the squares
Sew cup little squares onto background of ear and press towards the squares
Sew ear together and press towards the ear
Sew background square to bottom of ear
Sew ear to cup.
PRESS ear to the cup.
Frame teacups for Block A or Block B. Press frames away from the teacups.
These blocks will alternate in the quilt eliminating bulk and matching of seams
I am sewing into units of 4 then into a larger block of 8.

Let me know if you are sewing along!
I have a instagram hashtag of #ineedacupofteaquilt that I would love you to use on your blocks.
I have lots of ideas for different quilts.
-A Delft idea with all blue teacups on white
-Hot cocoa feeling with browns/tans
-Orange teacups on grey--a favorite color combination of mine
My design, use at your pleasure.
Tuesday, December 31, 2024
fragments, quilt completed
Fragments
(Floating Fragments pattern by Jamie Siel)
Quilt completed 2024
78.5 by 65 inches
Quilted by Sue DiVarco
White is Kona Snow
Red scraps
Jamie Siel of Sew Brainy Designs has a delightful pillow pattern series she does for Riley Blake. Her October 2023 "Floating Fragments" pillow begged to be scaled up to quilt size.
Her description of it is HERE.
The pattern tutorial is HERE.
My adaptation is described HERE.
My final finish for 2024.
Wednesday, December 25, 2024
Saturday, December 21, 2024
teacups: I Need a Cup of Tea, top completed
Teacups
I Need a Cup of Tea
about 54 inches square
54 blocks
Block finishes 3 by 5 inches
I describe how to make the block HERE.
And how to do the sashings HERE
Quilt was constructed in vertical columns and no outside sashings so outer blocks touch the borders.
A good quilt to piece and quiet my mind. A calming cup of tea was in order in November.
Love it in the red and white. And I am making it in the Solids + Prints style too as a long range project.
I included 10 inch wide borders, a place for Sue DiVarco to do her longarm magic.
My design, use at your pleasure.
Backing is this delightful Ski Hill by Corrine Wells for Riley Blake. LOVE those crabapple shaped gondolas. |
Friday, December 20, 2024
Jump on In designed by Julia Davis of Red Rainboots Handmade, top completed
Jump on In (designed by Julia Davis)
top completed 2024
96 by 80 inches
Last winter Julia Davis of Red Rainboots Handmade (her main business is making wooden barn quilts--those tulips are calling me) had a fabric swap and quilt-along called Jump on In. I did not participate in the swap, but purchased her pattern and watched the progress of the project on instagram.
The pattern is available HERE.
Read about the swap HERE. It was a fun process to follow on her Instagram. She was very organized!
And HERE is a link to the hashtagged quilts made by the participants.
I kept the idea on the back burner, cutting triangles while cutting reds for other projects and sewing stacks of the units behind the scenes.
Two things I changed to fit my sewing preferences:
I dislike trimming down units, so I cut my triangles from strips to finished size using the Easy Angle or Bonnie Hunter's Essential Triangle tool.
Are my triangles a bit less accurate than if I over-cut/pieced/trimmed?
Yes.
And I am ok with that.
I also dislike sewing lots and lots of long rows together onto a mothership, so I sewed the units into 16-patch style blocks. Once the 16-patches were made I laid out, I sewed into rows, pressing each row east or west, alternating.
All seams nest.
Sew into strips of 4. Press half of these strips up and half down. Make half-block of 8 units. Do not press these units yet |
Sew two half-blocks together into a block Do not press these units yet |
My reds range from tomato/madder to berry/maroon. The white is Kona Snow.
Thanks, Julia, for the delightful design!
Backing by Timeless Treasures |