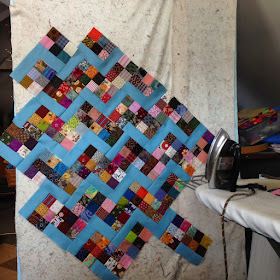
Sew the squares into 3 piece units, press to one side.
Then, sew two units together BUT, in two different ways.
Set 1 sew with the seam allowance toward the needle.
Set 2 sew with seam allowance away from the needle.
Keep these sets separate, and sew a solid 6 1/2 by 2 1/2 inch piece on to each set.
Set 1 press all seams to the solid fabric.
Set 2 press all seams away from fabric.
I keep one block of each by the machine to keep this sewing and pressing plan in front of me as I make more blocks.
Sew two of the same set together. Pictured has set 1 on top and set 2 on the bottom
Then, using one section from each set, put together into one large block.
All this sorting allows for the seams to nest. Eventually in putting the top together there will be some twisting ones, but I can live with that. If you wish, you can make all the rail fence blocks the same and just deal with more twisted seams.
I am keeping some sets unsewn into blocks so they will be available to fill in on the edges once I decide how I am going to do that.


Lynn, you are tempting me, yet again! I have 4 of the postage stamps done, and so this one will have to wait... Thanks for the nesting tips! I'll pin your post so I can find it when it's turn arrives.
ReplyDeletegreat idea for a scrappy quilt! And you can arranged the blocks in a variety of ways! I think I will have to try that one for sure! cheers!
ReplyDelete