Cornerstones keep you honest. They help line up blocks when making the field of a sashed quilt. But they also add a visual that I don't always want in a quilt.
When I want to have sashings but NOT cornerstones, I don't like the pinning/easing/moving/instability that happens with long segments of sashings joining rows
My work-around is using L sashings.I don't know if there is another word for this, but I call it L or 7 as that is the shape it makes around two sides of the block.
*note--the outer blocks may be treated differently as I will explain later.
Measure the block. Decide on a sashing width.
Do the math to make sure you cut the sashings the correct size. complete a sample block before cutting all the sashings.
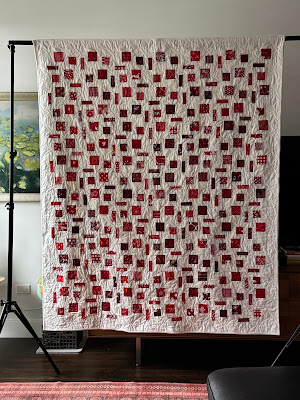
If an asymmetrical block, put the first sashing on the most irritating side of the block. (I should have done this with the snout side of the dogs but didn't figure this out until I was too far into the quilt.)Here is an example using my
Scottie Dog blocks.
*I decided to have the sashings go all around the field, so some blocks will need to be resolved.The block finishes 6 inches across and 5 inches down.
Unfinished it is 6 1/2 by 5 1/2 inches.
I used a 1 inch finished sashing, so I cut 1 1/2 inch strips.
I sashed the longer side of rectangle blocks first, so I cut this piece 6 1/2 inches and sewed onto the bottom of the blocks.
Sewn on the block height is now also 6 1/2 inches.
Press towards the sashing
I sash the right side at 6 1/2 inches.
DO NOT press yet.
The sashed block now measures 7 1/2 by 6 1/2 inches, to finish 7 by 6 inches.
See how the sashes make a L or 7 shape?

*I decided to have sashings surround the field so:
I resolved the left blocks with a 6 1/2 inch sashed on the left sides.
I resolved the top blocks with a 7 1/2 inch sashed top sides EXCEPT the top right corner block
I resolved the top right corner block with a top sash of 8 1/2 inches
 |
| resolved left side blocks |
 |
| resolved top row blocks |
 |
| resolved top corner block |
Lay out the quilt and sew into rows or columns I did rows for the dogs. Press sashings to the left or right on alternate rows.
Everything nests.
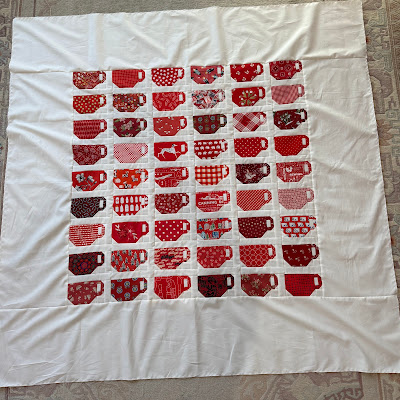
Now an example with the Teacups.
*I decided NOT to have the sashing go around the field, so I set aside the Right and Top blocks.
The block finishes 5 inches across and 3 inches down.
Unfinished it is 5 1/2 by 3 1/2 inches.
I want to use a 1 inch finished sashing, so I cut1 1/2 inch strips.
This time I remembered to sash the irritating side first, so I cut the initial cup ear sashes 3 1/2 inches. Press to the sash.
Sewn on the block width is now 6 1/2 inches.
I sash the bottom at 6 1/2 inches. DO NOT press yet.
The sashed block now measures 6 1/2 by 4 1/2 inches, to finish 6 by 4 inches.

*Resolving the sides:
I eliminate the side sash of the right edge blocks and just put the lower sash on them (except for the bottom right corner block which remains unsashed). These sashes were cut 5 1/2 inches.
I eliminate the bottom sash on the bottom row and just put the side sash, cut 3 1/2 inches, on all of the lower row blocks (except the bottom right corner block which remained un-sashed).
Lay out the quilt and sew into rows or columns I did columns for the teacups. Press sashings up or down on alternate columns.
Everything nests.
Watch for these tops to be completed soon. The semester is ending!
My directions of the concept--use at your pleasure.